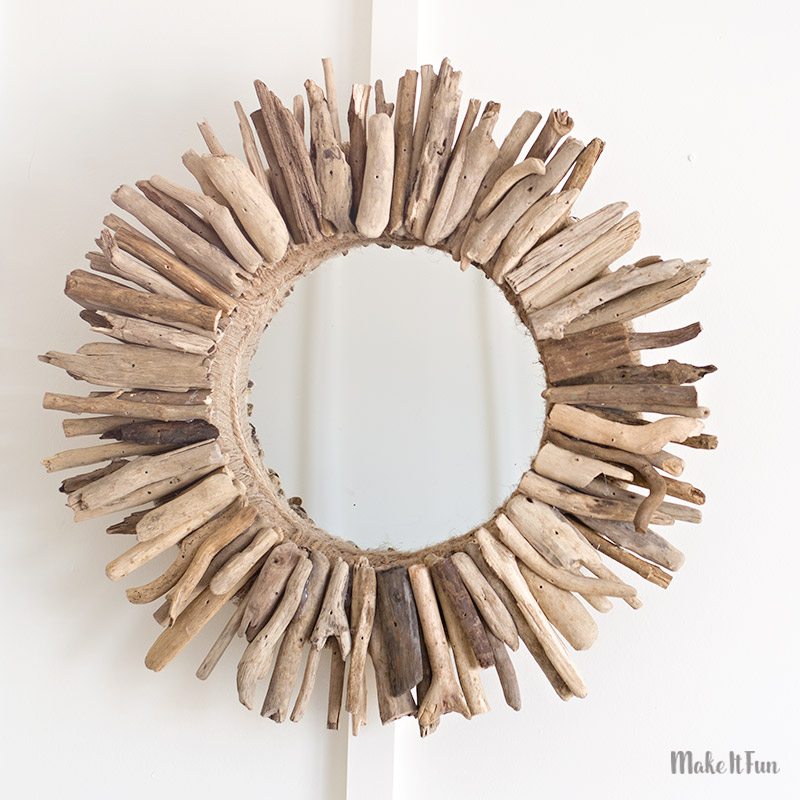
Easy DIY Driftwood Mirror
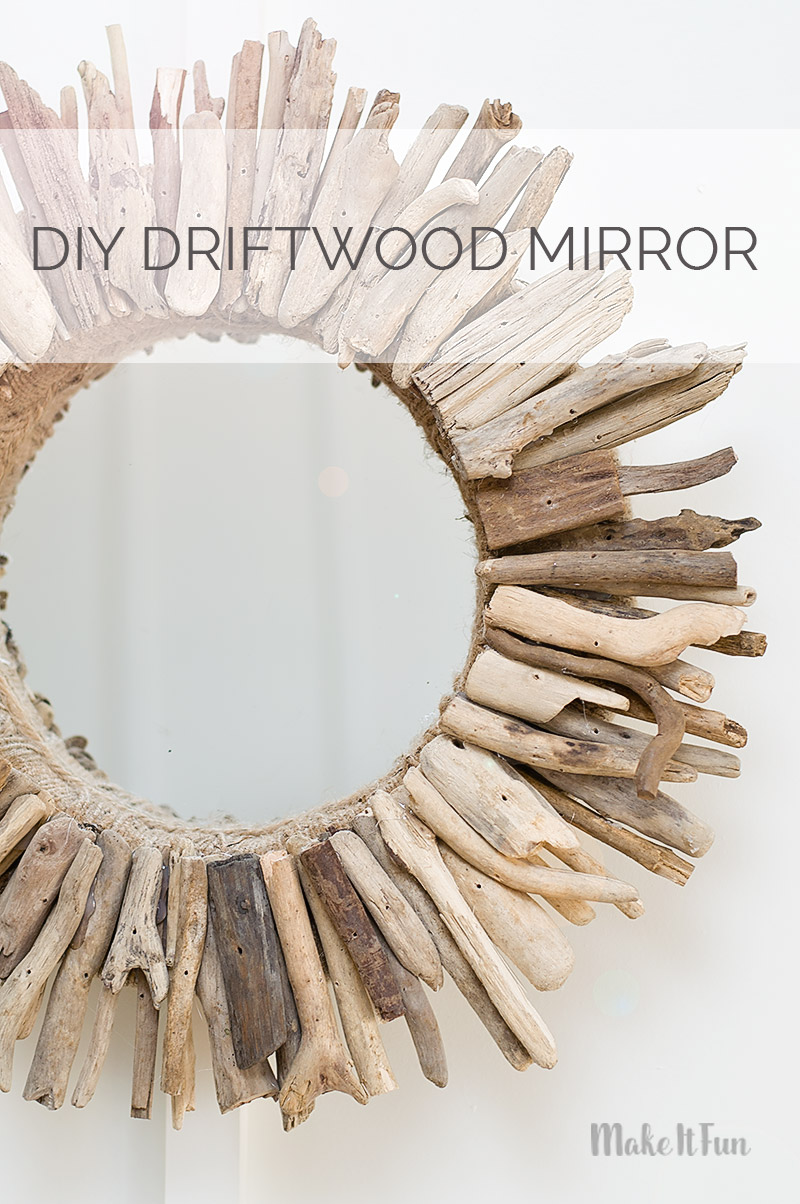
If you haven’t noticed by now, I’m a huge coastal fan. One project that has been on my to-do list for a long time is making a driftwood mirror. A couple months ago I made a nautical rope mirror and I love how it turned out which inspired me to finally make my driftwood mirror.
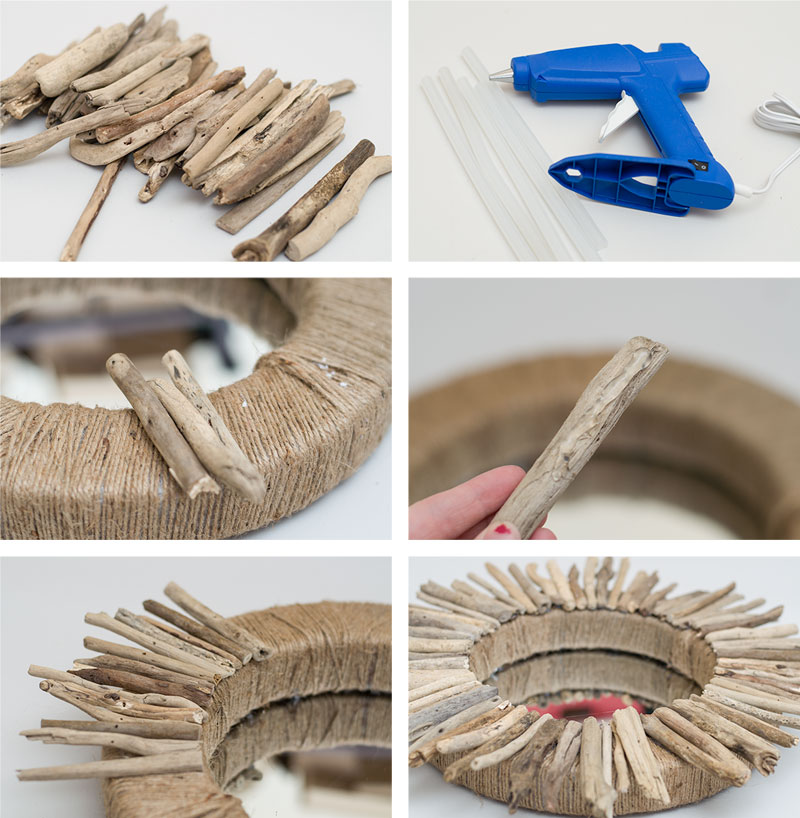
Supplies needed to make this project:
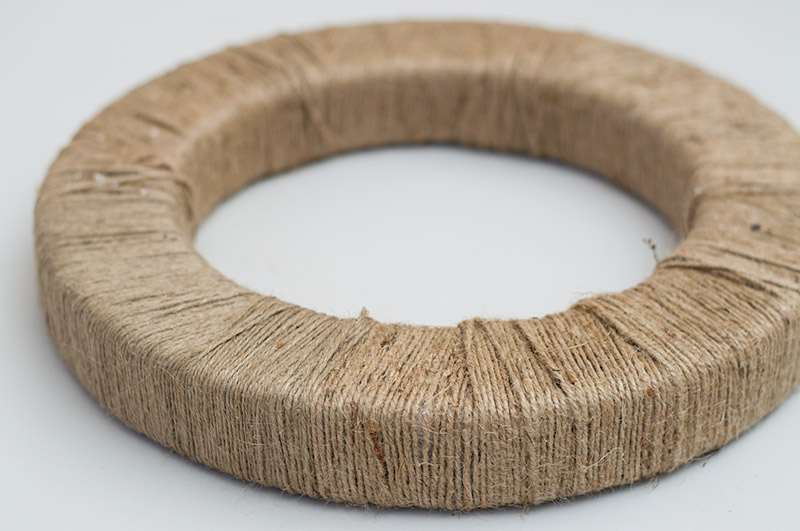
- FloraCraft® Make It: Fun® Foam: Wreath (similar size to mirror)
- Jute Twine
- Driftwood
- Round Mirror
- Multi-Temp Glue Gun and Glue
- Gorilla Glue Epoxy
- Metal Picture Hanger
Instructions:
For my 12 inch mirror I found the 16 inch size foam wreath fit perfectly. I started by wrapping the wreath form with jute all the way around. I used low-temp glue to keep in place.
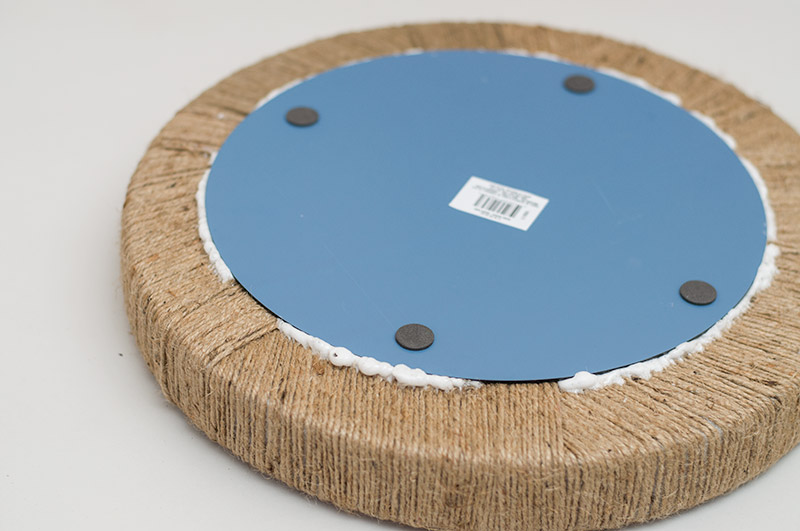
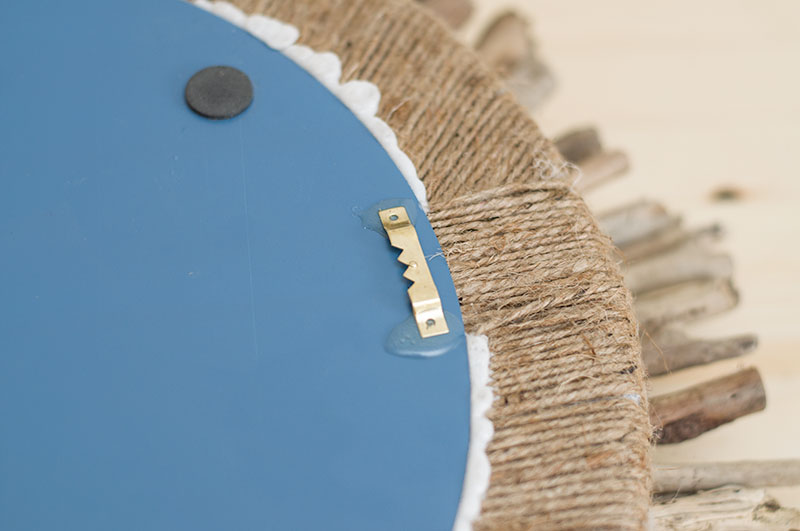
Next, I used Gorilla glue to attach my mirror to the back of the wreath.
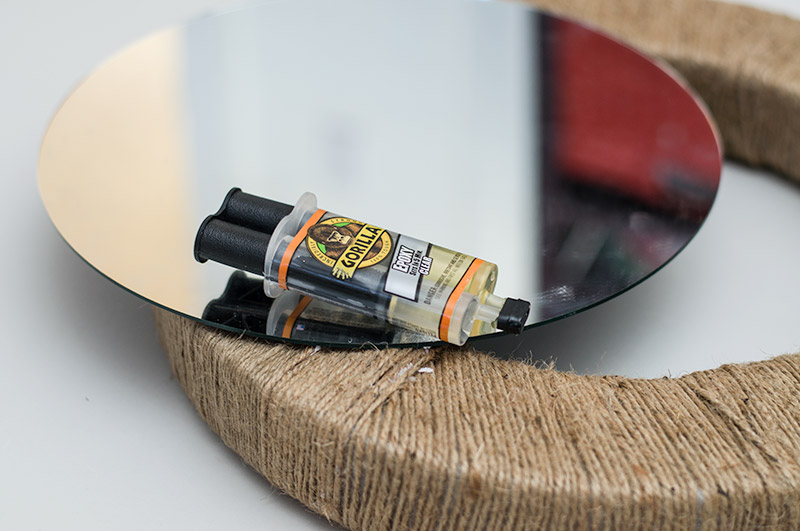
Quick Tip: Place several heavy books on top while the glue dries so it seals to the jute cord. Let dry at least 3 hours.
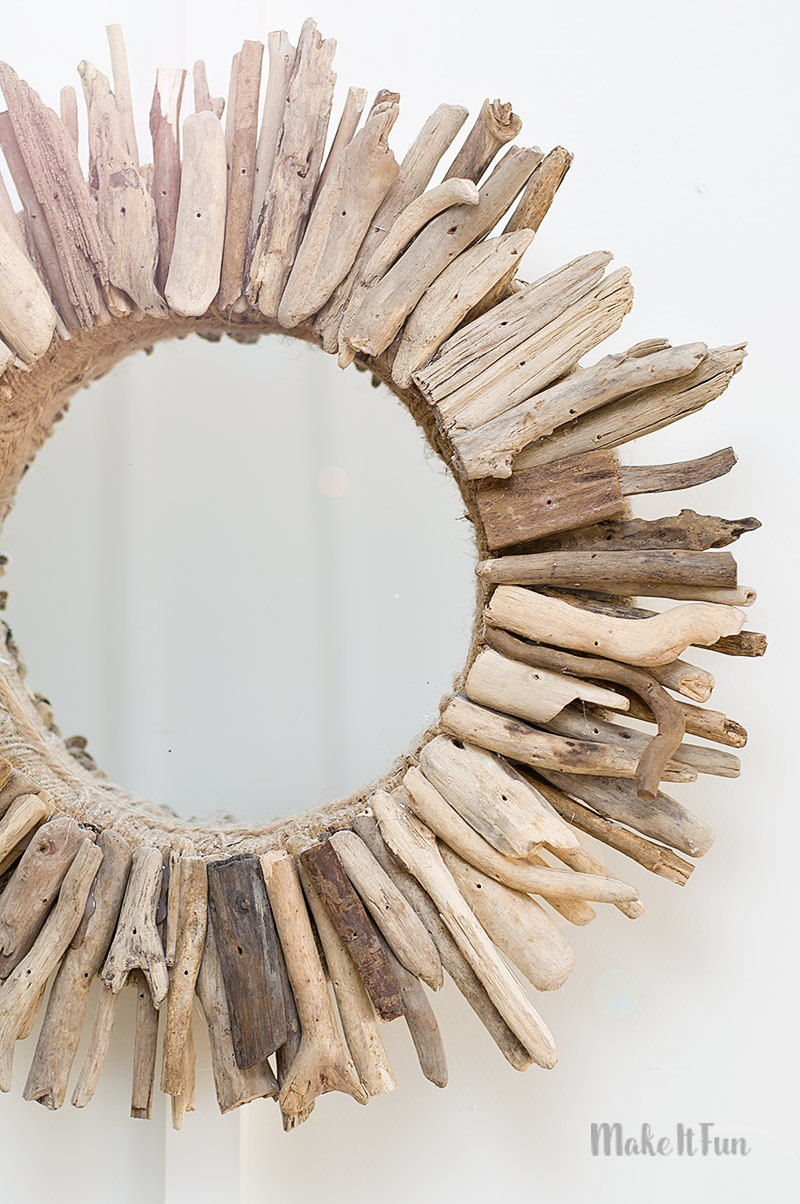
Next, add your driftwood!
Since the glue would not be touching the foam I used the high-temp setting for this part. I didn’t want the driftwood going anywhere once I was done. I started by adding one layer of driftwood around the wreath, side by side. Then I started filling in spots with extra pieces which ended up being about two full layers.
To hang the mirror, attach a metal picture hanger to the back of the mirror with the Gorilla Glue Epoxy. I let it dry overnight before I hung the mirror up. I didn’t want to take any chances that it would fall on the floor.
So I have to say I LOVE this mirror and making it was only a fraction of what it would cost pre-made!! It’s so simple but so pretty!
Driftwood is beautiful and I love using it. Here’s another great driftwood project by Kim that I think you’ll love!