Teach Me! – Humpty Dumpty Oops!
Research has shown how important nursery rhymes are for children. With our “Humpty Dumpty Oops!”, kindergartners and first graders can learn about sequencing and dramatic play, how to tell and retell stories and to recognize rhyming. In less than an hour, they can make a project that’s fun and memorable!
Supplies needed to make this project:
For Child:
For Humpty Dumpty
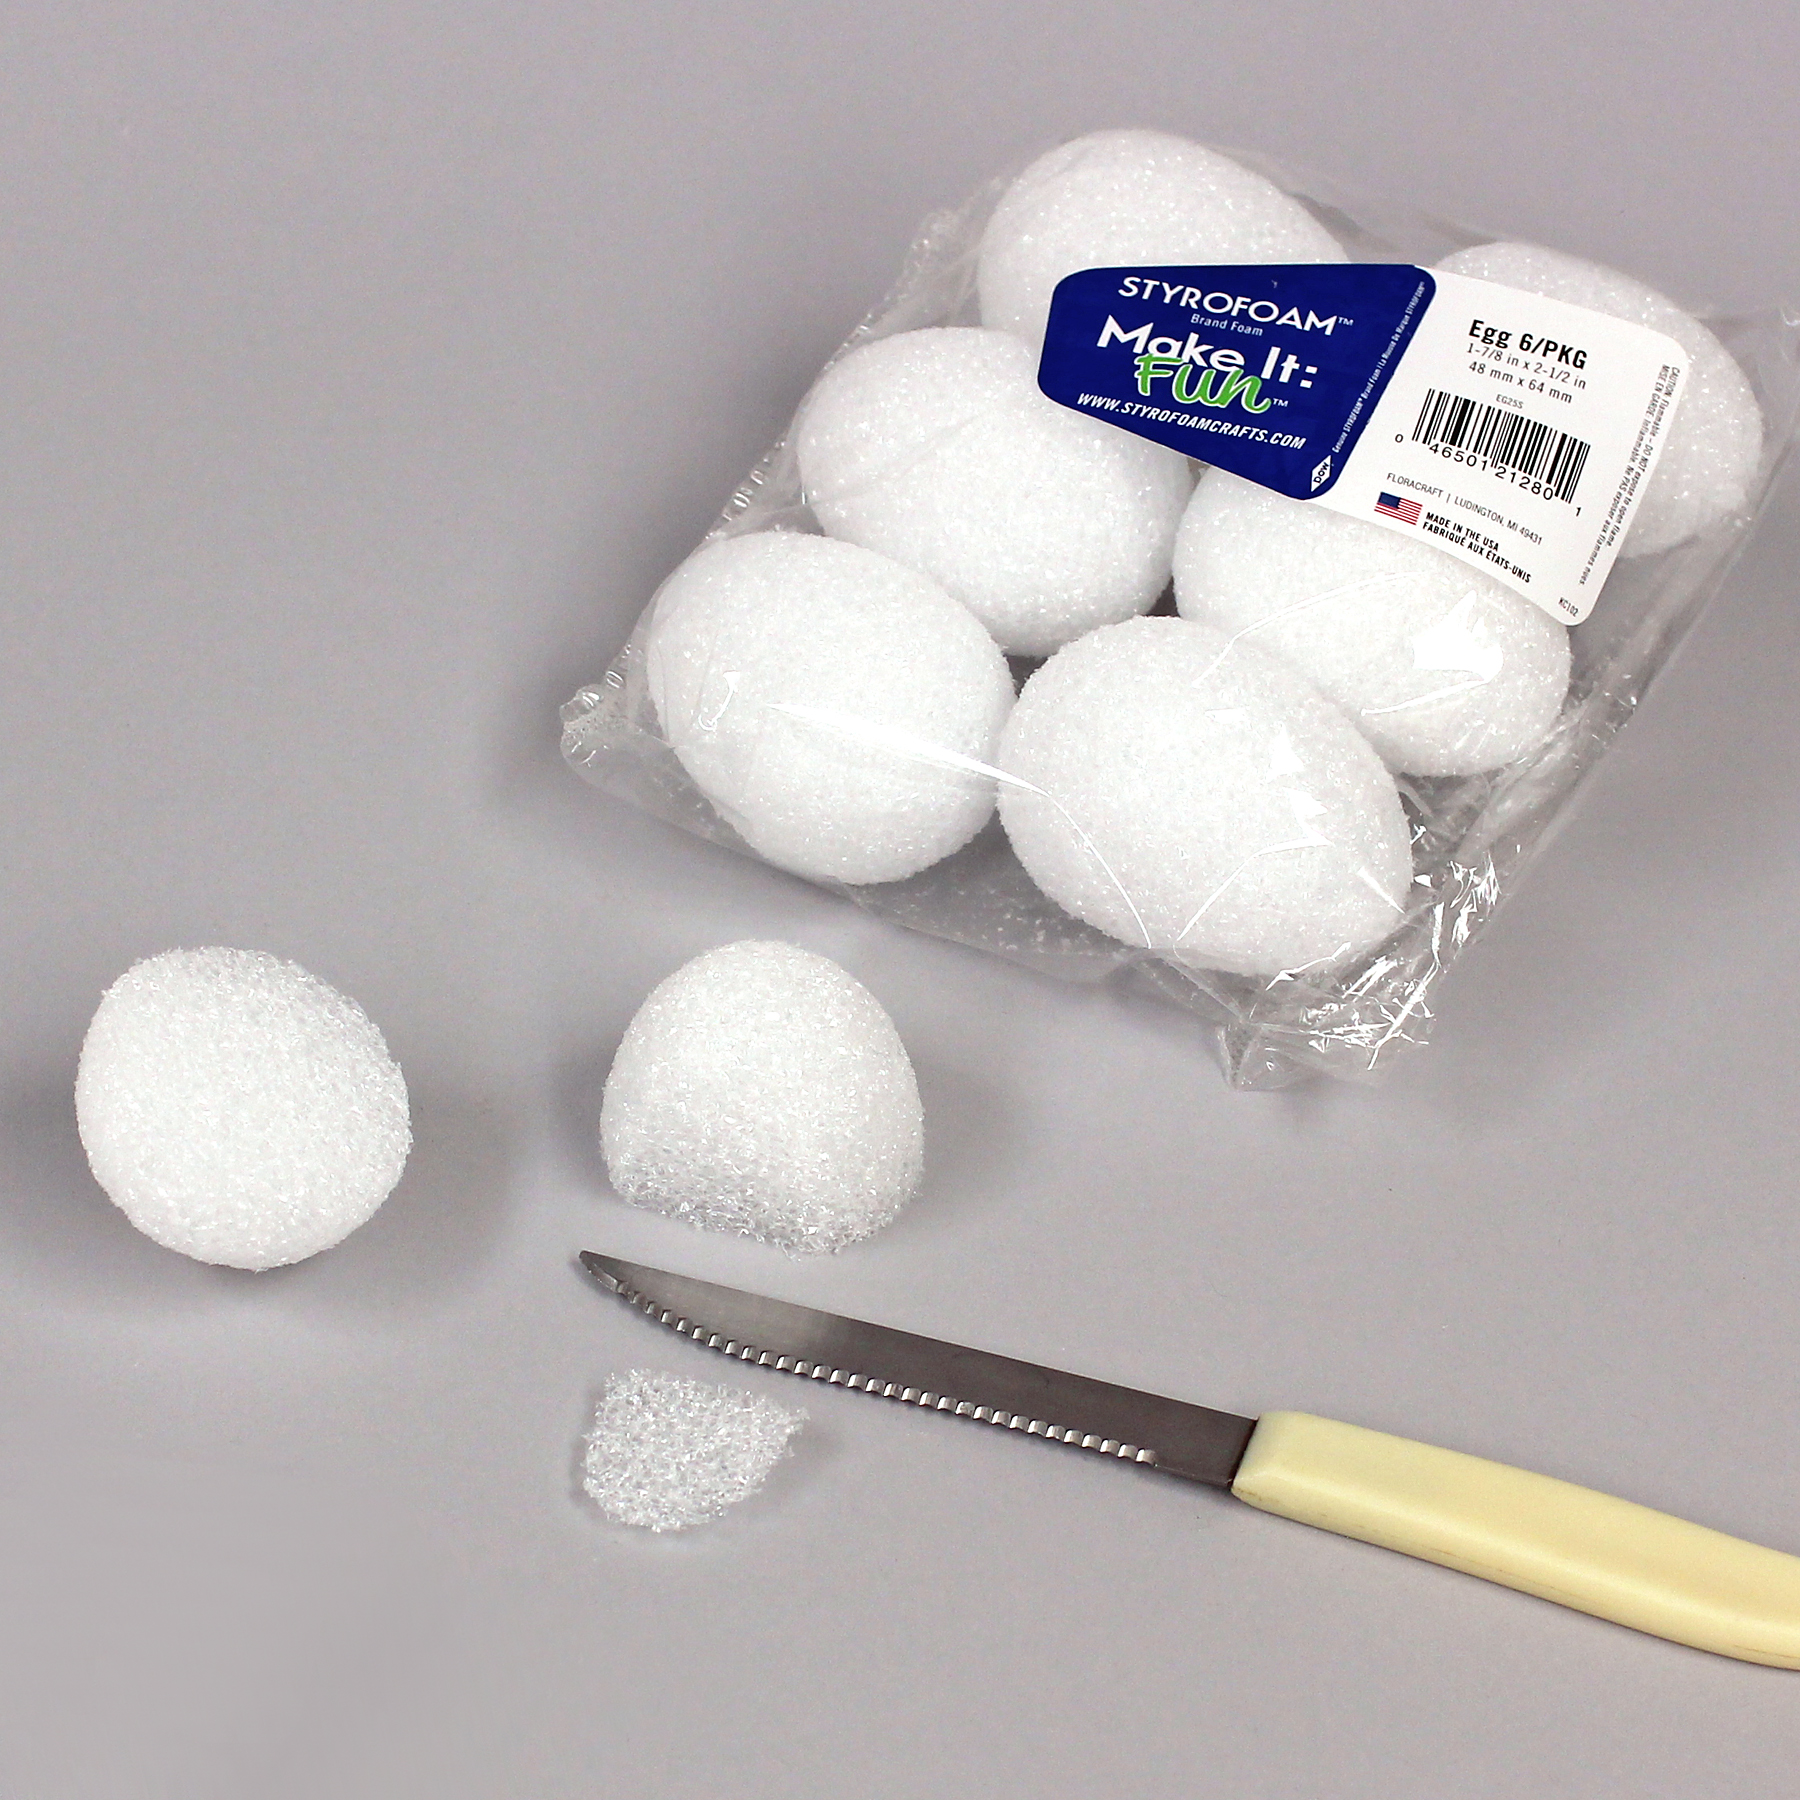
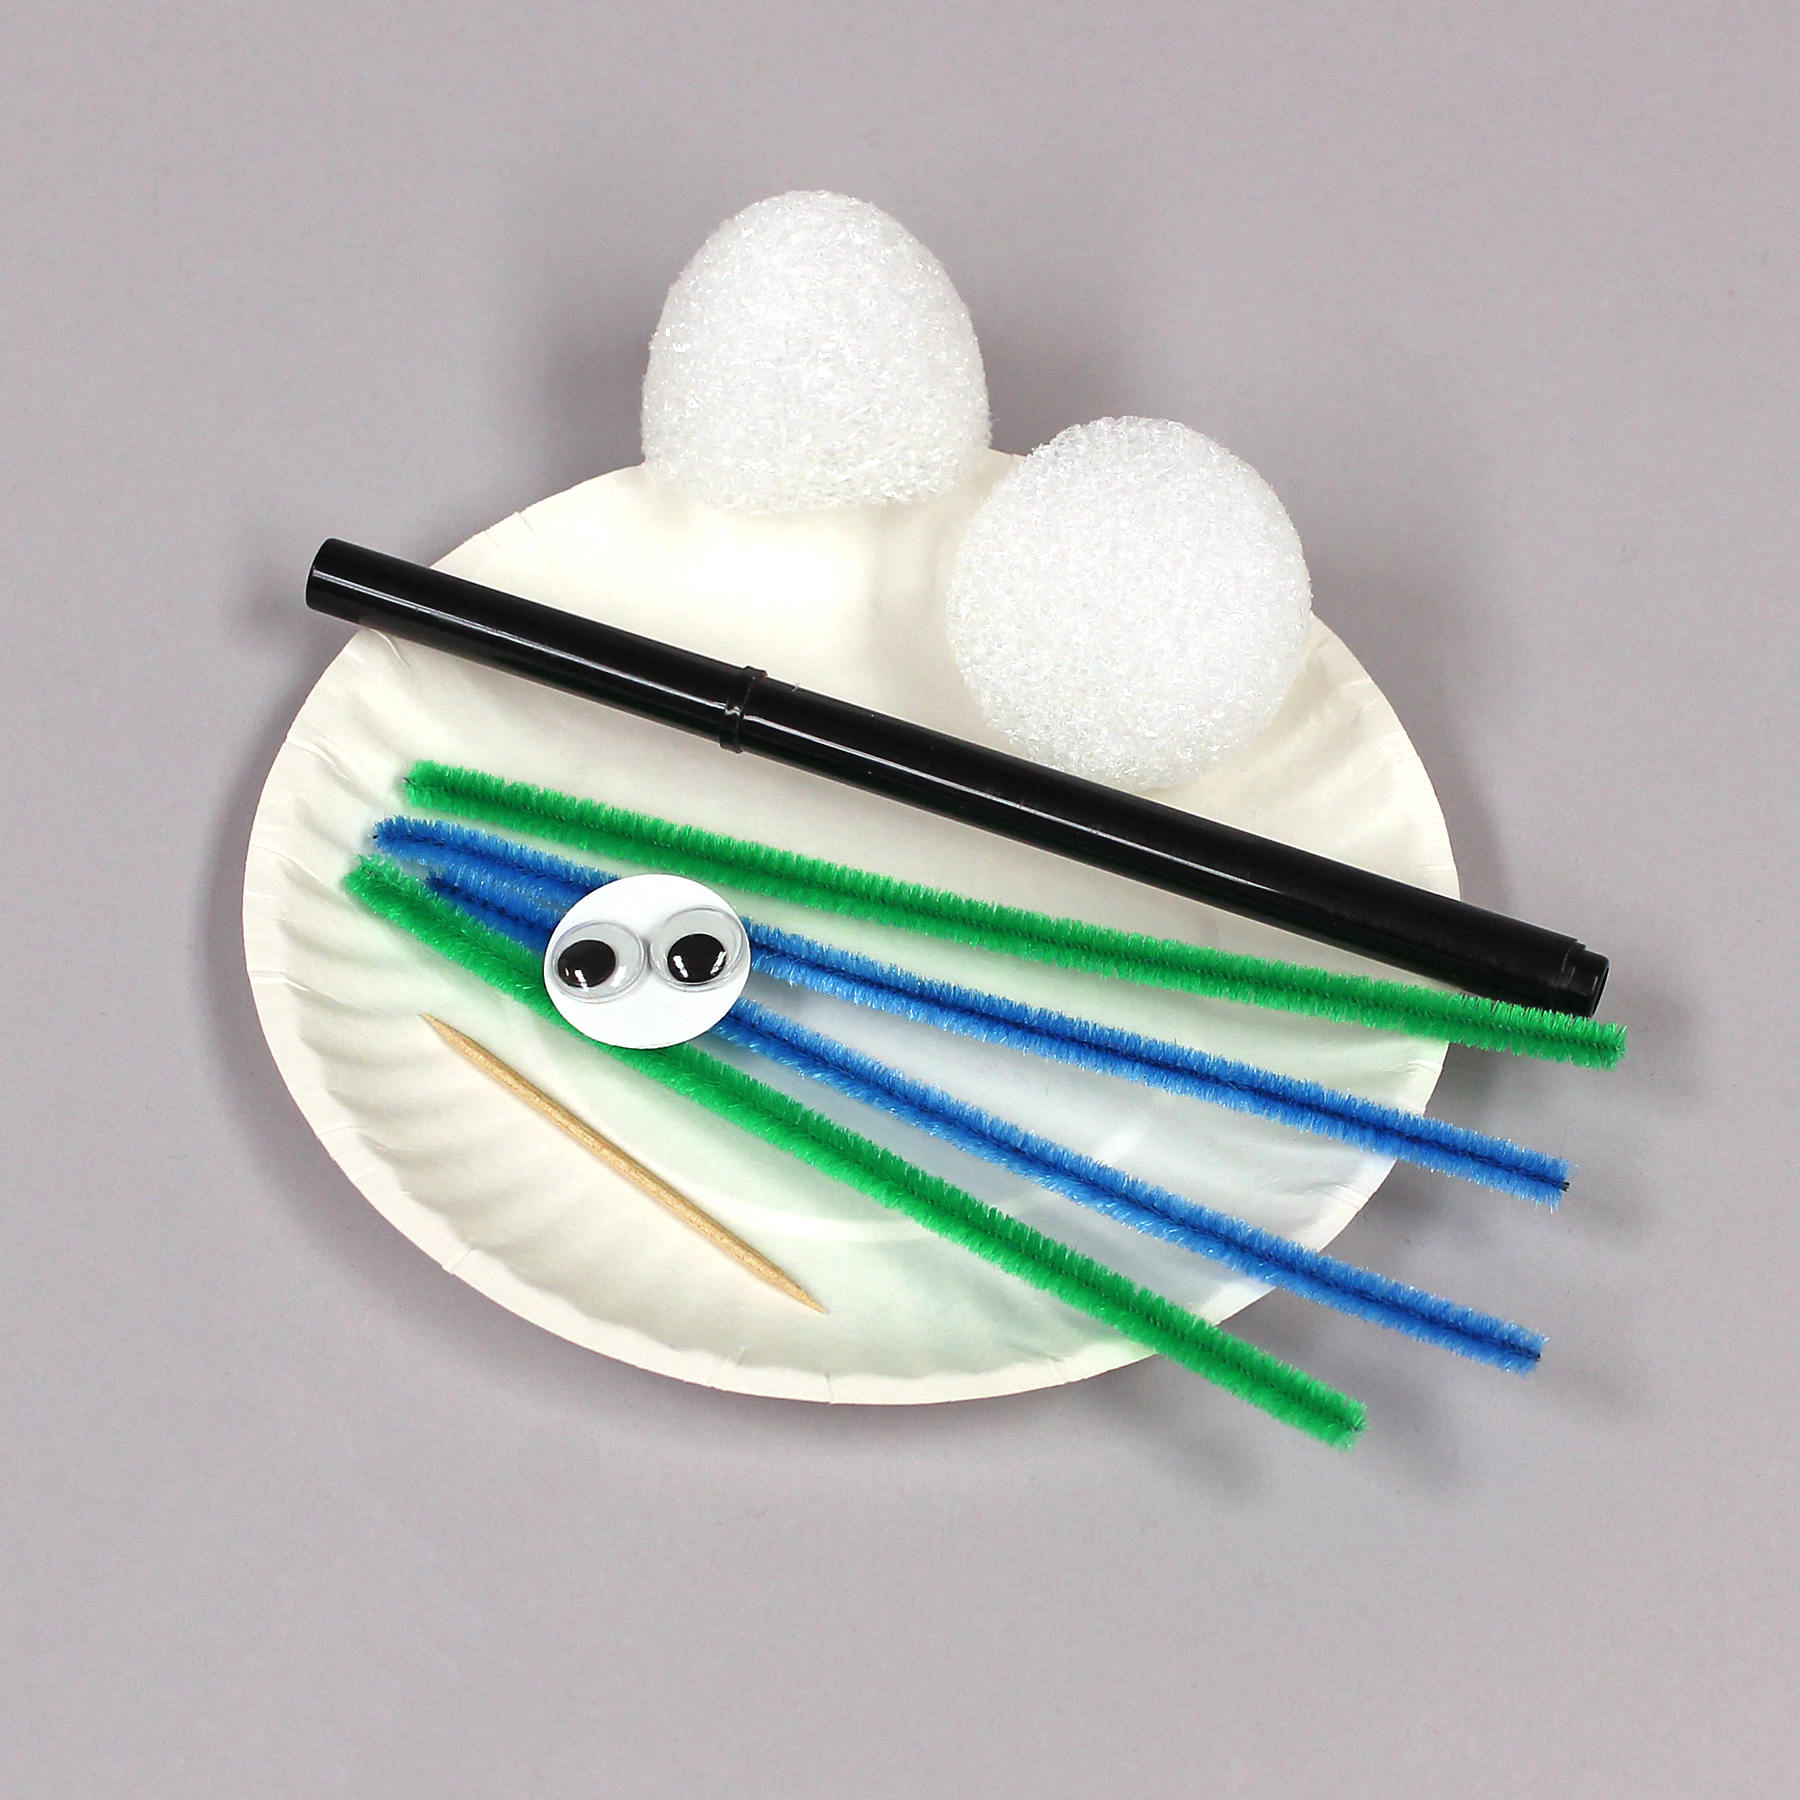
- FloraCraft® Make It: Fun® Foam Egg, 1 7/8″ x 2 1/2″
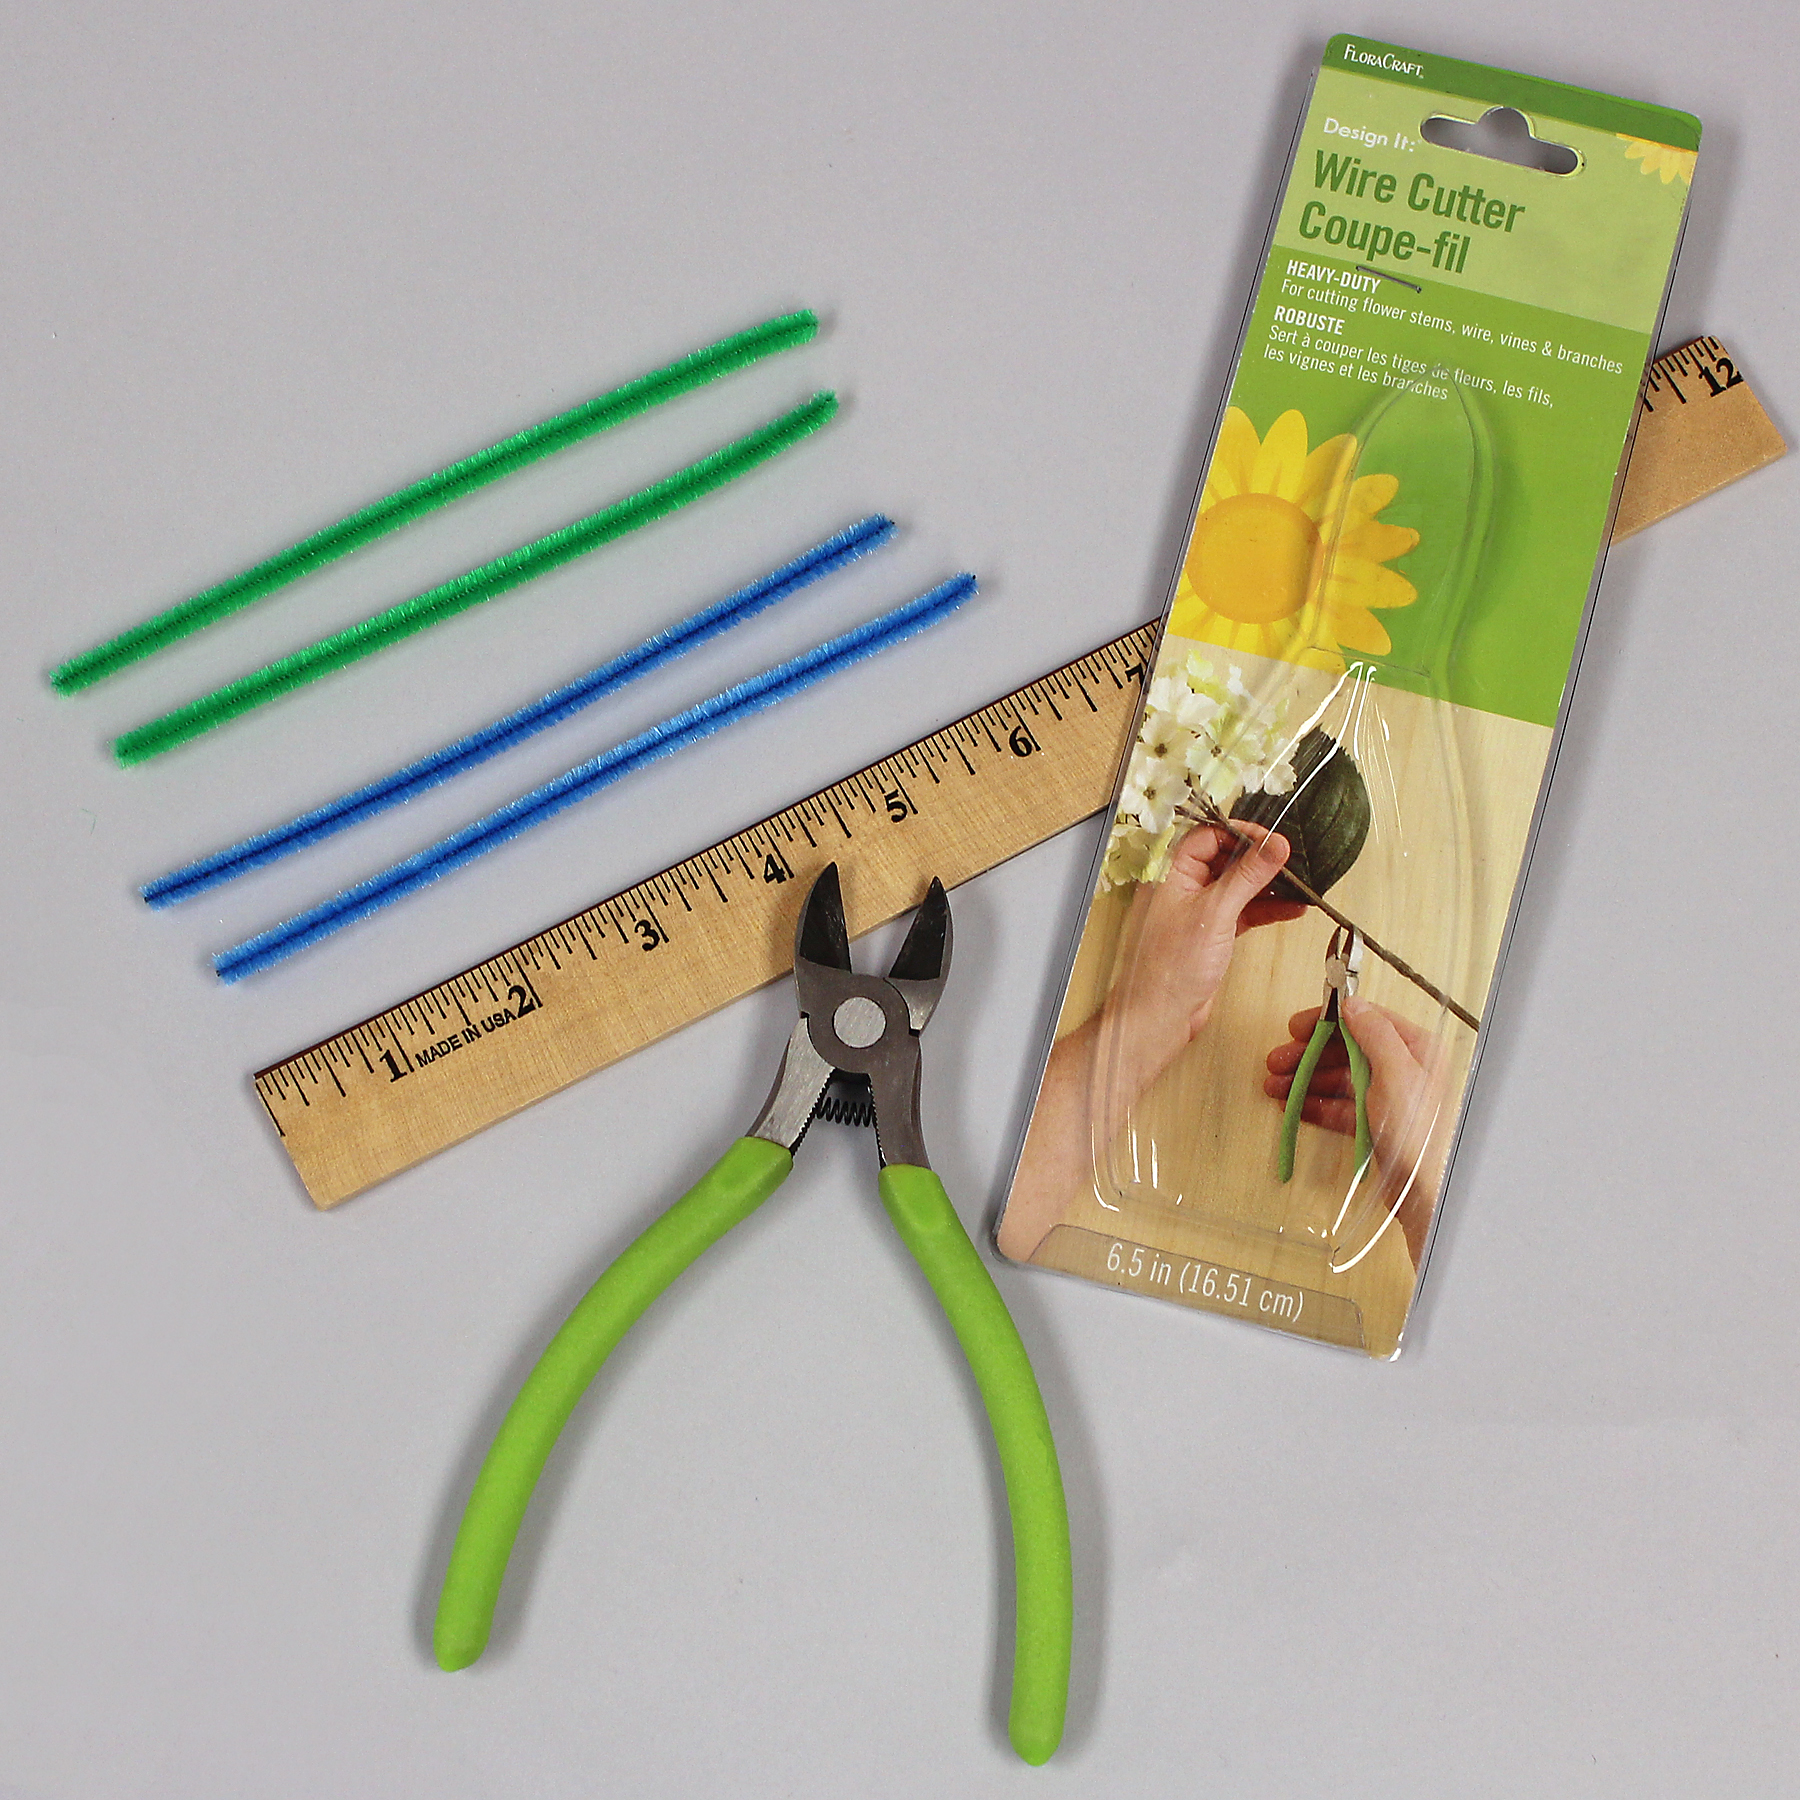
- Chenille stems: Green and Blue
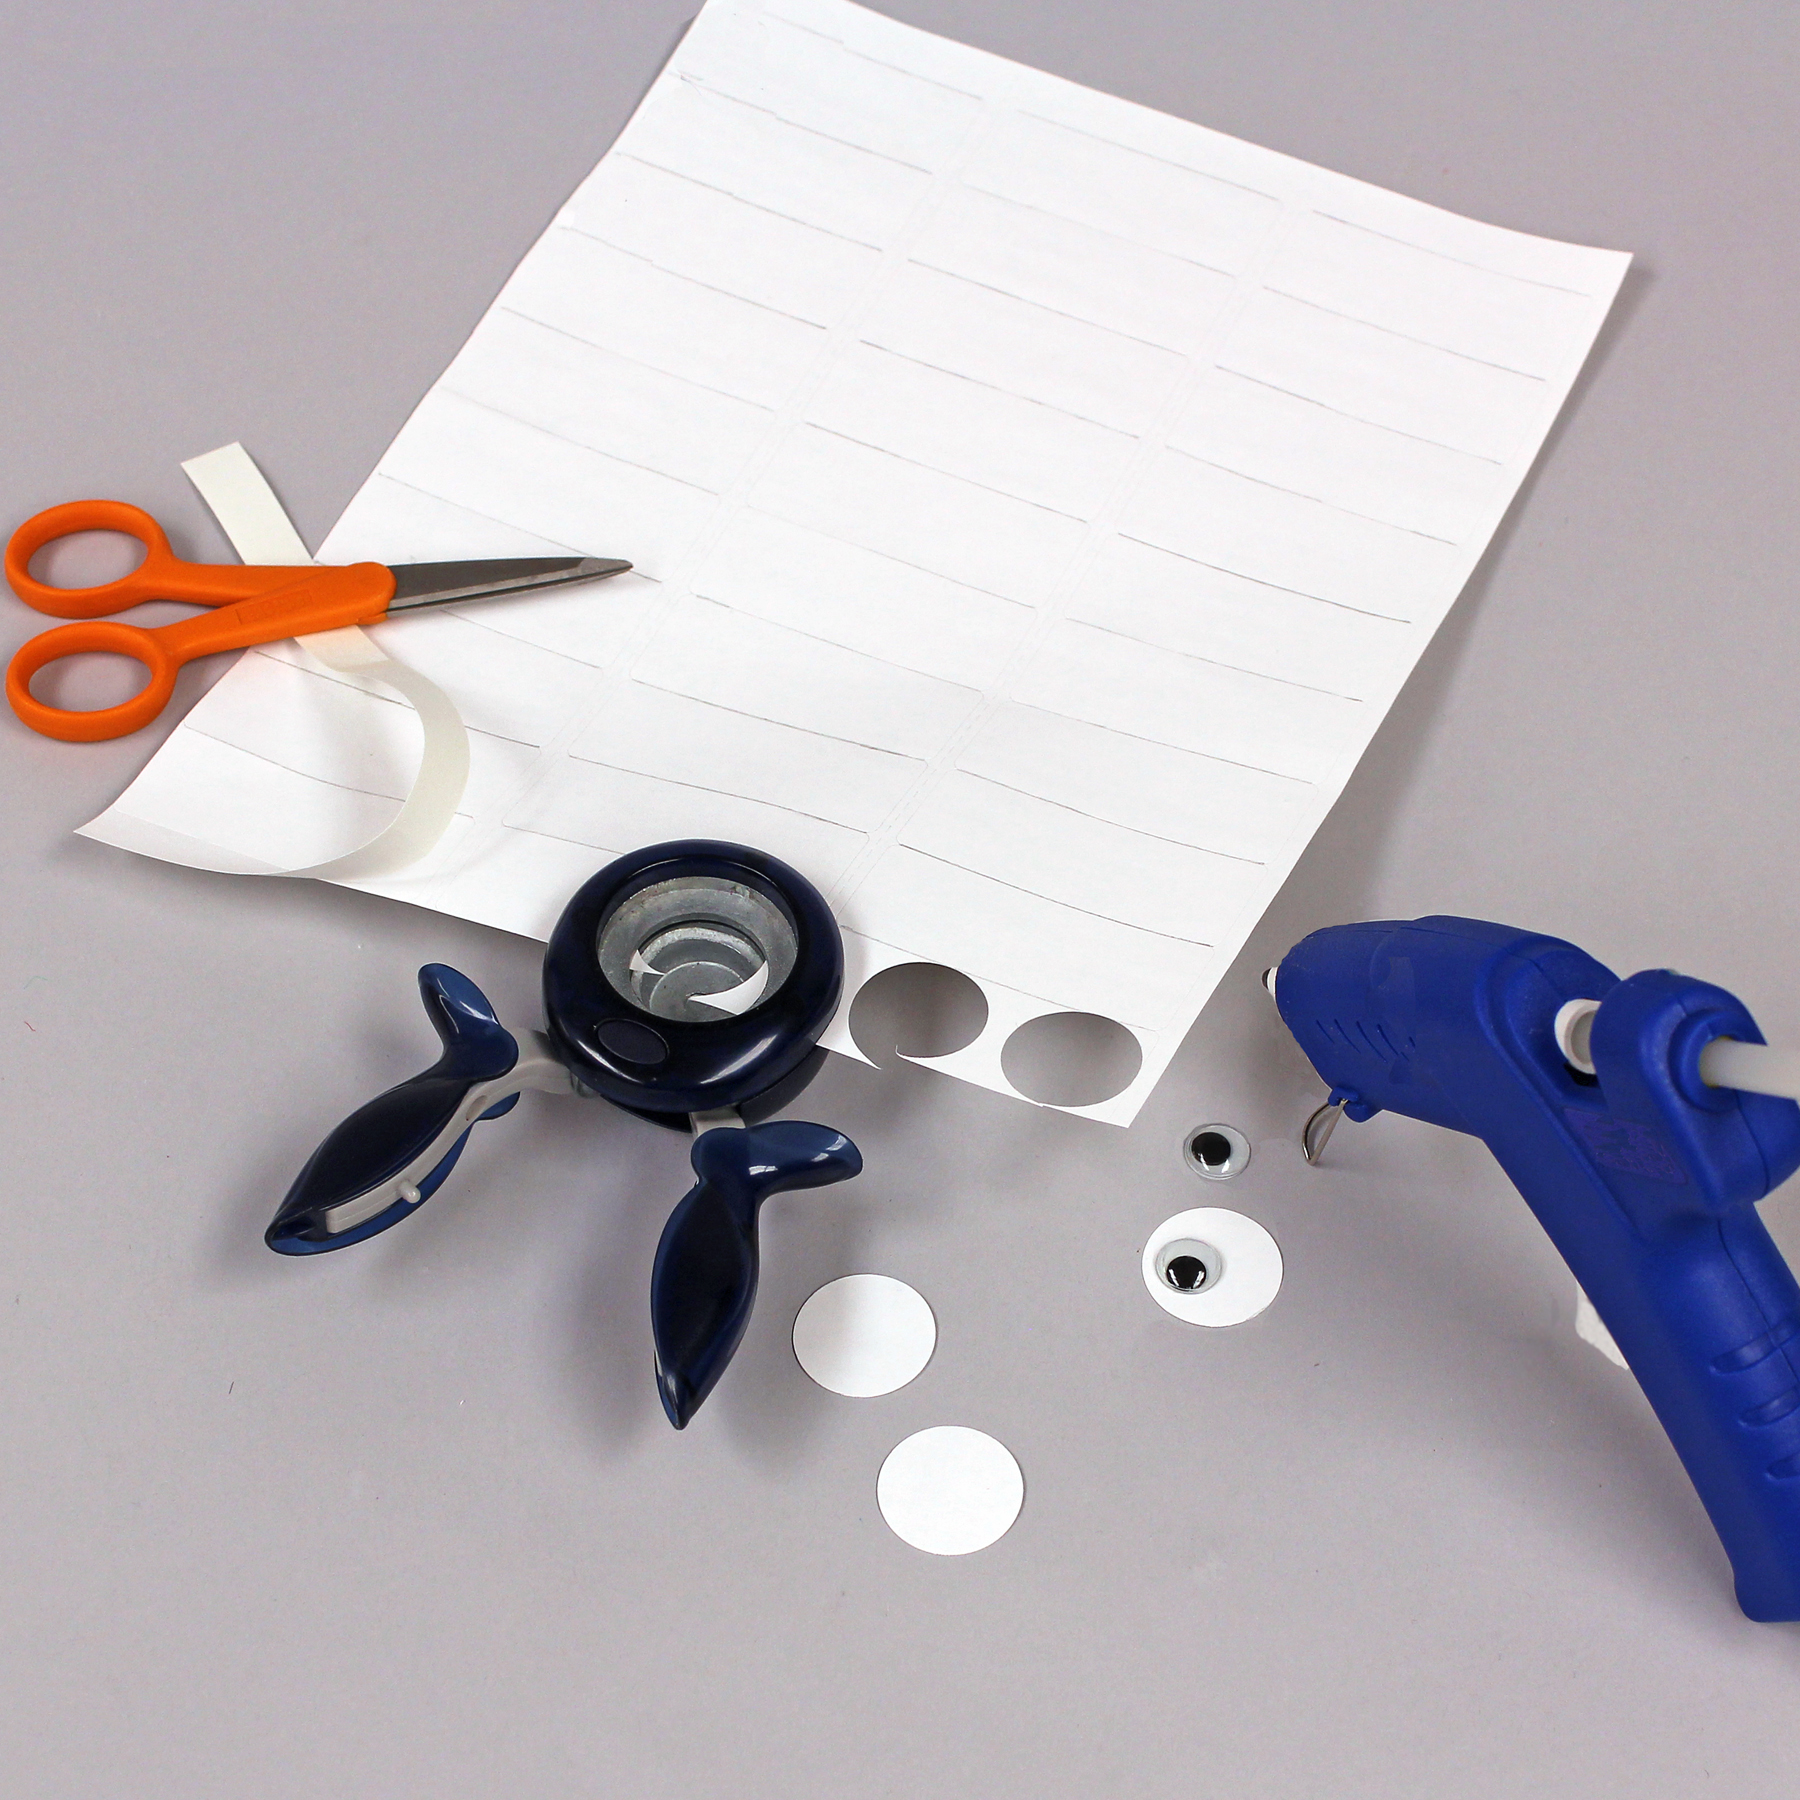
- (2) 1/2″ Diameter Wiggle Eyes
- Toothpick
- Washable Black Fine, Felt Tip Marker
- Two Paper Plates
For Wall:
- FloraCraft® Make It: Fun® Project Bricks, Tan, 18 Bricks
- 13 Toothpicks
- Rubber Band
- Plastic Cup
For Parent or Teacher:
- FloraCraft® Design It:® Wire Cutter
- Scrap Paper
- 8-1/2″ x 11″ Sheet Sticker Labels (1″ wide)
- 1″ Diameter Circle Punch
- Low-Temp Glue Gun
- Serrated Knife
- Ruler
- Pencil
Instructions:
Before working with the child
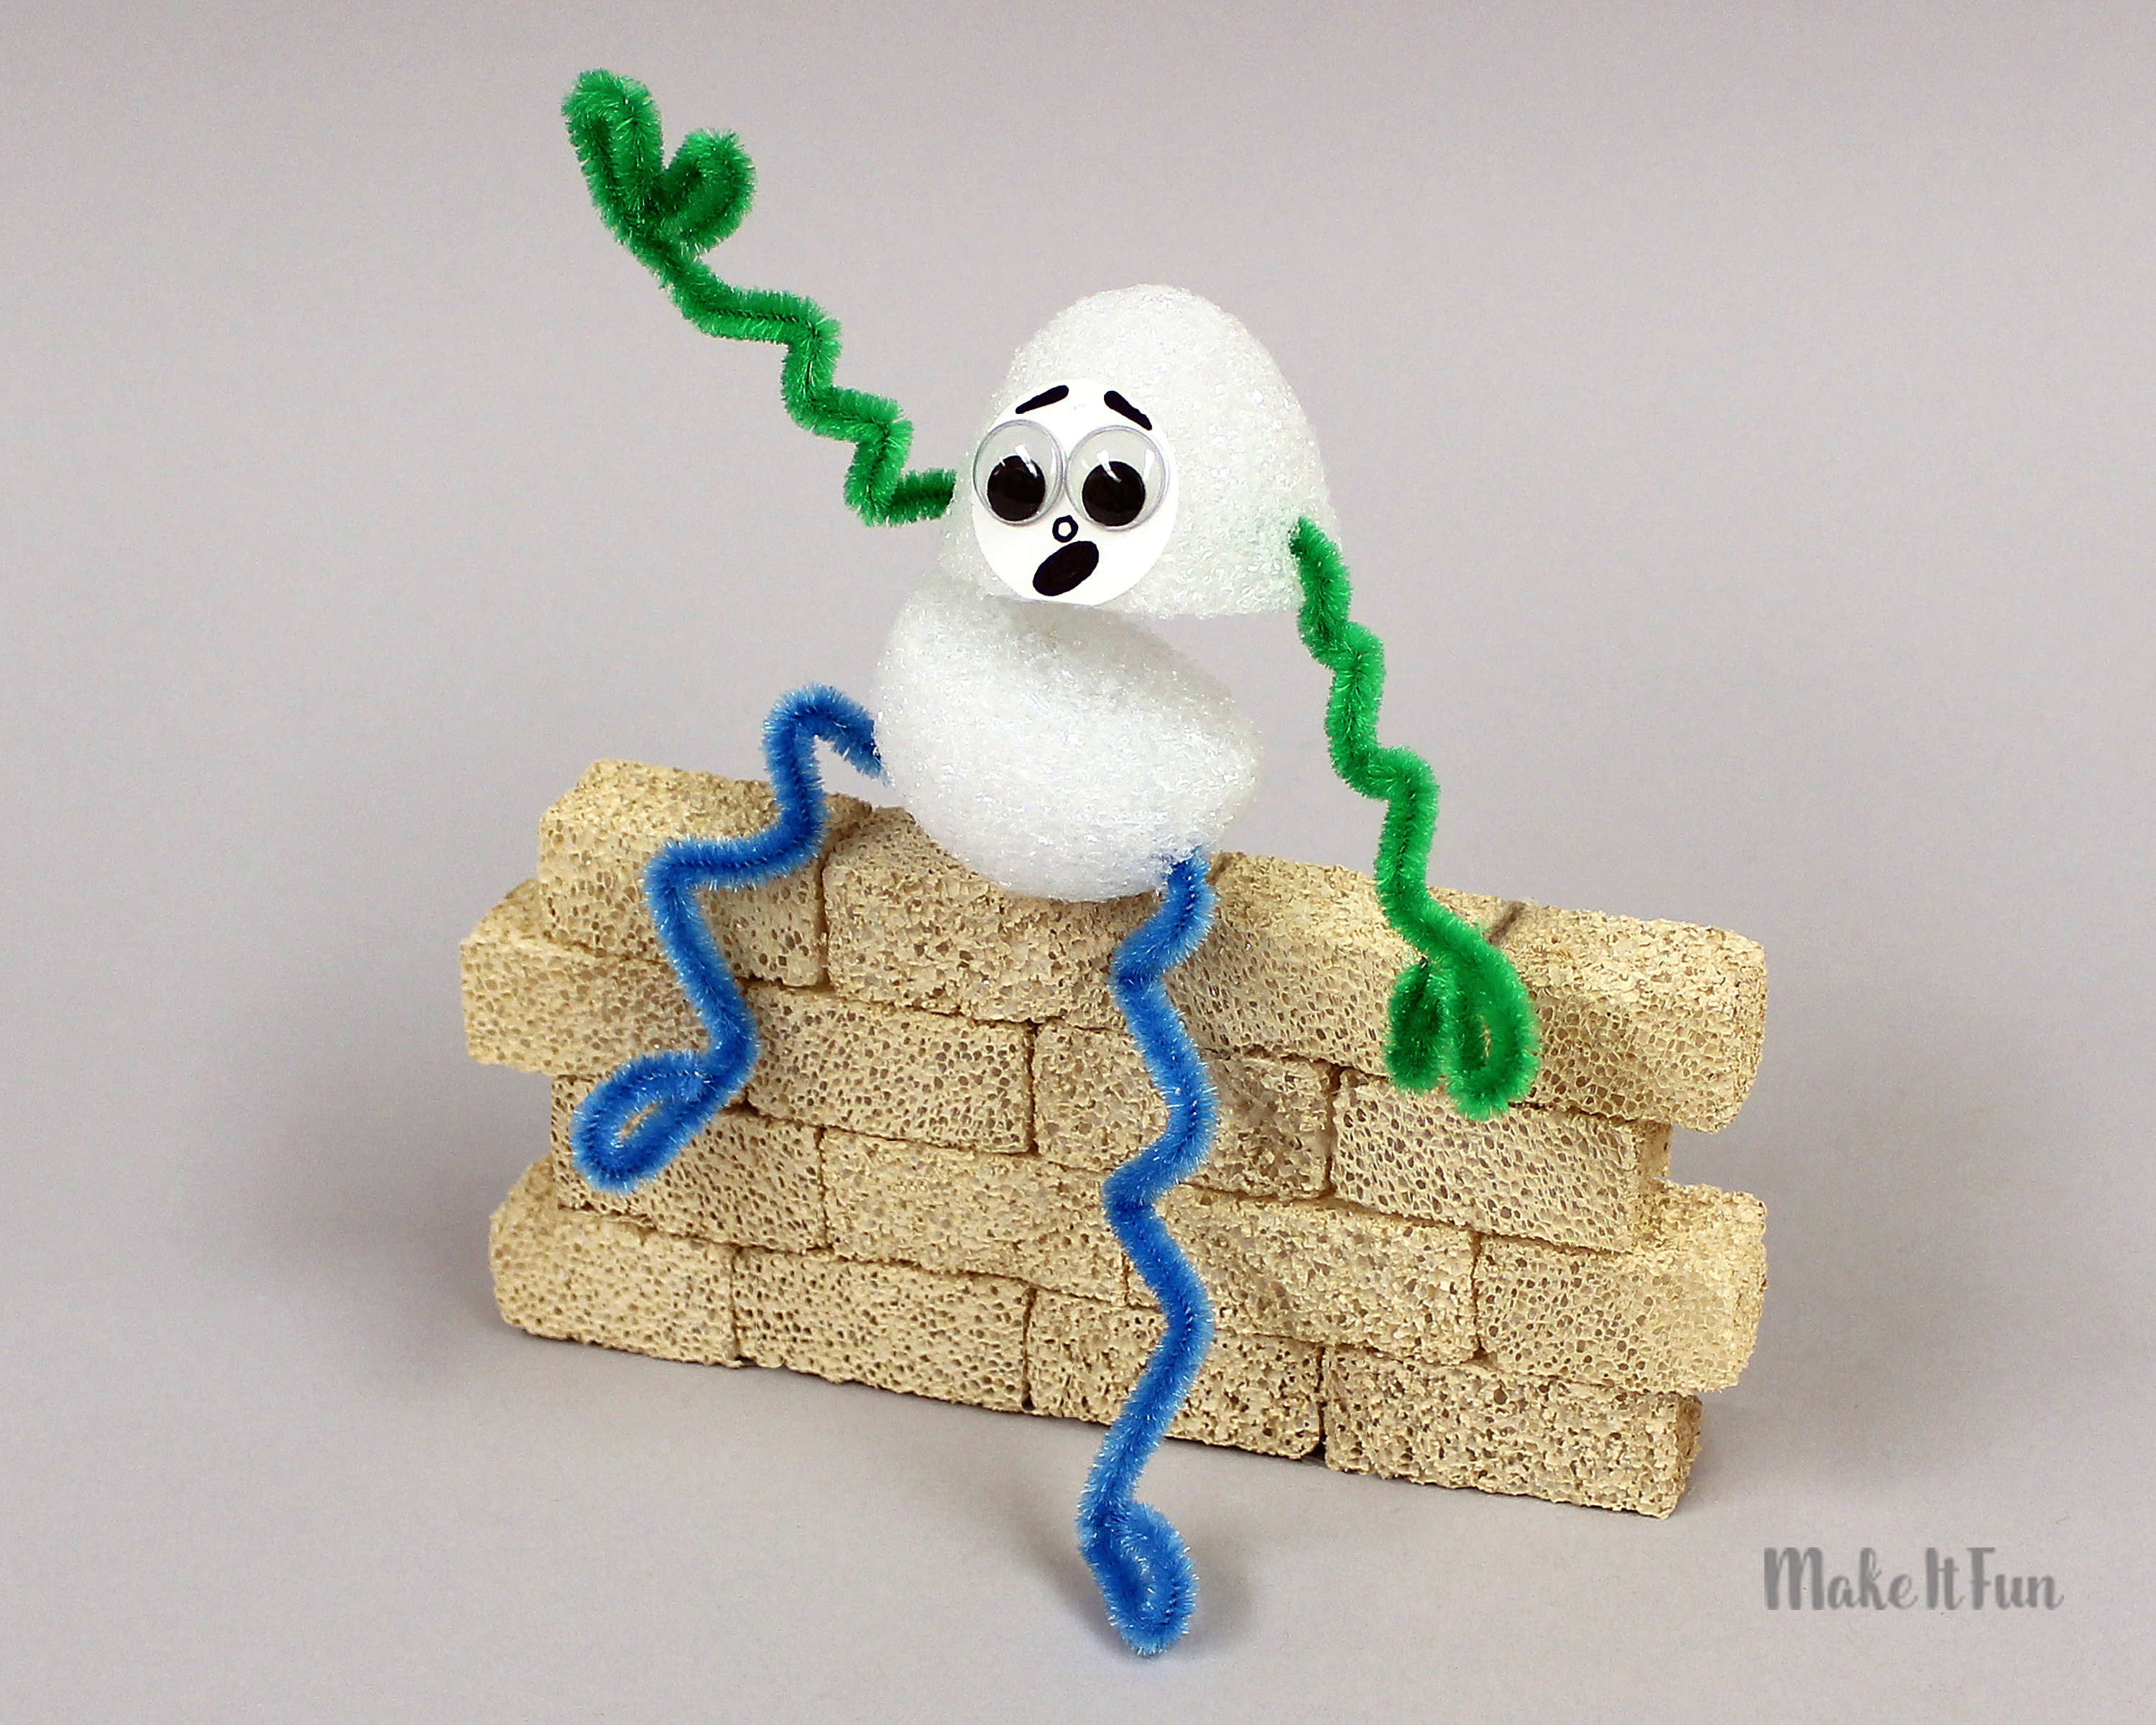
Use a serrated knife to cut a foam egg width-wise, leaving the narrower top about 1-1/2″ tall and the wider bottom about 1″ tall. Also cut a slice off the front of the top part, to create a flat area for the circle face sticker.
Use the ruler and a wire cutter to measure and cut both green and blue chenille stems in half to create four 6″ lengths.
Use scissors to trim off the borders from the sheet of sticker labels so that the circle punch reaches into the label area. Punch out one circle (or more if you’re working with more children).
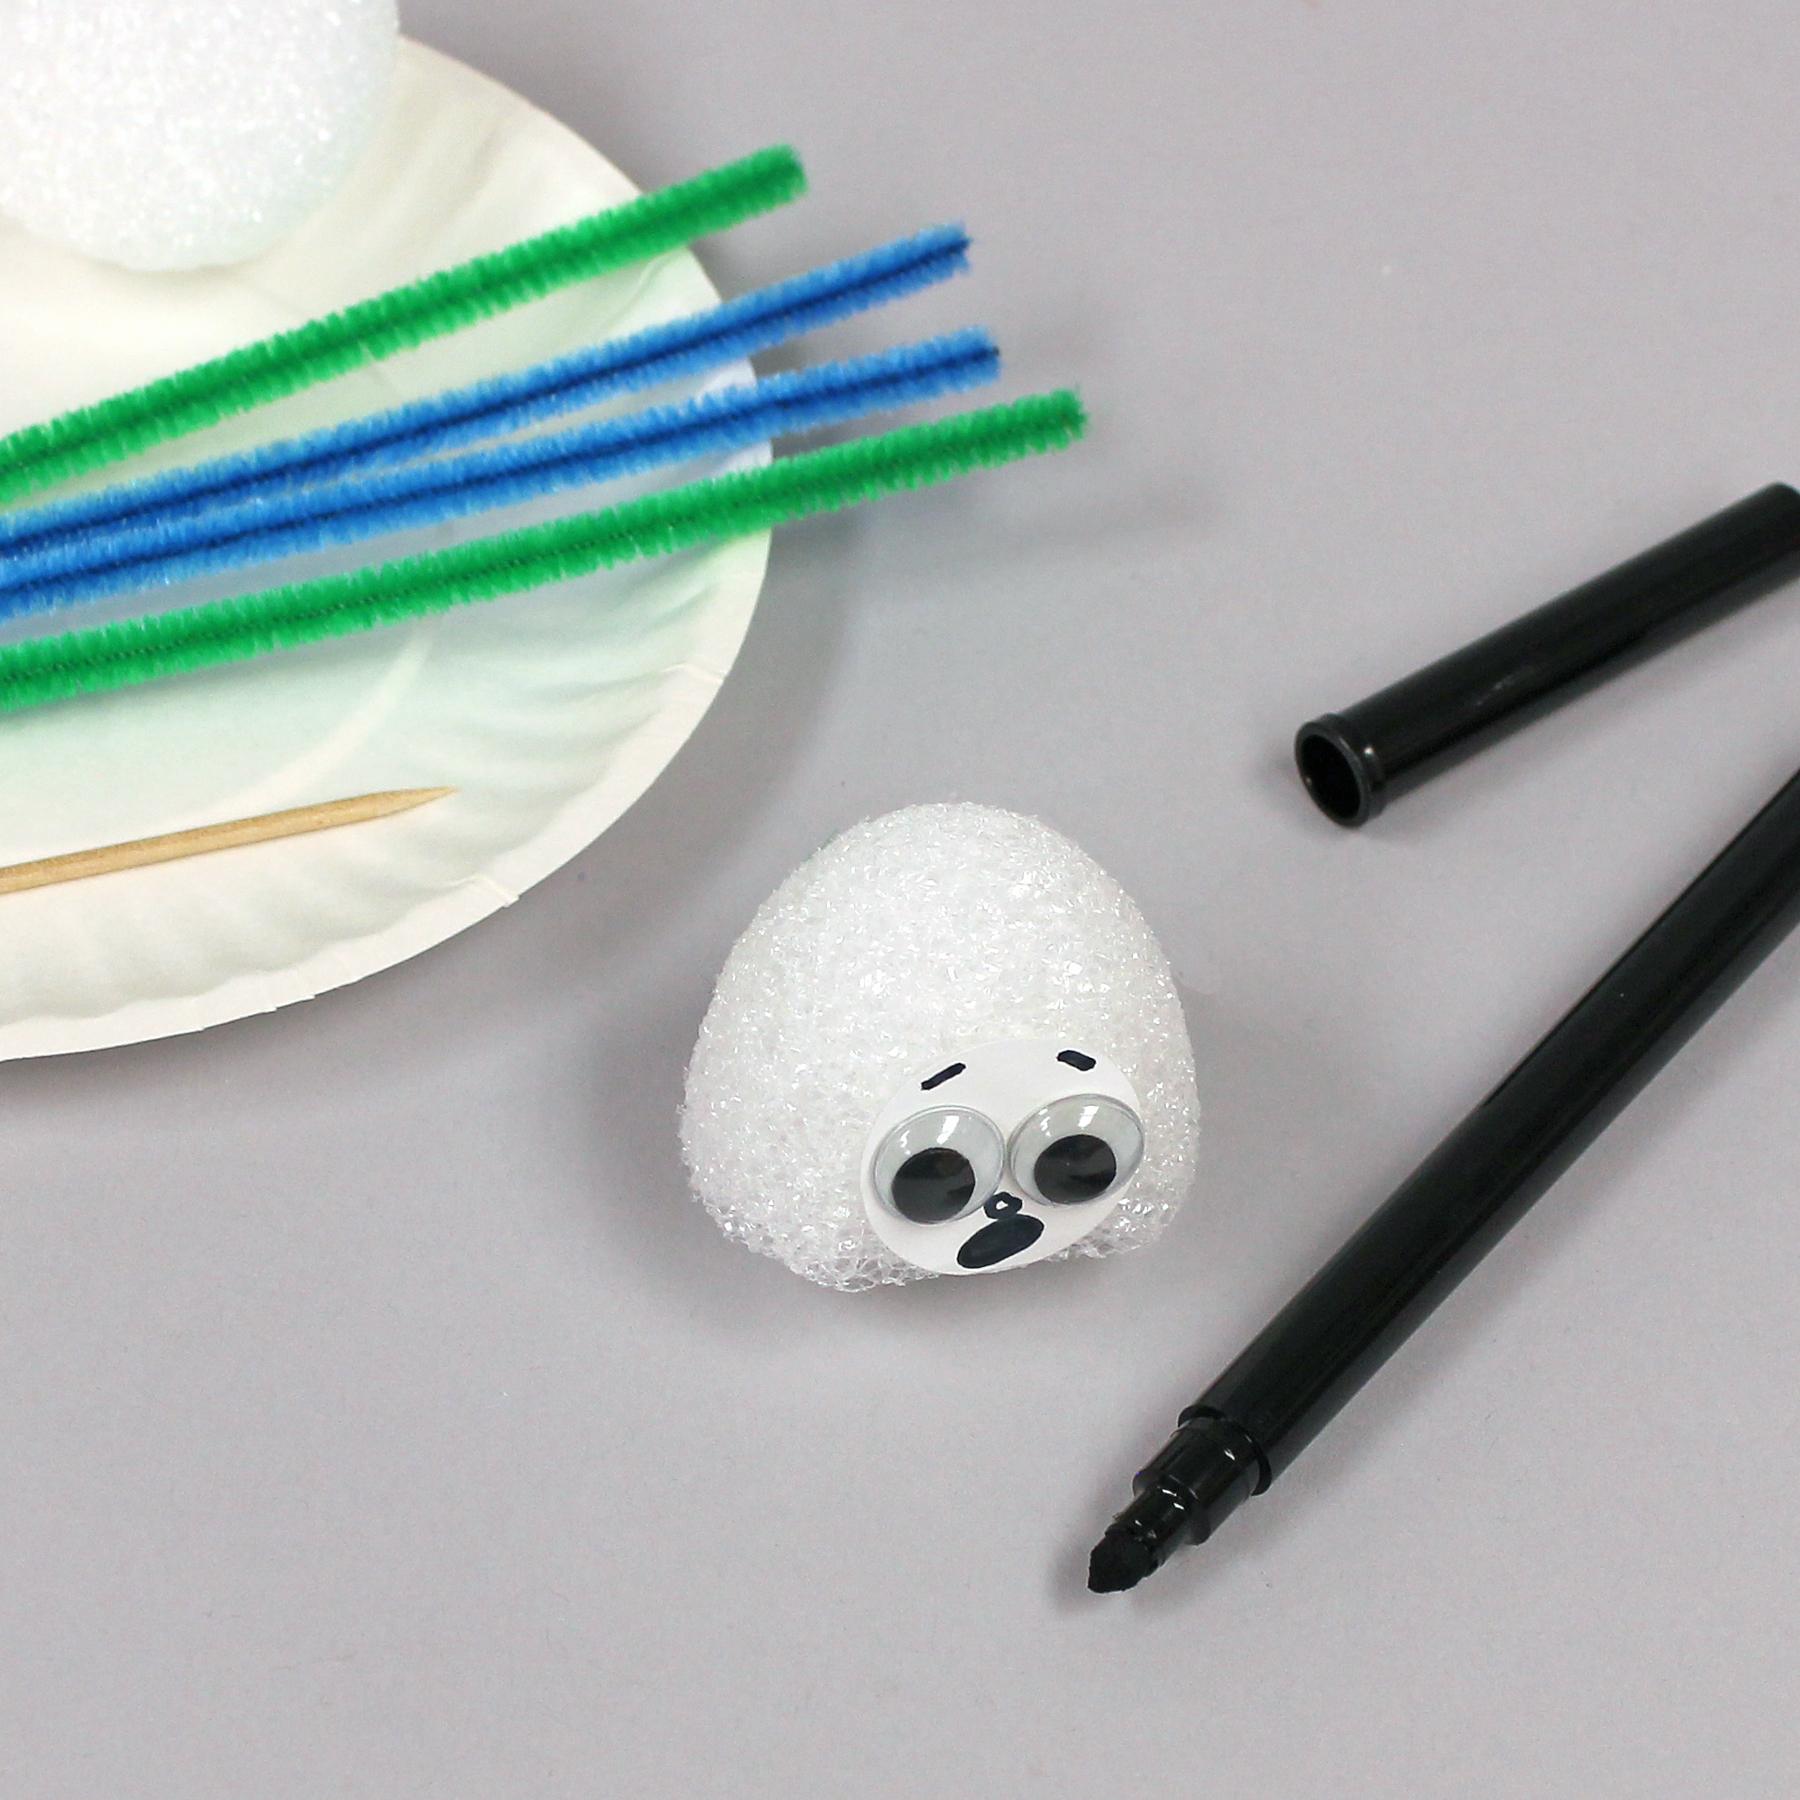
Use the glue gun to glue the wiggle eyes onto the sticker, leaving room for child to draw two eyebrows at the top and a nose and mouth at the bottom.
On a paper plate, set Egg top and bottom, four chenille stems, one toothpick, one marker and one circle face sticker.
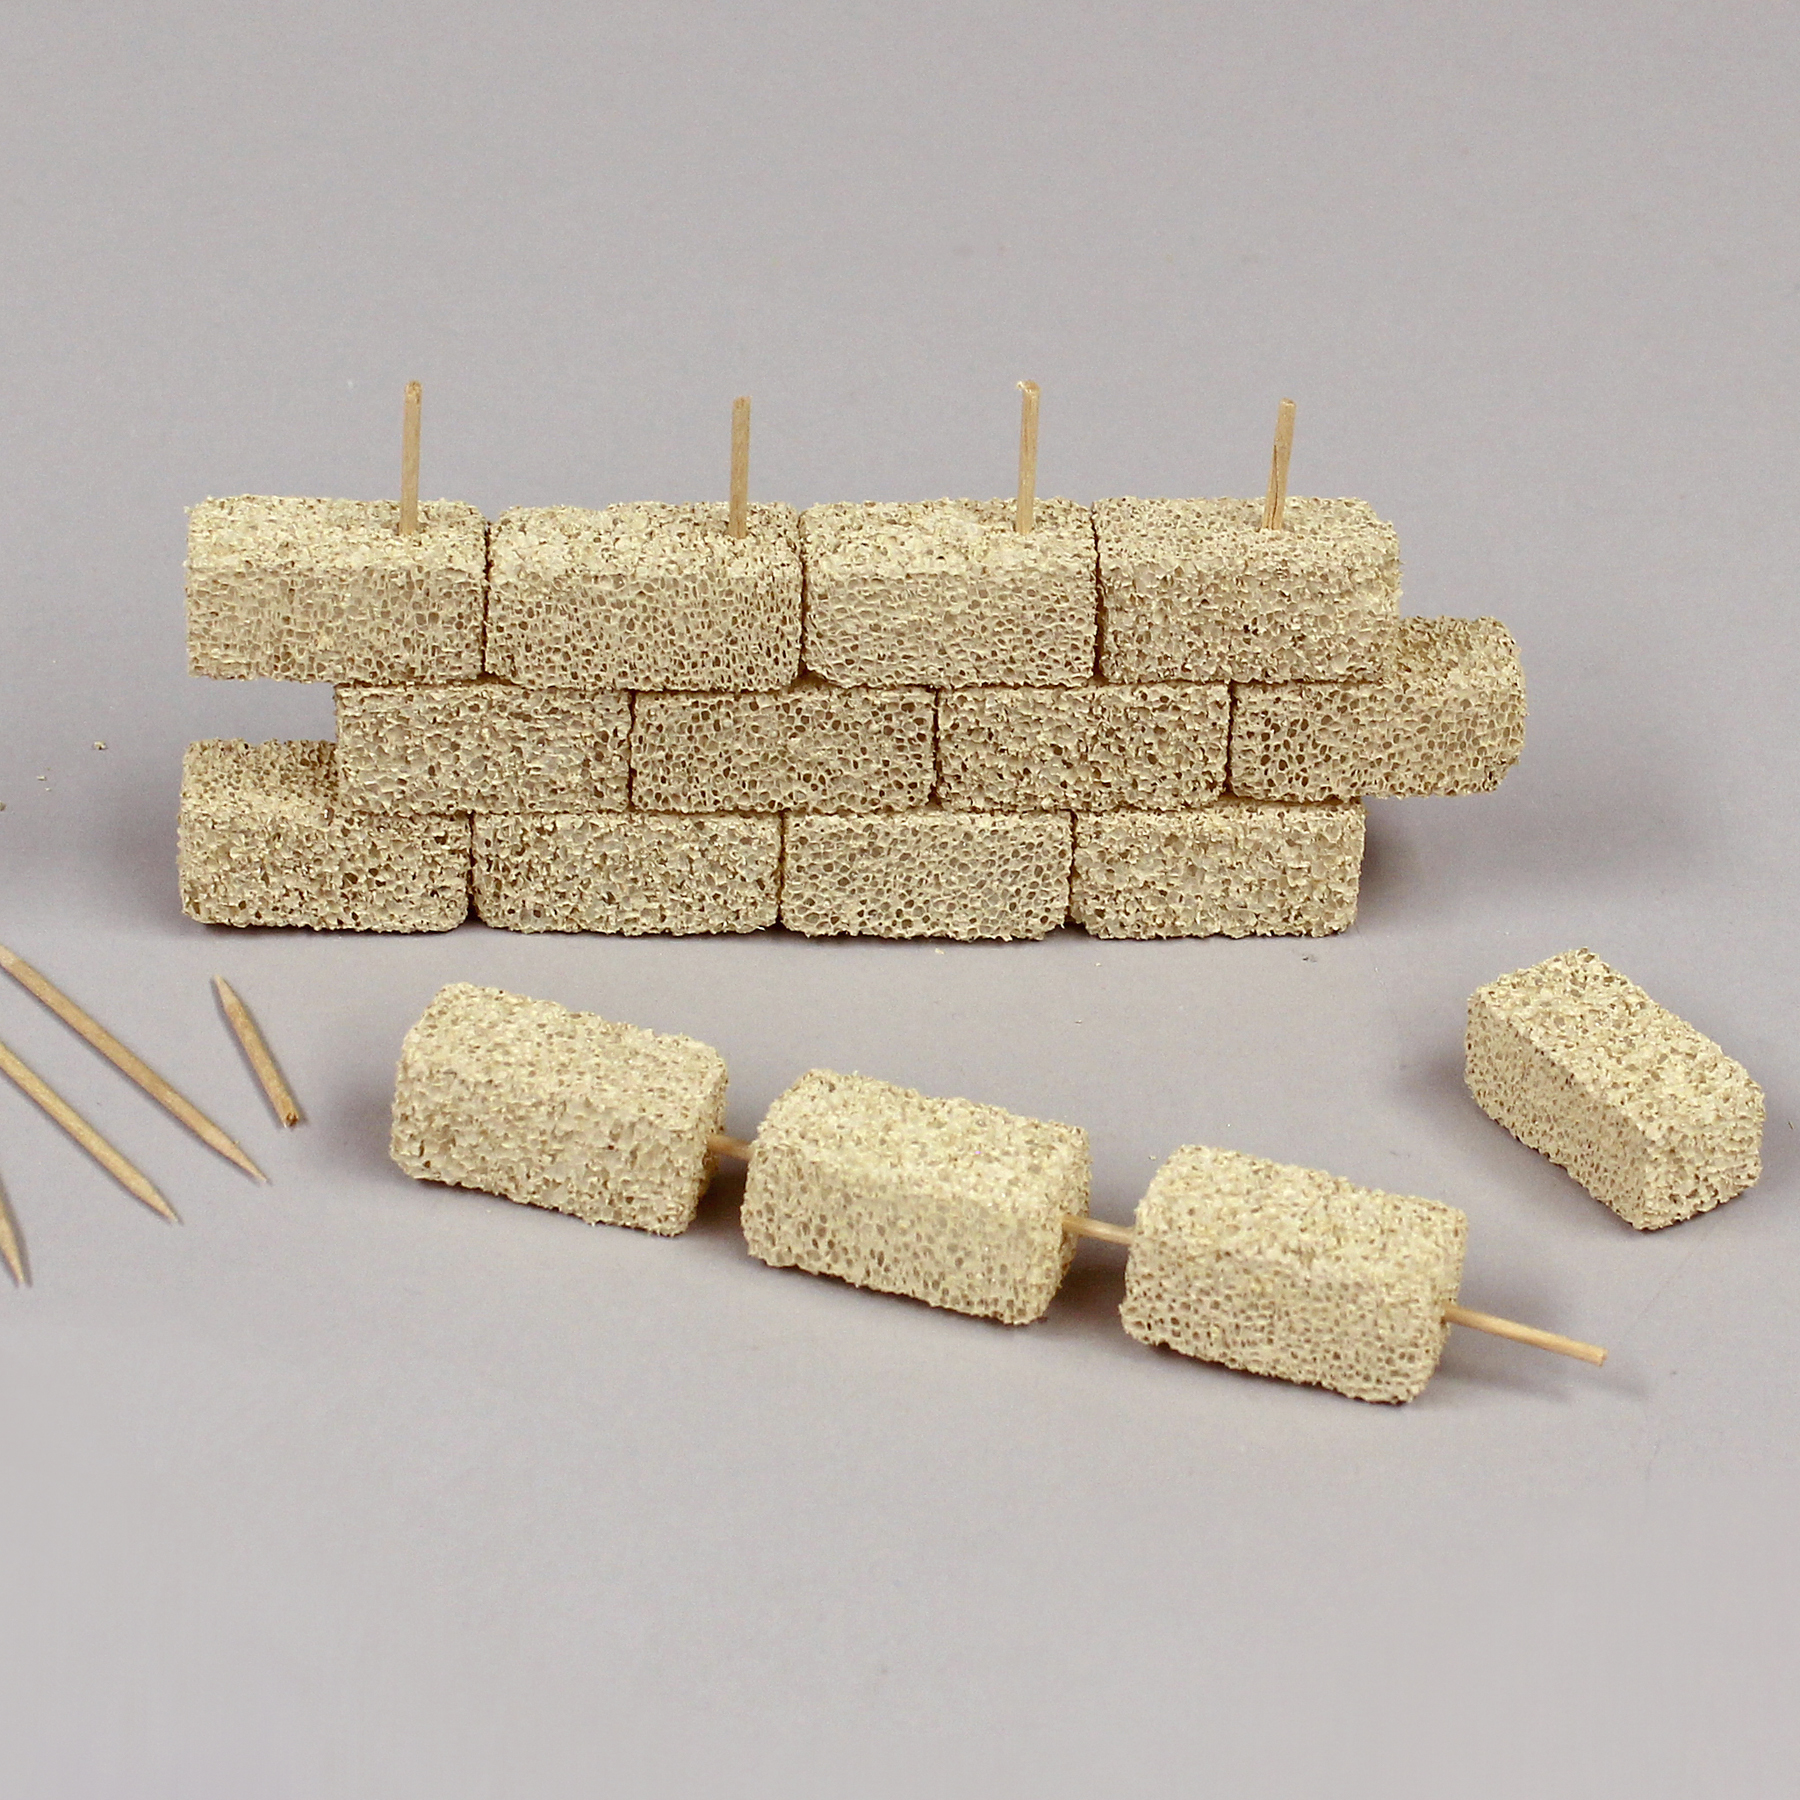
Count out 18 bricks on another paper plate (16 plus two on back). Use a rubber band to hold the 13 toothpicks and put them on the plate.
Wait to give the child the project bricks and toothpicks plate until you’re ready to have them build the walls.
Do this part with the child
On a piece of scrap paper, draw a large circle with two eyes. Demonstrate that to look surprised the eyebrows should be angled up. Also show mouth options: Surprised (oval); smiling (curved up); sad (curved down); or silly (wiggly line). The child can use the marker to draw the features they prefer. Then have them remove the release paper from the back and attach it to the flat front of the egg top.
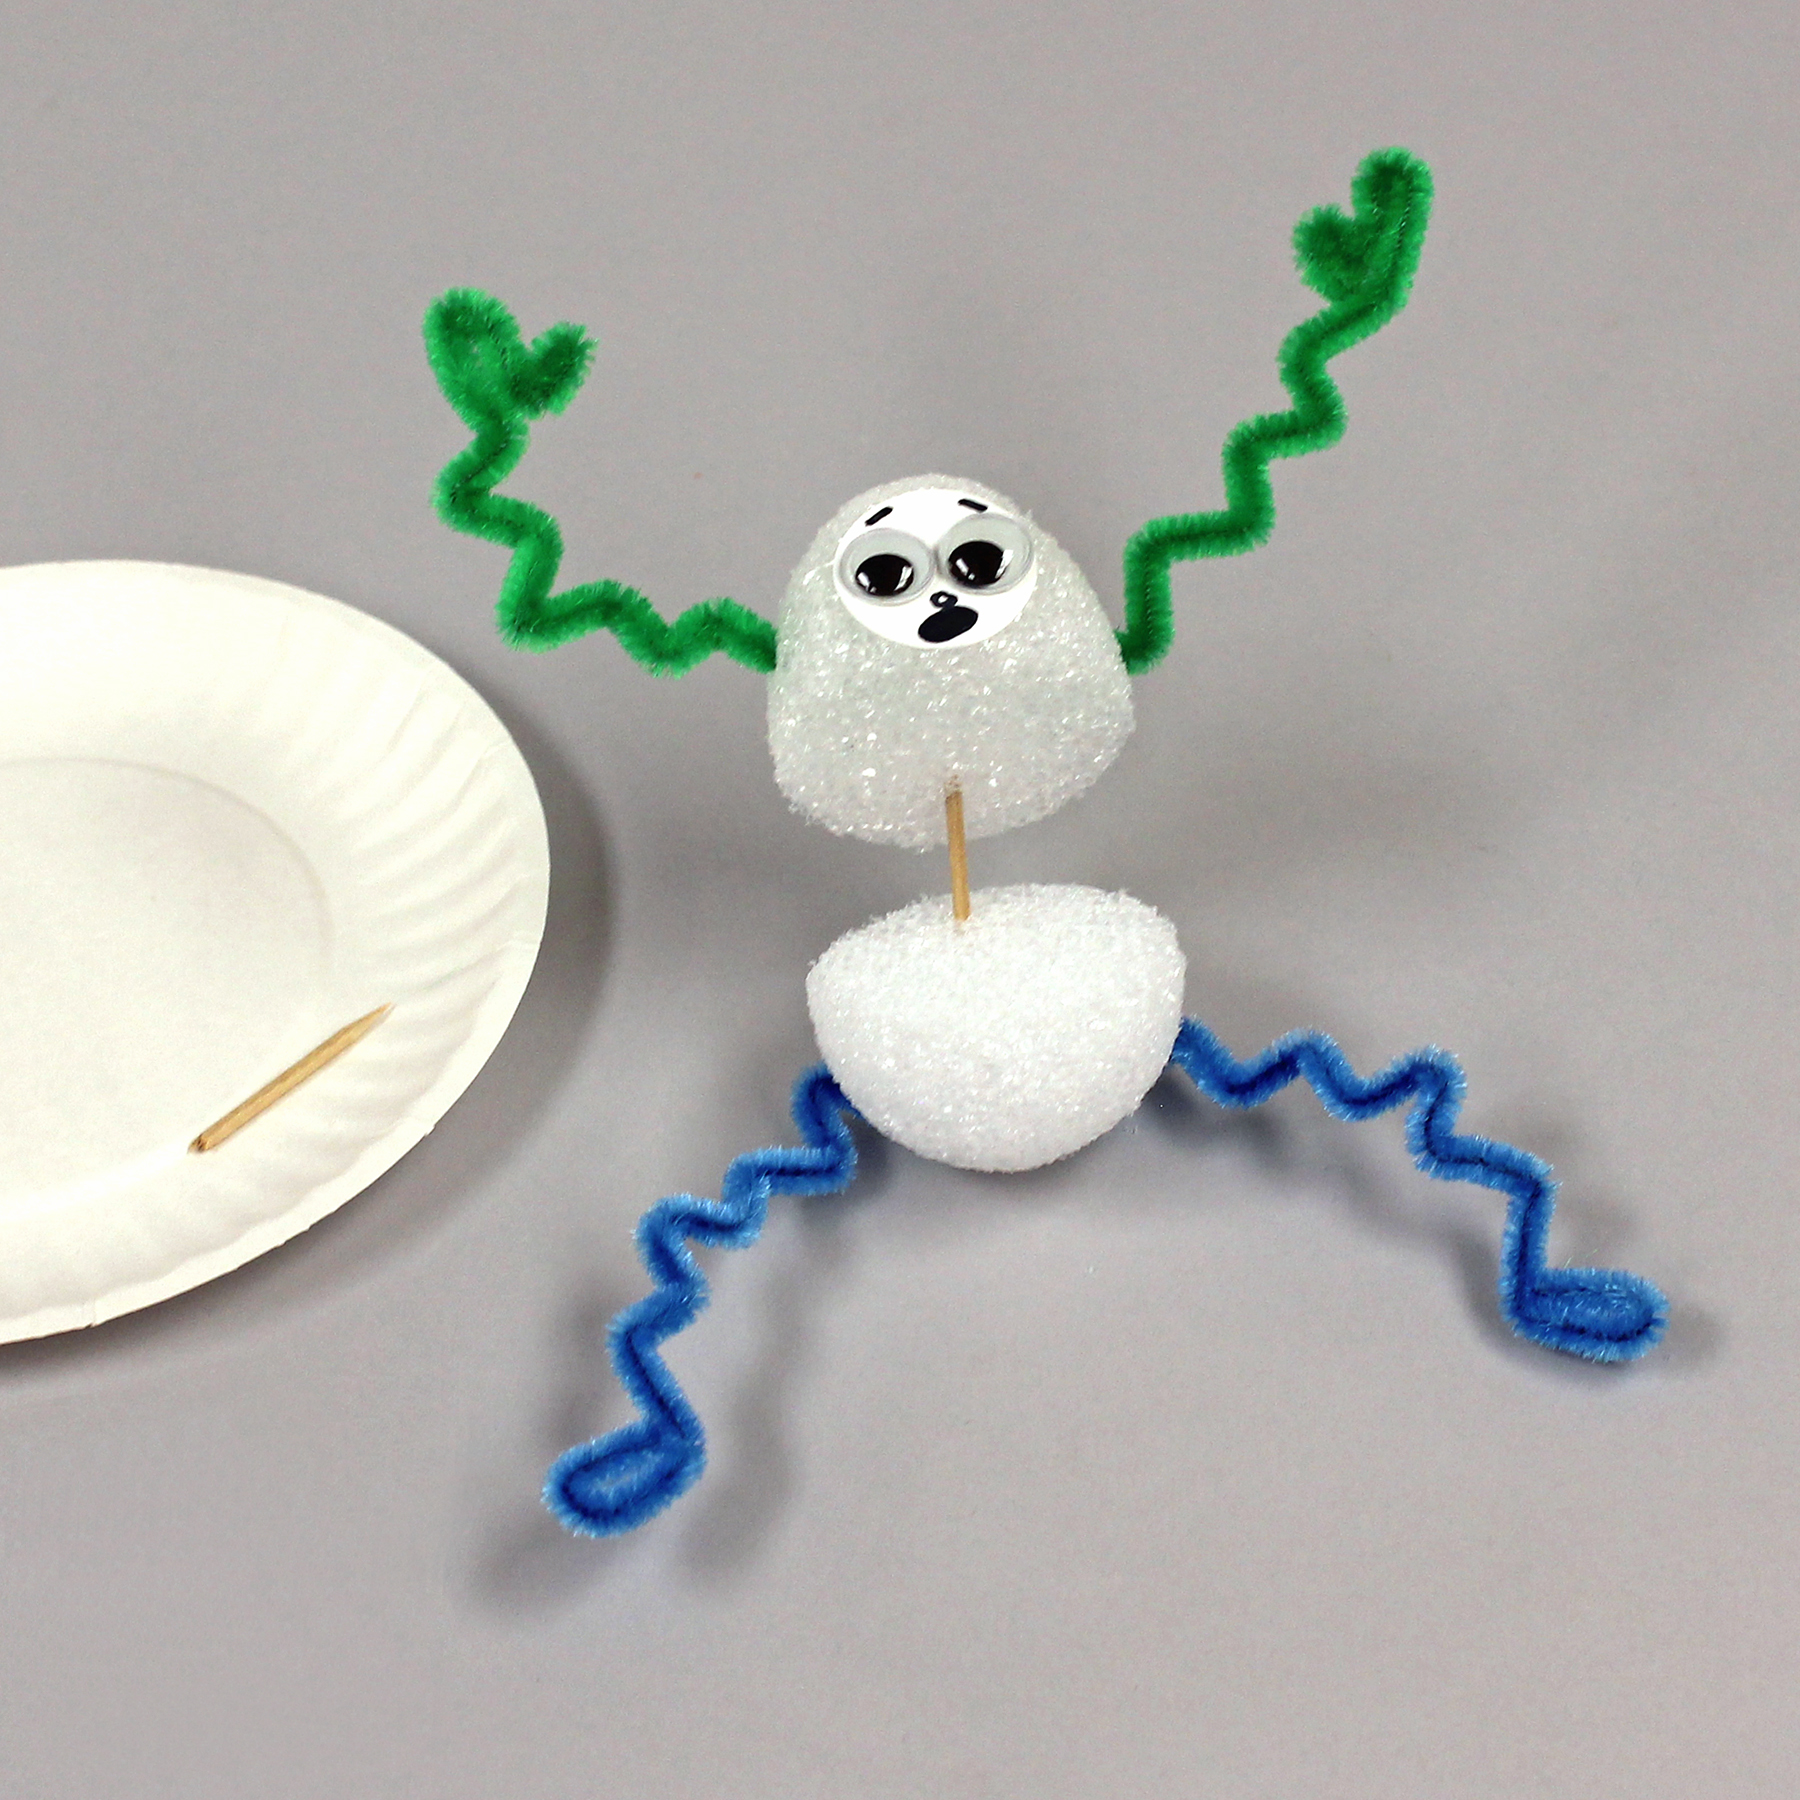
Have the child bend a thumb and mitten in the end of one green chenille stem. Then have them bend zig-zags in the rest of the arm. Have them repeat, using another chenille stem. Ask them to insert the arm ends into the sides of the egg top.
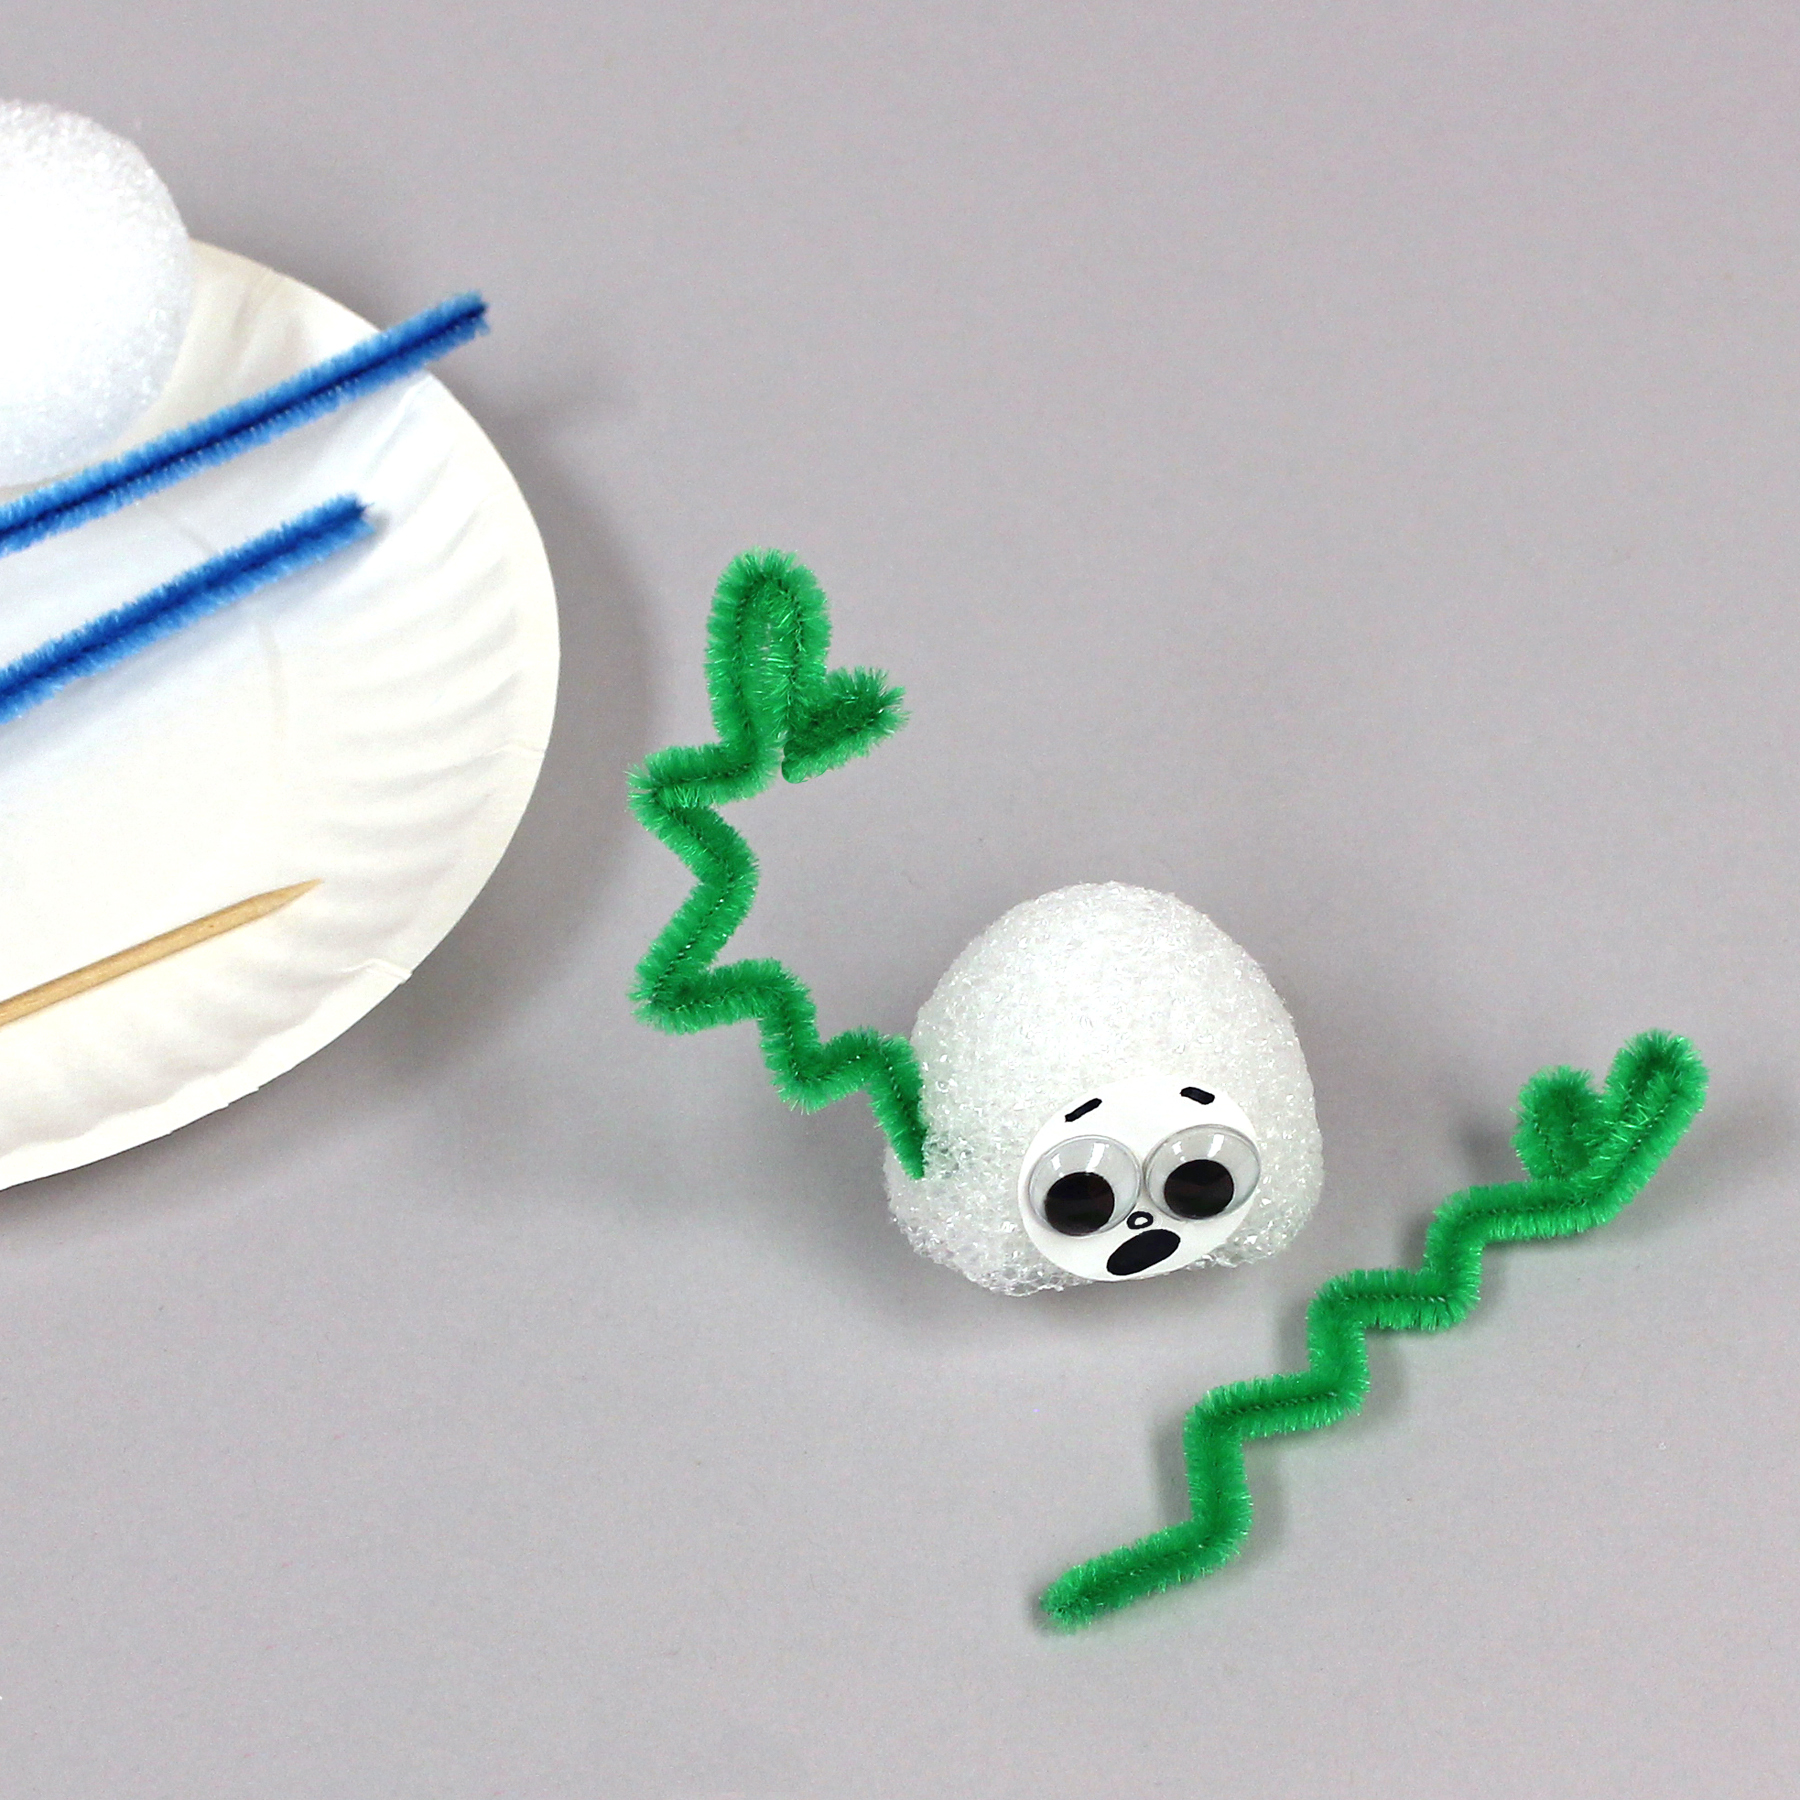
Similarly, have the child bend an oval foot in the end of one blue chenille stem. Then have them bend zig-zags in the rest of the leg. Ask them to repeat with another chenille stem and to insert the ends into the sides of the egg bottom.
Demonstrate how to snap a toothpick in half, by tightly holding both ends and bringing hands together. Use a toothpick half to join the top back of the egg bottom to the bottom back of the egg top.
On scrap paper draw to explain how bricks are placed end-to-end and the rows staggered as follows: Draw a row of four rectangles. Above that row, draw four more rectangles that are shifted over to stagger. Draw a third row on top of that, so that those bricks align with the first row. Last, draw a fourth row on top, so that those bricks align with the second row. Discuss so that child understands.
Give the child the plate of project bricks and toothpicks. Show how to insert a toothpick half into the short end of one brick and push it against the short end of another, to connect them. Repeat with two more bricks. Have the child make the first row. Have the child make three more rows the same way. (Wait to connect rows.) Use glue gun if any joints are loose.
Have the students use toothpicks in the tops of the bricks in three rows to join them, making the rows stagger, as shown on the scrap paper.
On the bottom back of the wall, about 1″ from each end, have the child add two bricks that extend out from the wall, to keep it from tipping.
Set Humpty Dumpty on the wall, using remaining toothpick half to hold his bottom onto the wall. They can bend his arms and legs as desired.
Tips & Ideas:
- If you have concerns about safely breaking the toothpicks, break them inside a paper bag to catch any flying pieces.
- Use a glue gun to attach any circle stickers that won’t stick during play.
- If the wall tends to tip forward (or backward) adjust bricks on back, as needed.
- The child can also use foam, chenille stems, felt, paper and other craft basics to make environments (dioramas) for their story’s characters.
- Discuss other nursery rhymes and create characters from foam (eggs and balls), chenille stems, paper, etc.
- Make a giant Humpty Dumpty using a large foam egg, jumbo chenille stems (found in specialty toy stores) and classroom building blocks.
More…
For more information on this project and other learning activities, click here to visit the Make It: Fun Learning Center.