Easy Gold Raven Skull
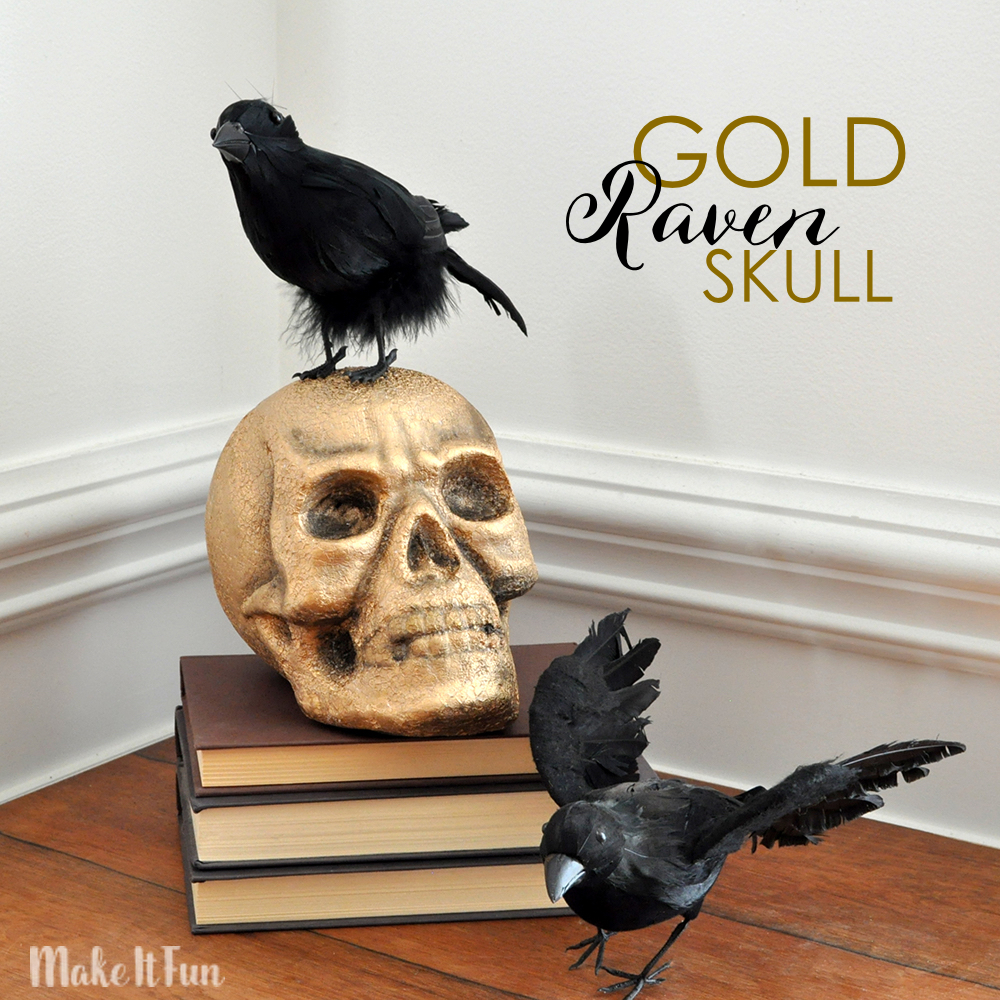
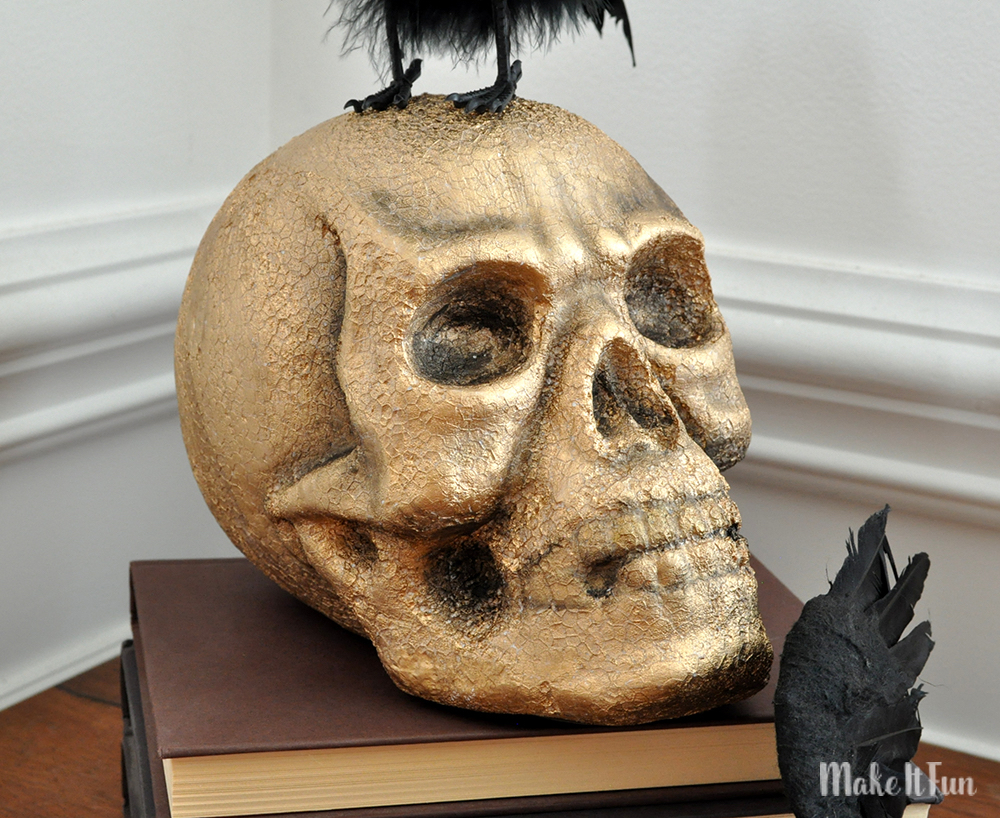
Gold home decor is trendier than ever this year and Halloween decorations are no exception. I used liquid gold gilding to bring out the luster of real gold to this project.
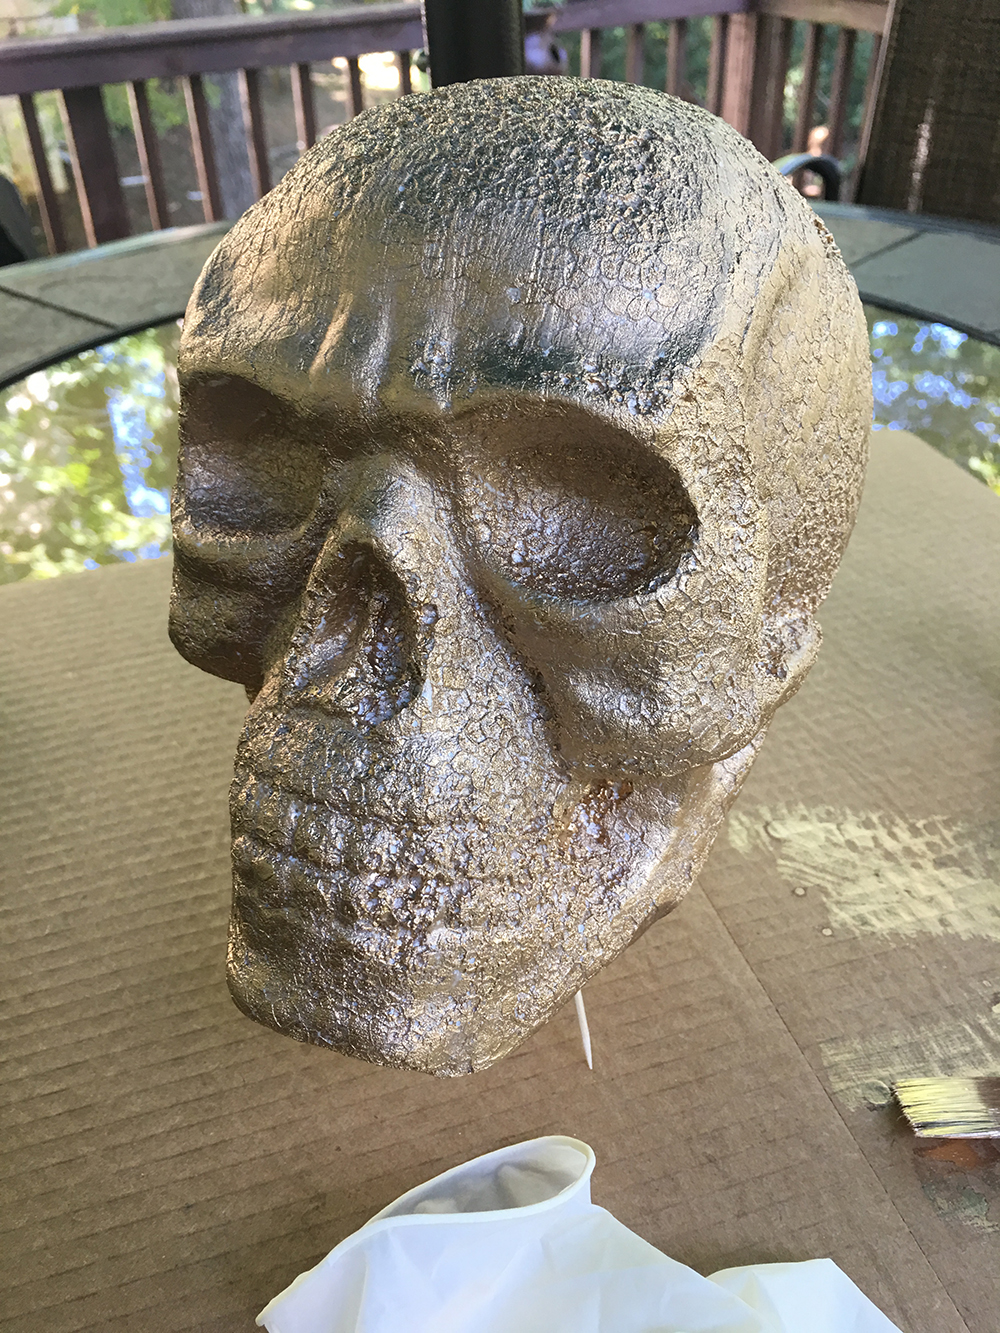
Applying liquid gilding to foam creates a crackled effect. For this project I believe it enhanced the spookiness of the skull. I have to admit, I am a little addicted to gilding, when the paint dries it adds such a beautiful sparkle to projects.
Supplies needed to make this project:
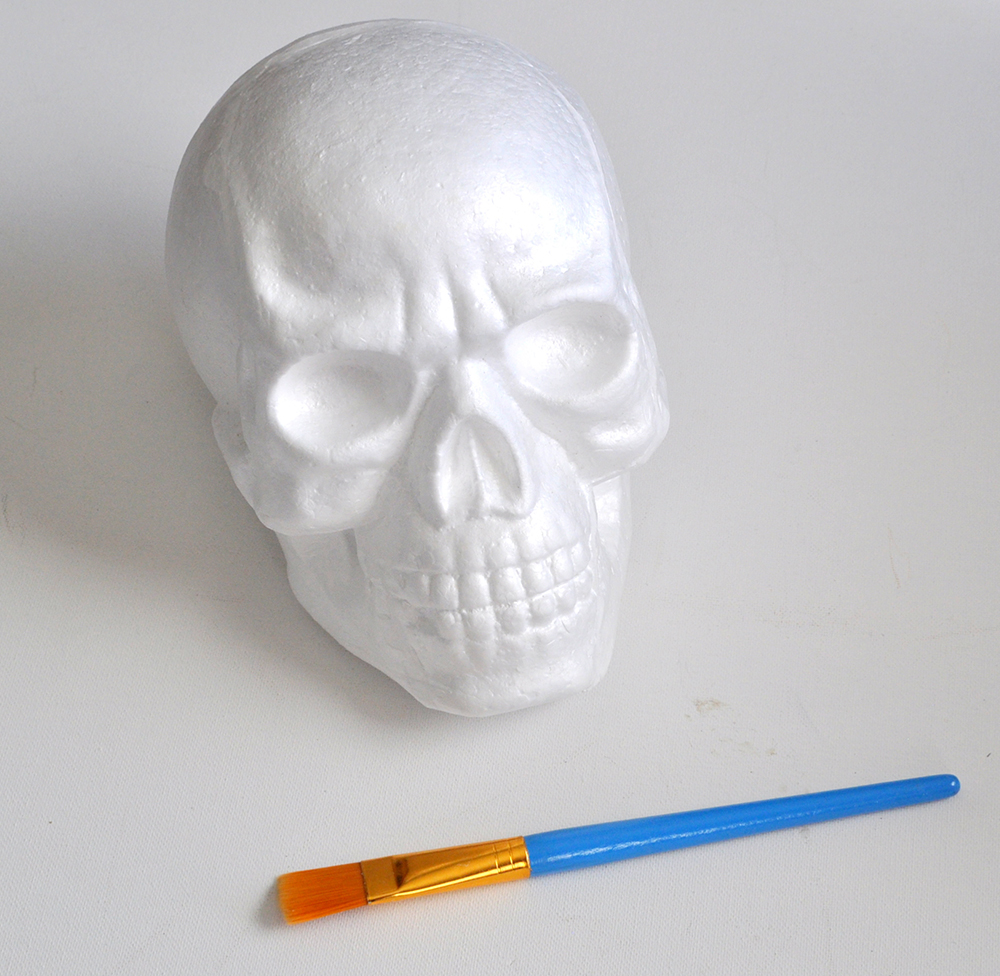
- FloraCraft® Make It: Fun® EPS Foam Halloween Skull
- Gold Gilding Paint
- Black Acrylic Paint
- Faux Crows
- Paint Brush
- Gloves
- Toothpicks
Instructions:
Insert four toothpicks into the bottom of the foam skull to use as a stand so you can apply paint to it.
Tip: When using liquid gilding please follow the safety instructions on the package. Be sure to use this paint in a well ventilated area and always use gloves.
Paint the skull with gilding using a thin layer of paint. The more paint you have on your brush, the more the crackle effect starts to form. Less is more when using gilding on foam.
Let the gilding dry for a few hours. Using a stiff natural paint brush, dry brush black acrylic paint into the creases of the skull. Dry brushing is done by lightly dipping the brush tip ends into the paint and wiping most of it off on a paper towel before applying to skull.
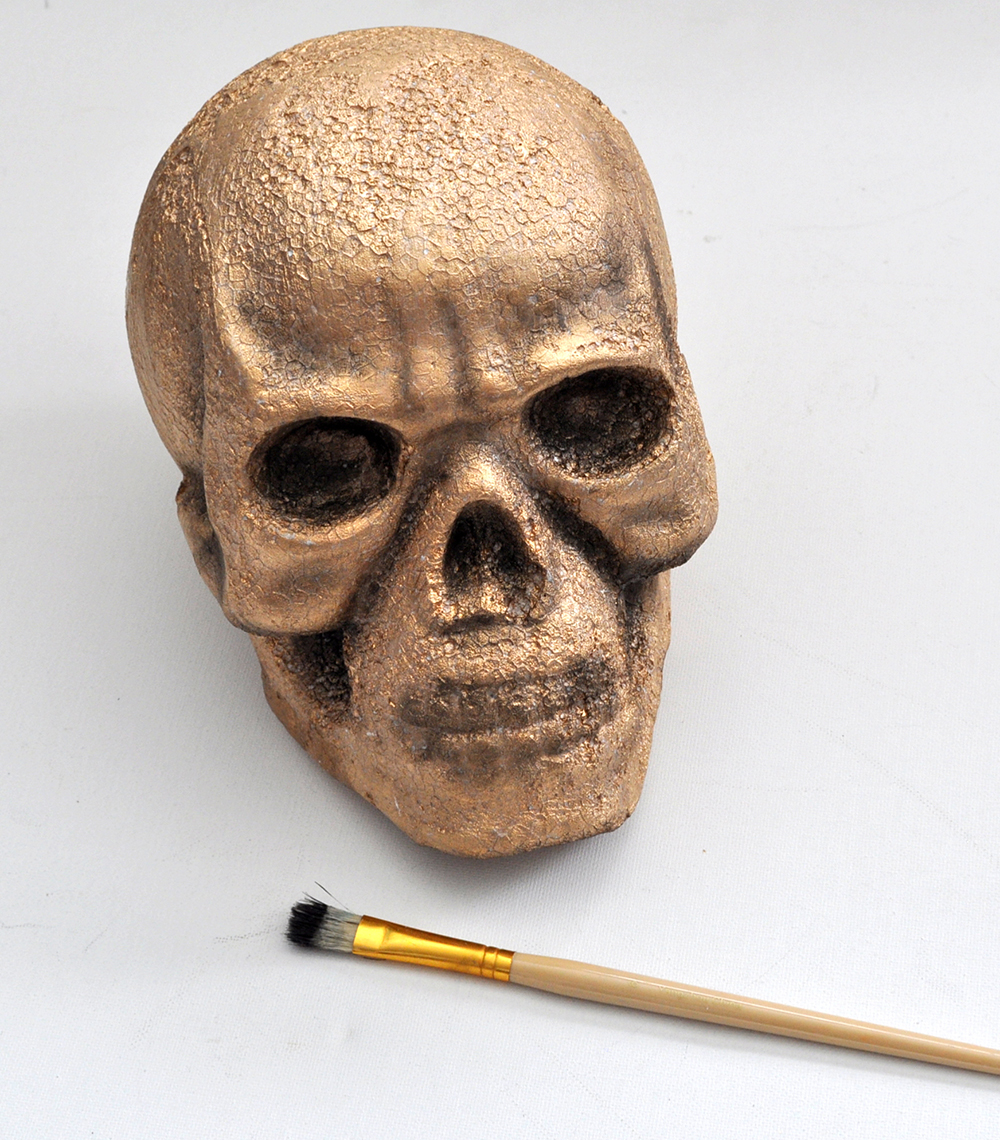
Paint the bottom of the skull black. Let the paint dry completely. Take the large faux crow and bend the wire feet straight down and insert the wire into the foam. You can use low-temp glue to secure if desired.
You can pose your creepy skull in many different scenarios for the big night. My favorite look is adding a feather boa and placing him onto a candlestick for an eerie look for my fireplace.
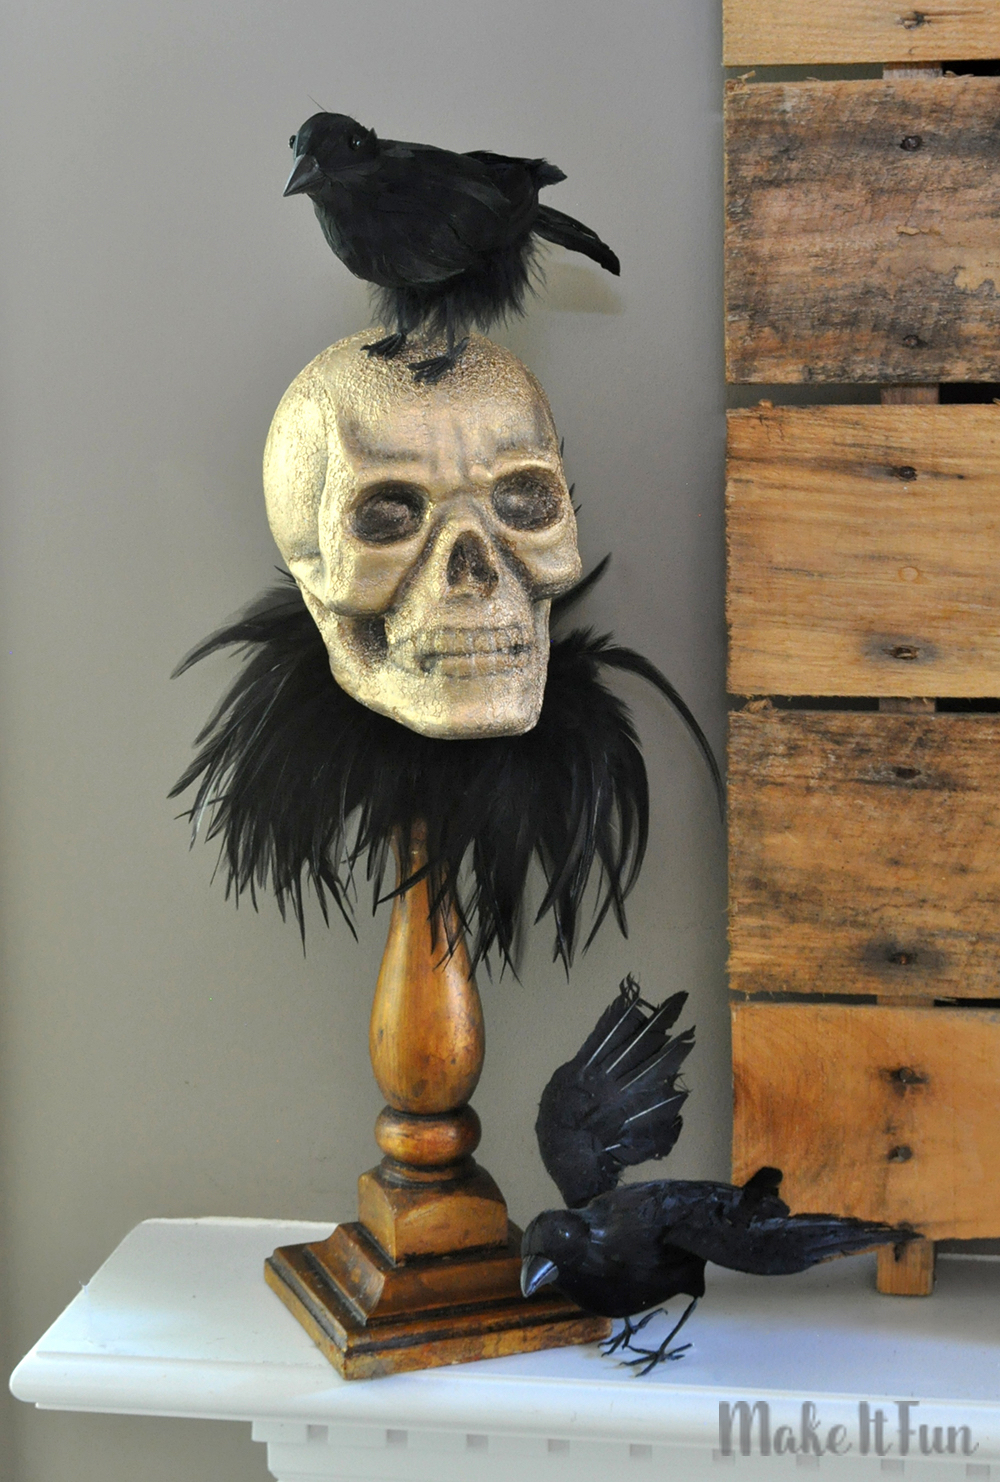
This glamorous guy is sure to be a great addition to your Halloween decor. Happy Halloween!