
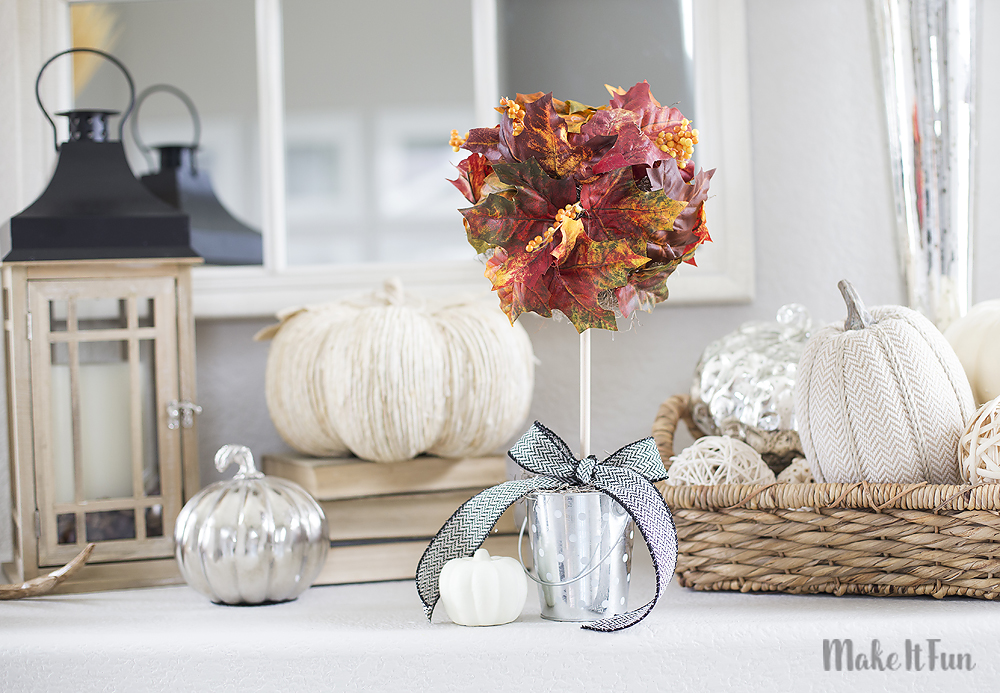
Simple Fall Topiary

Fall is in the air, and there is nothing I love more than creating fun, DIY home décor for each season. When I think of fall, I cannot help but think of bright and beautiful fall colors, rich crisp textures, and of course delicious smells of spice, apples, and pumpkin. Today I’ll share how to create this Simple Fall Topiary using just a few supplies.
Supplies needed to make this project:
- FloraCraft® Make It:Fun® Foam: Balls (I used a 5″ ball for the top, and a 2″ ball for the base)
- Small Vase or Bucket (I found this bucket at the target dollar section)
- Spanish Moss
- Ribbon
- Faux Fall Leaves or Fall Garland
- Faux Berries (optional)
- Dowel
- Low Temp Glue Gun & Glue
- Scissors

Instructions:
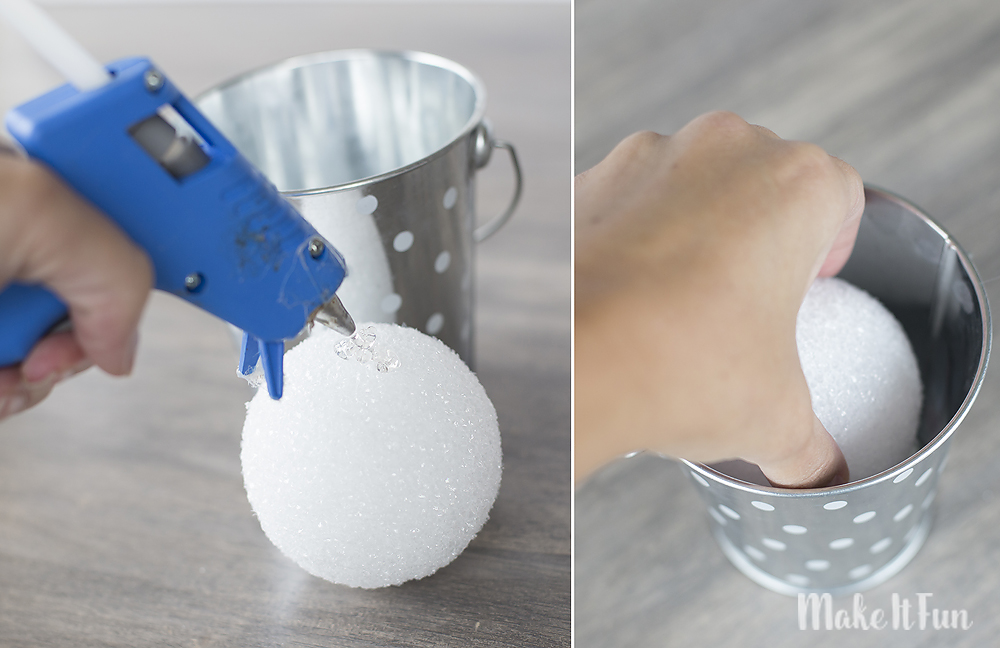
Take your smaller foam ball and glue it to fit inside the bucket or vase. You’ll want to secure it to the bottom with glue so that it can hold the dowel and topiary securely in place.
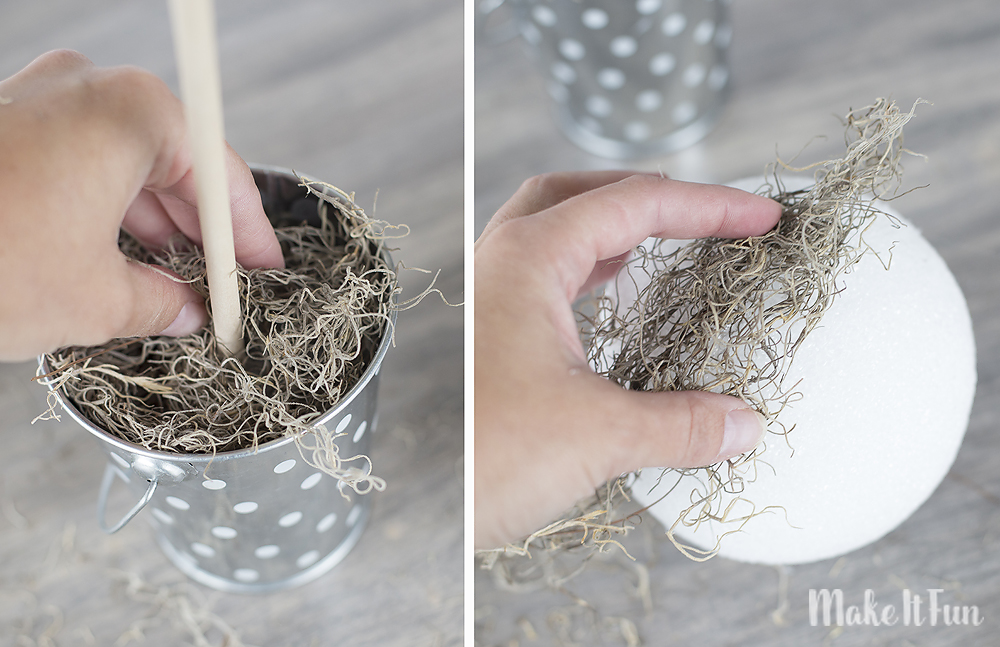
Insert the dowel into the foam base and glue Spanish moss on top to cover the foam. You’ll also attach the moss to the larger foam ball. (It is easier to glue on the moss before you attach the larger foam ball to the dowel).
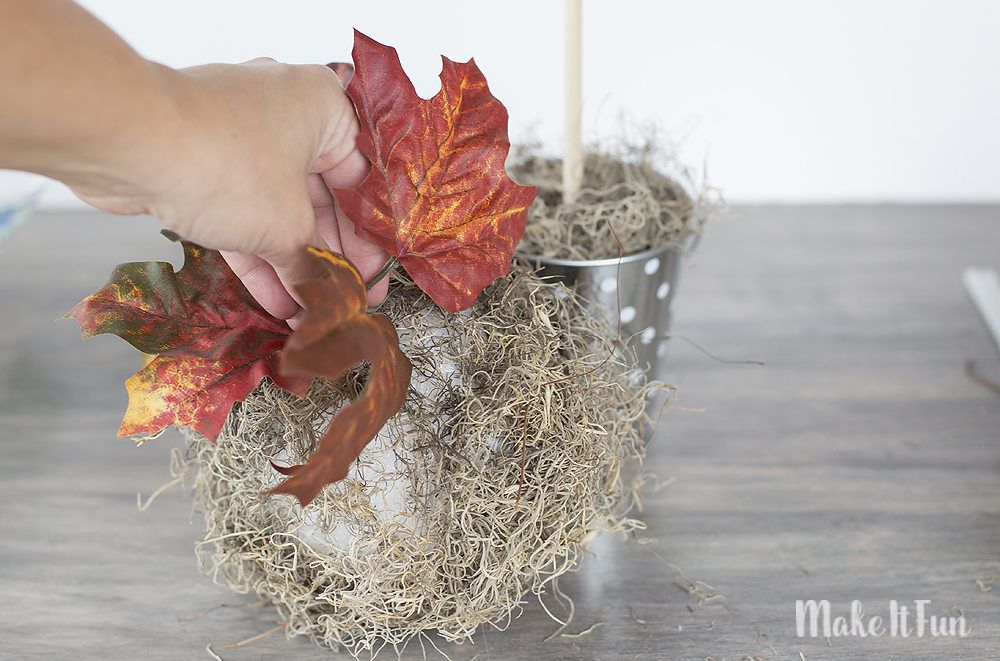
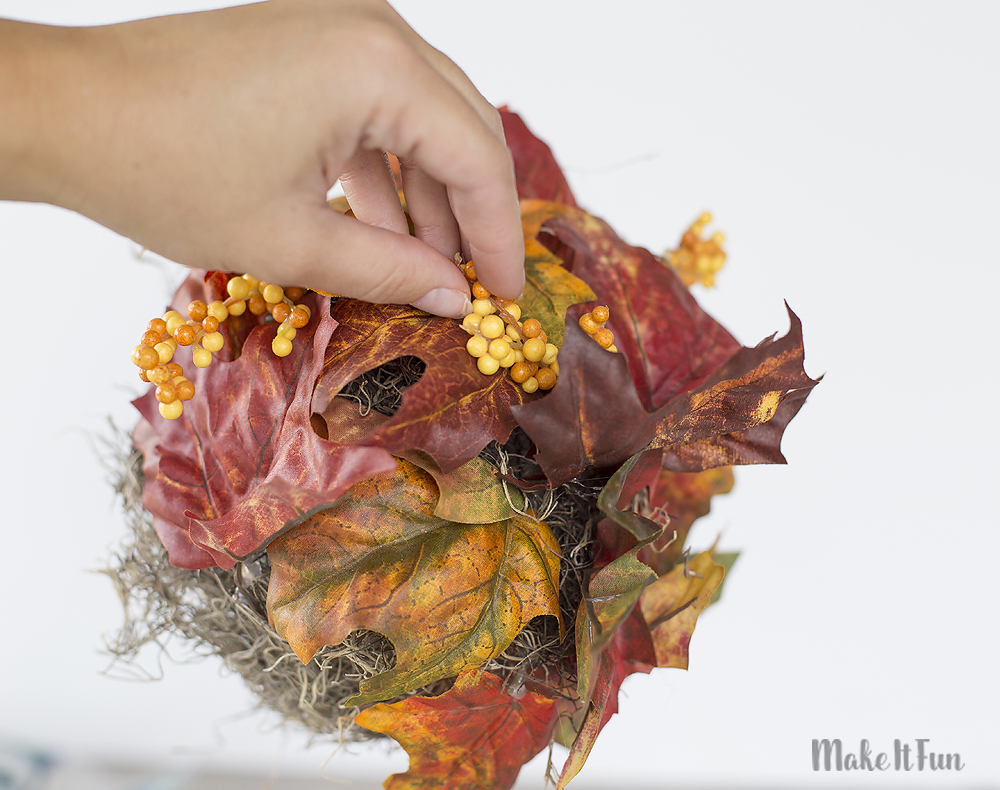
Insert the moss covered foam ball on the top of the dowel and use glue to secure. Now you’ll attach fall leaves to the large foam ball. I chose to trim down a fall garland and attach the leaves with glue around the ball. You’ll place the leaves in varying directions and you can also add in optional berries. (These were also attached on the garland I used or you could buy them separately from the craft store).
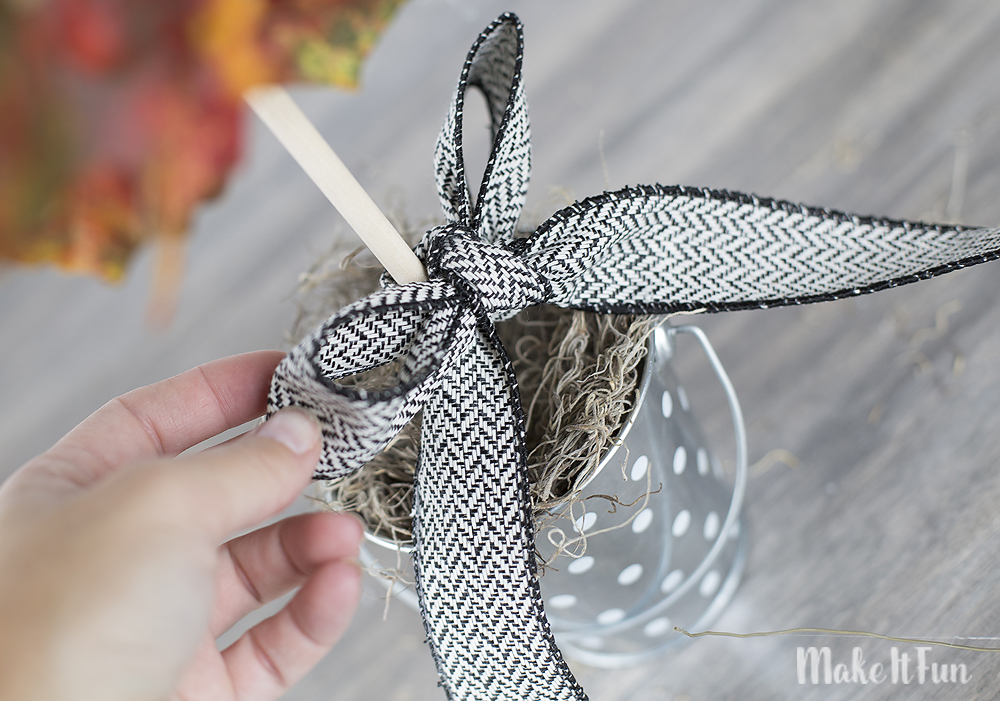
Finish off your topiary by attaching a ribbon the base.
When you’re finished, you’ll have a simple and beautiful fall topiary to decorate your home!
Do you have any fun fall DIY projects planned?
![Marie[1]](https://blog.makeitfuncrafts.com/wp-content/uploads/2016/08/Marie1.png)

