Teach Me! – Branches of Government
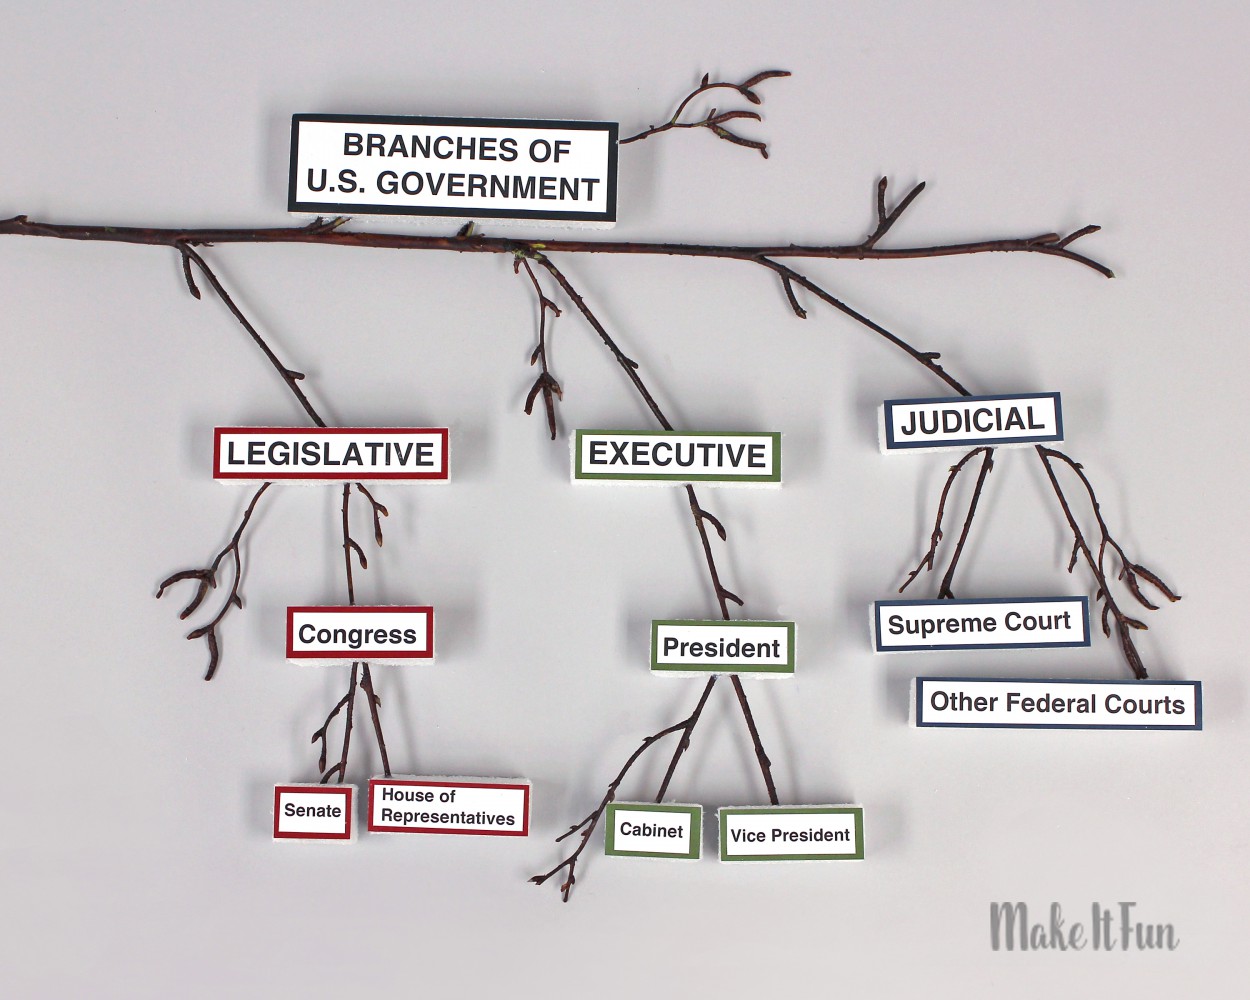
Your second or third grader will learn all about the structure of the U.S. government in about an hour (and will retain more than you would have thought possible) with this very visual and hands-on activity!
As a social studies project, this teaches important educational standards and will give you a chance to discuss why the “founding fathers”, who laid the groundwork for our government, created three separate branches. Also, you can teach the hierarchy within each of the branches of government.
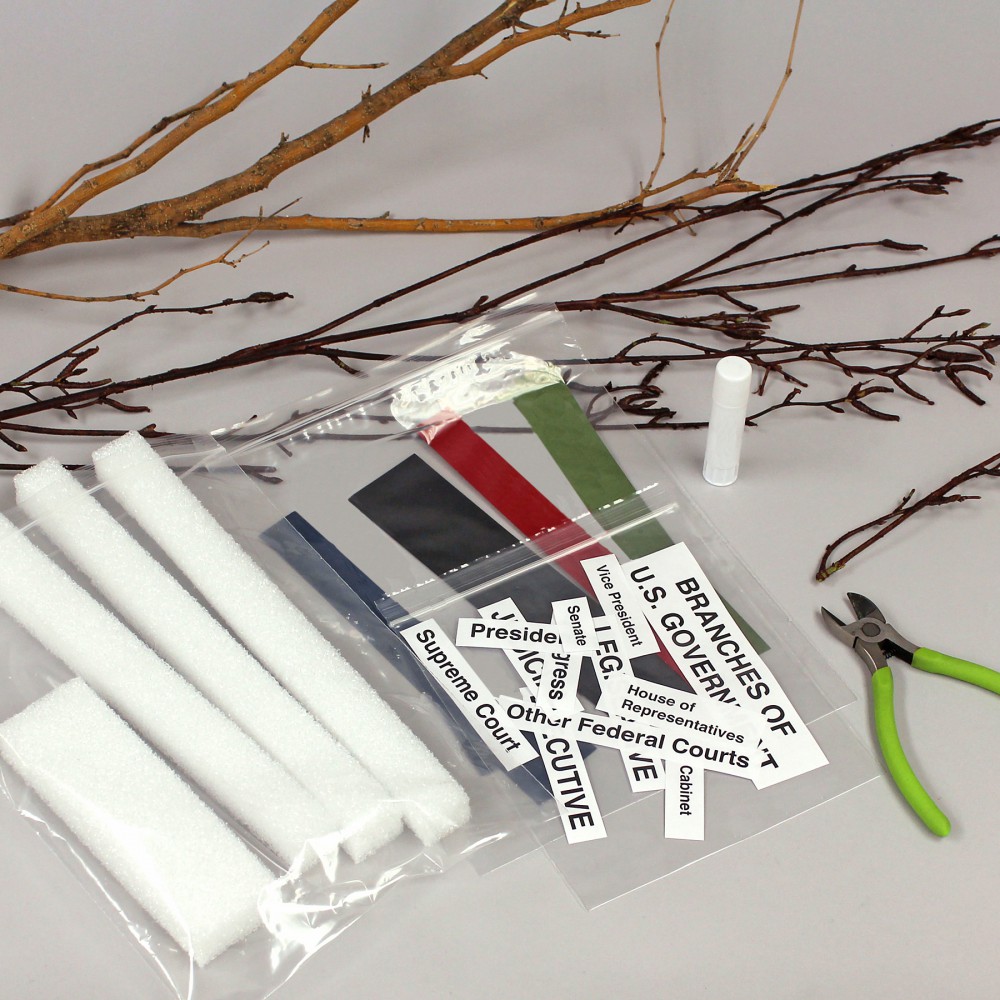
Supplies needed to make this project:
For Child:
- FloraCraft® Make It: Fun® Foam: (3) 1″ x 12” and (1) 2″ x 6″ foam strips (See “For Parent or Teacher”)
- Cardstock, (1) 1″ x 12″ strip of each color: Burgundy, Navy and Deep Green plus (1) 2″ x 6″ strip of Black
- Branch with Three Branches, Real or Artificial, along with additional assorted twigs*
- Pencil
- Ruler
- Plastic Knife
- Scissors
- Glue Stick
- Plastic Bag
For Parent or Teacher:
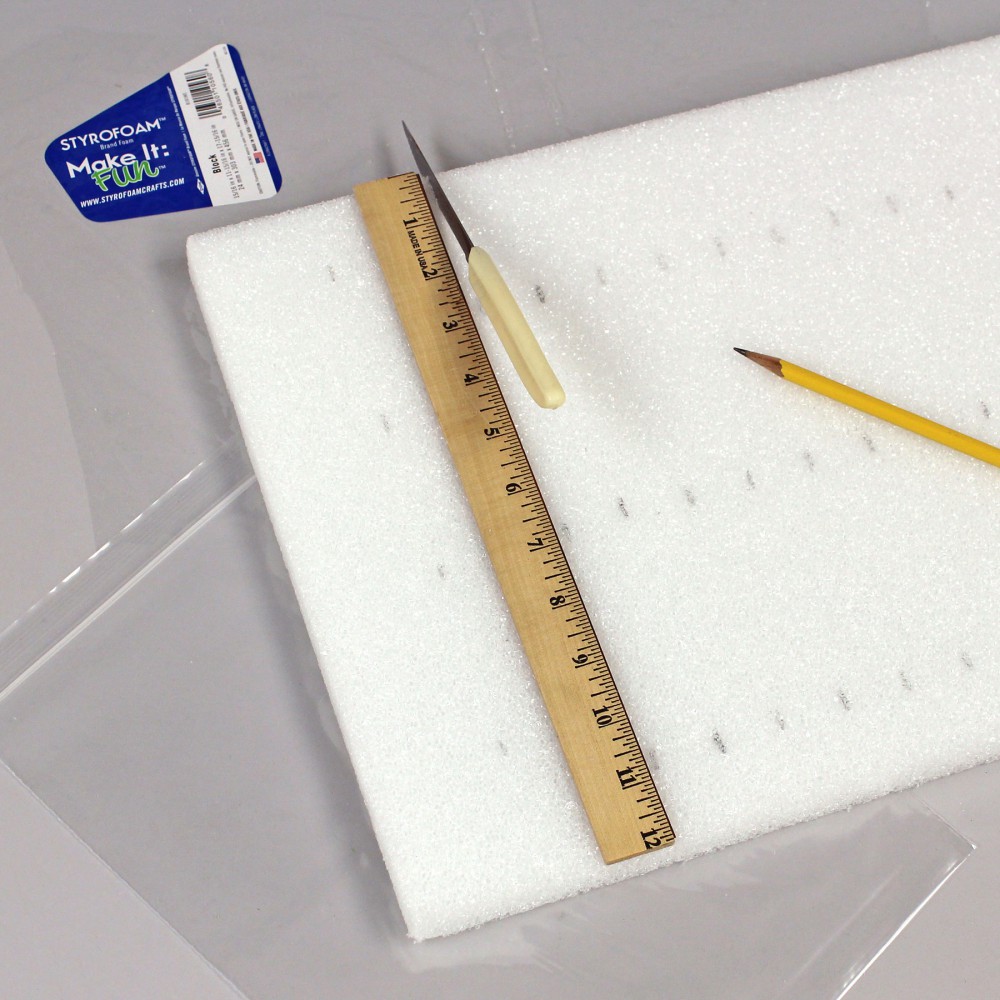
- FloraCraft® Make It: Fun® Foam: Block, 1″ x 12″ x 18″ (makes 4)
- Wire Cutters
- Pencil
- Ruler
- Serrated knife
- Scissors
- Paper Cutter
- Cutting Mat or Stack of Newspapers
- Glue Stick
- Low-Temp Glue Gun & Glue
- Paper Towels
*Note: In selecting a branch, decide if you have a good source of natural branches or if you should purchase it from the floral department of a craft store. The advantage of the natural is that it’s free, but it can be a bit tricky finding one with three branches in a row, growing out of the bottom. However, a branch can be trimmed (and even hot glued if needed). The advantage to purchasing a branch is that it is wired plastic and can be bent in any direction or removed with a wire cutter.
Instructions:
Before working with the child
If you’re making this with more than one child, figure out the number of materials you’ll need. Also, make one project first, before preparing the others, since knowing how the parts fit, might affect how you prepare.
Place the foam block horizontally on a cutting mat. Use a ruler and pencil to measure and mark two 2″ wide and three 1″ wide strips (that are approx. 12” long). Then, use a serrated knife against the edge of the ruler to cut the foam, with several passes of the knife for each cut.
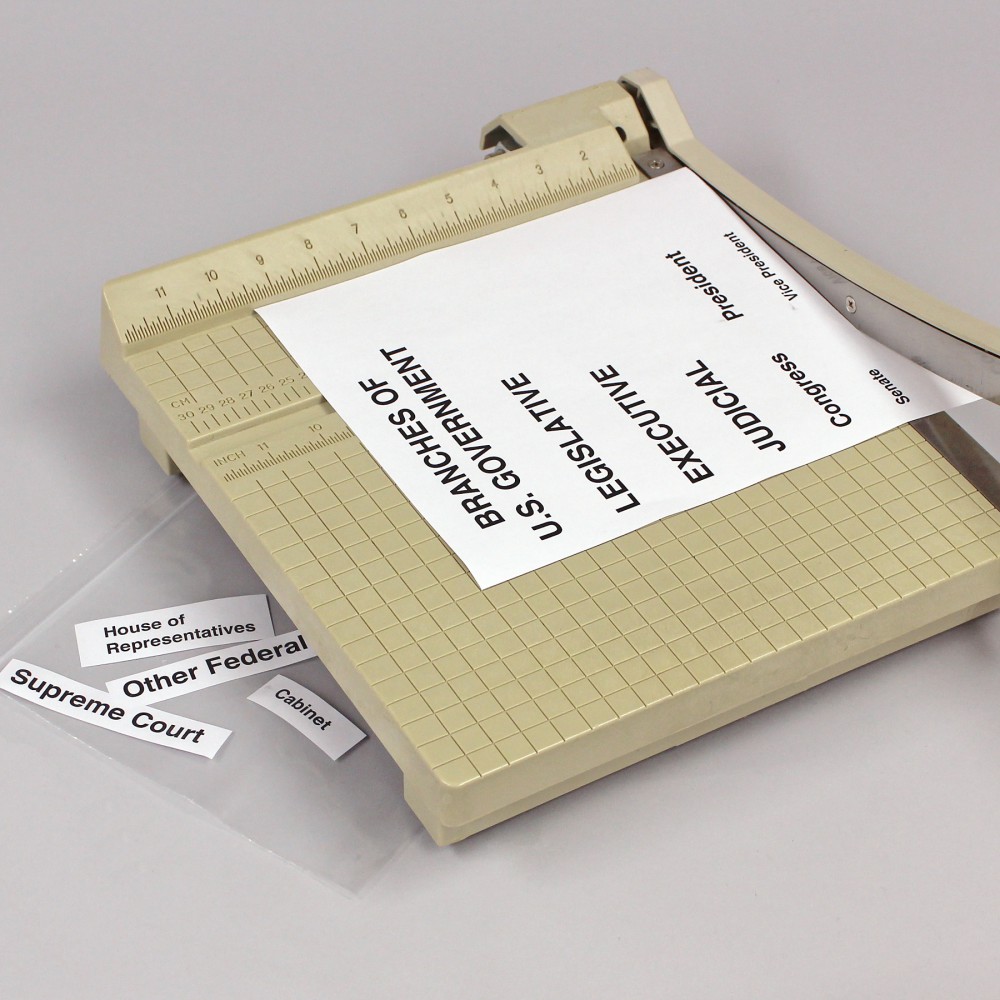
Refer to the project photo to type and print one set of captions. The title font is double layered and fits on a 1-3/4″ x 5-3/4″ piece of paper when trimmed. Size the font so that the other captions will fit on a 3/4″ wide strip of paper. Use a paper cutter to cut them apart.
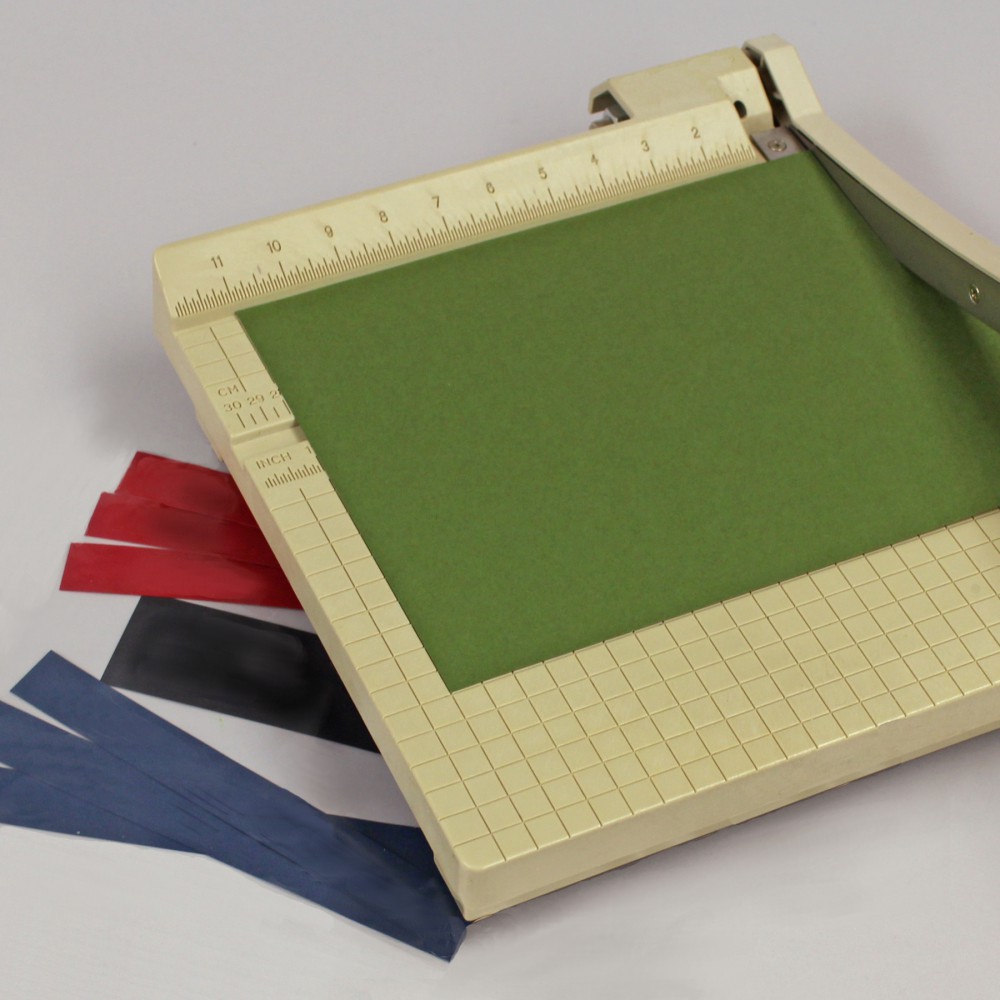
Also cut one 1″ x 12″ length of each of three cardstock colors and a 2″ x 6″ length black strip for the title.
Put the papers in a plastic bag and set it with the foam strips, branch, pencil, ruler, plastic knife, scissors and glue stick in the work area.
Do this part with the child
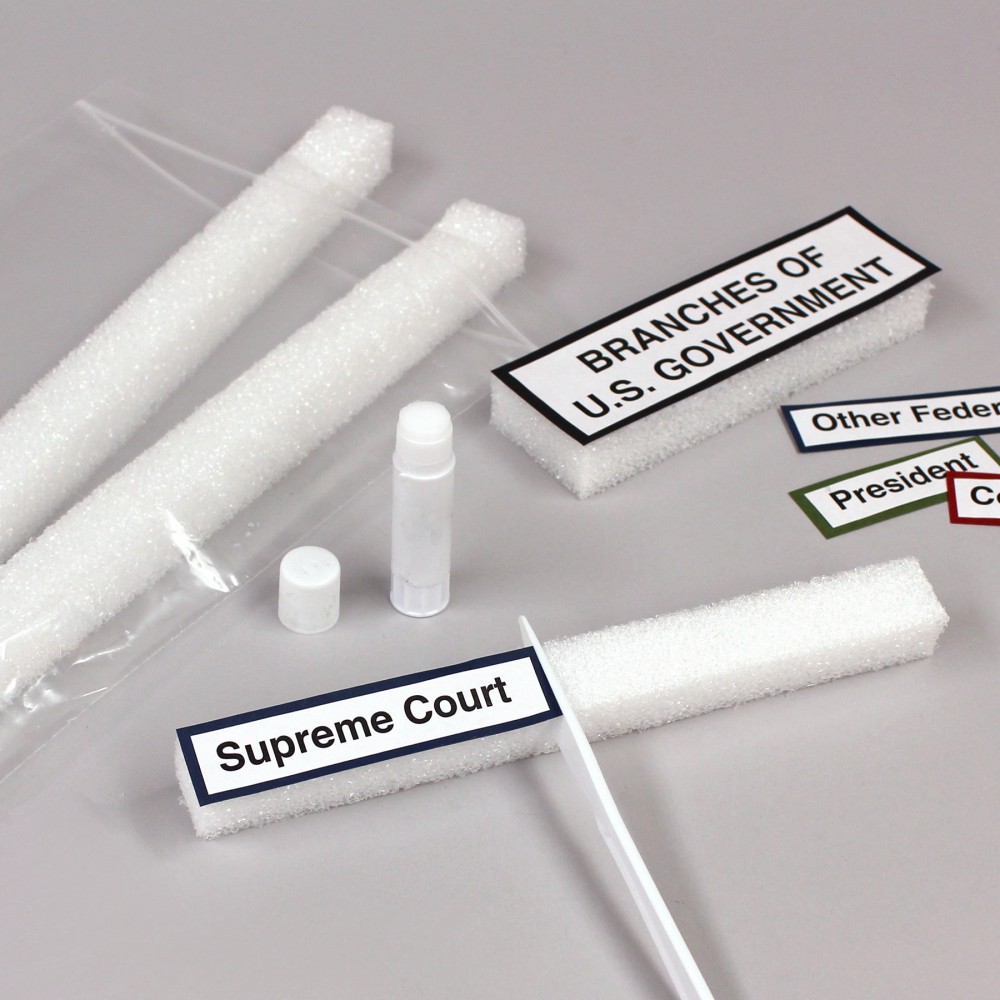
Refer to the finished project photo. Have the child sort the captions by branch of government: Legislative (red), Executive (green) and Judicial (blue). Use glue stick to mount them onto their correct color cardstock strip, leaving a little mounting border on both ends. Use scissors to cut apart the strips. Also mount the title caption on black.

Show the child that the foam strips are exactly 1″ wide on two sides and almost 1″ wide on the other two sides, so set the 1″ wide cardstock strips on the 1” wide side of the foam. Then, have the child cut the foam to the right length using the plastic knife. Apply a generous amount of glue stick to the foam pieces and press the paper strips in place.
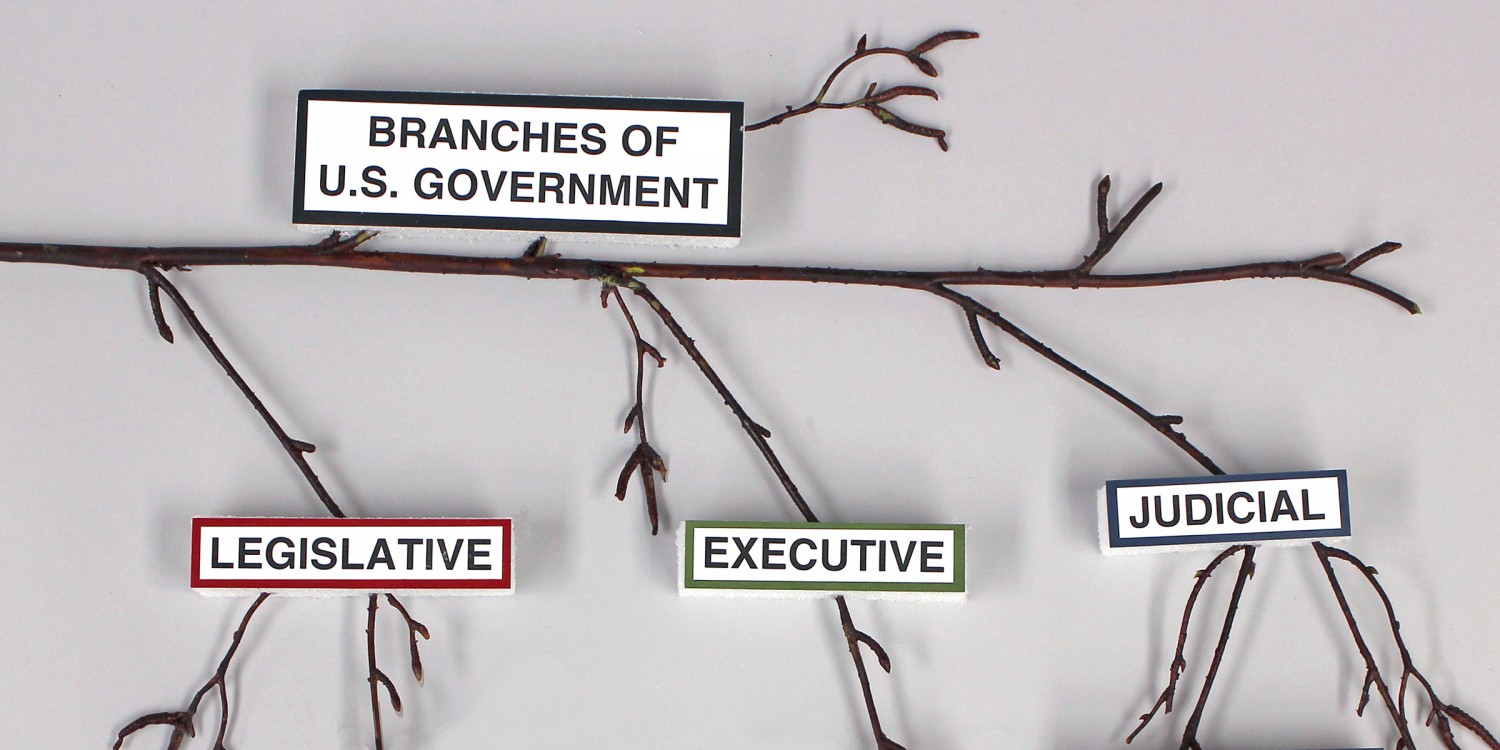
If you’re working with wired branches, bend them according to the photo. If you’re working with natural branches, you may need to be creative in finding a way to make them work. (If necessary, you can break off branches and re-glue them to other places.) Look for small twigs that extend out the top, onto which the 2” wide title piece of foam can be pressed at the top. (If there isn’t one, you may need to glue it to the top edge of the branch.)
Decide where to put the three branches of government below, but point out to the child that they need to be on the same level, since they are equal in power. Help the child press the foam against the branch and push it enough to indent it on the back. Then, with the caption side down, show the child how to use a pencil to impress a channel into which the branch will fit. Try to make the captions as straight as possible.
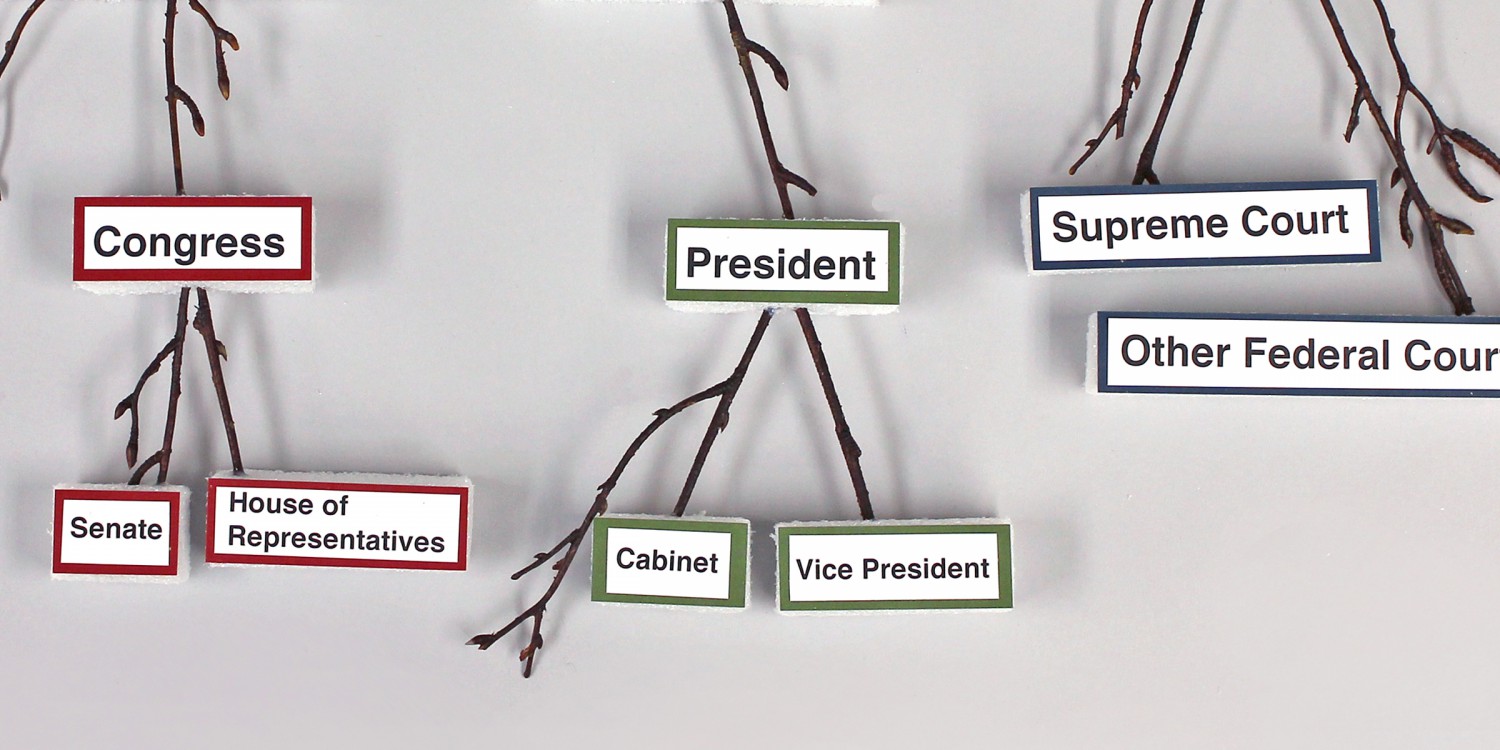
For the second level down, you may need to use the wire cutter to cut that branch at the point where the foam caption should go. Then the child can insert the branch end into the top of the foam, but point out that they need to be aware of where the other second level captions are on the branches. (They need to be level because they are of equal power.)
For the next level, this is where having extra twigs can be helpful. Have the child insert the twigs into the bottom of the foam caption above, and add the last level.
Adjust the positions and then you can glue any areas that need it.
Tips & Ideas:
- Encourage the child to saw back and forth when using the plastic knife on foam – don’t just press it down or it mashes more than cuts.
- When cutting foam, keep the serrated knife blade perpendicular to the table so that the foam edges are straight. Score lightly first and then press more firmly to cut deeper with several passes of the knife.
- The reason for applying the glue stick to the foam is that a generous application will fill in the foam cells a little and create a stronger bond with the cardstock, than if the glue were applied to the cardstock and set onto the foam.
More…
For more information on this project and and to find other learning activities, click here to visit the Make It: Fun Learning Center.