
Faux Wood Deer Head
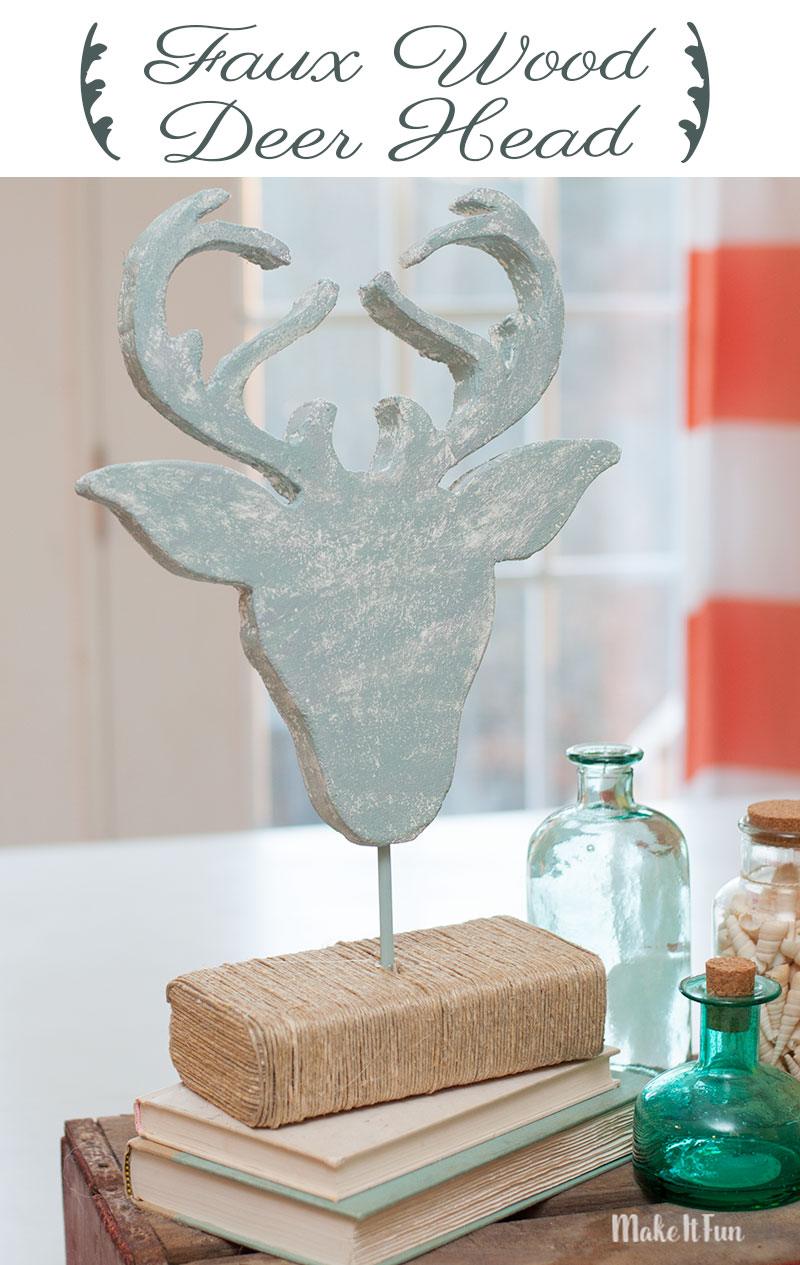
I’ve always admired the Deer Head decor look, but I’ll be honest, it did take me awhile to start incorporating it into my home. When I finally did I kind of got addicted. I think I have at least four deer head projects in the house now.
Over the past few months, I’ve seen these wood silhouettes in the craft store, but I really wanted to try it myself using the foam sheets so I could make it the size I wanted.
Supplies needed to make this project:
- FloraCraft® Make It: Fun® Foam: Sheet. 1″ x 12″ x 36″
- FloraCraft® Make It: Fun® Foam: Block 8″ x 4″
- FloraCraft® StyroCutter® Plus
- FloraCraft Smooth Finish®
- Sharpie Marker
- Paint Brush
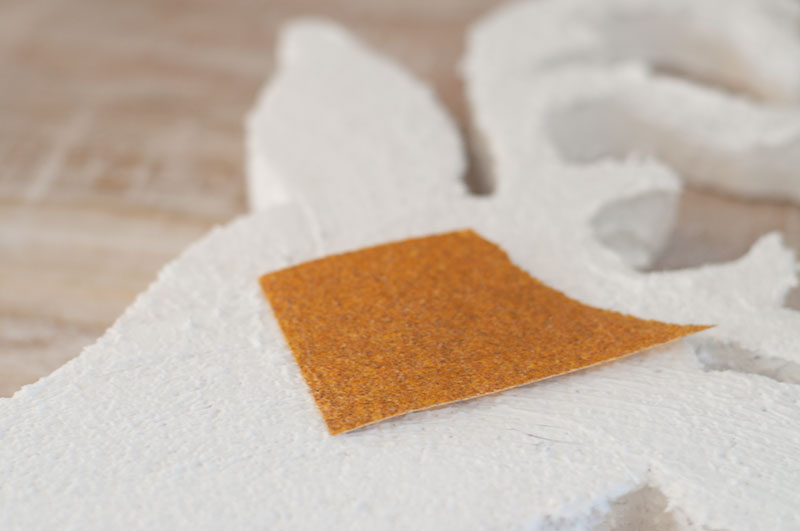
- Sand Paper
- Chalk Paint
- Ribbon
- Jute Cord
- Low-Temp Glue Gun and Glue
- Pencil or Dowel Rod
Instructions:
I had a deer head I could trace on hand, but you could print a template out from online. Using your marker, trace it onto the foam sheet.
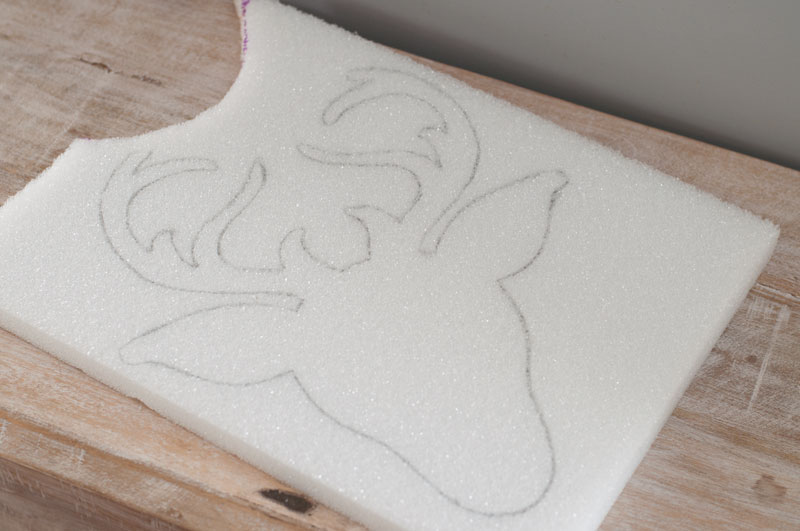
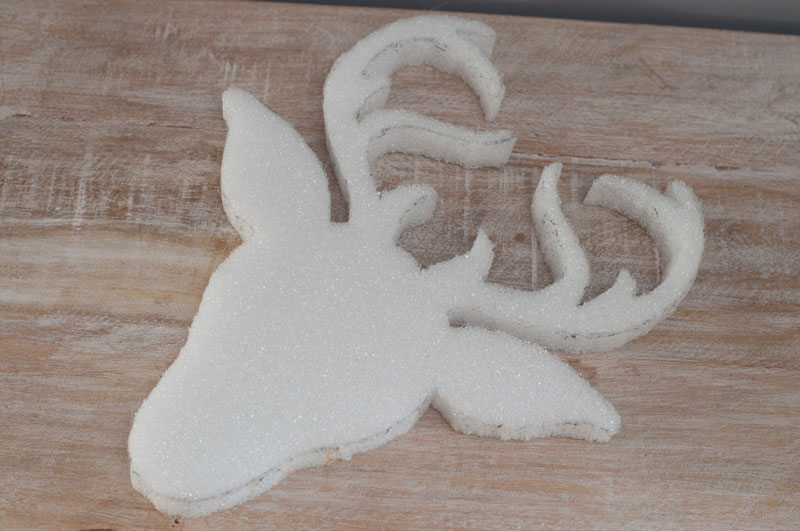
Next use your “trusty” StyroCutter Plus. This works perfect when cutting out detailed shapes like this. Cuts like butter. All you have to do is glide it and the cutter does the rest. Just be sure to read the package instructions carefully and don’t push too hard. If the wand in bending, you’re pushing too hard.

You can get really intricate details using the StyroCutter Plus and it eliminates the mess!
Now my favorite part as always is covering the foam with smooth finish. It fills in the cells and makes a smooth surface for painting! You can use a spatula or paint brush to apply it but I’m a crafter and used my hands! Let dry several hours.
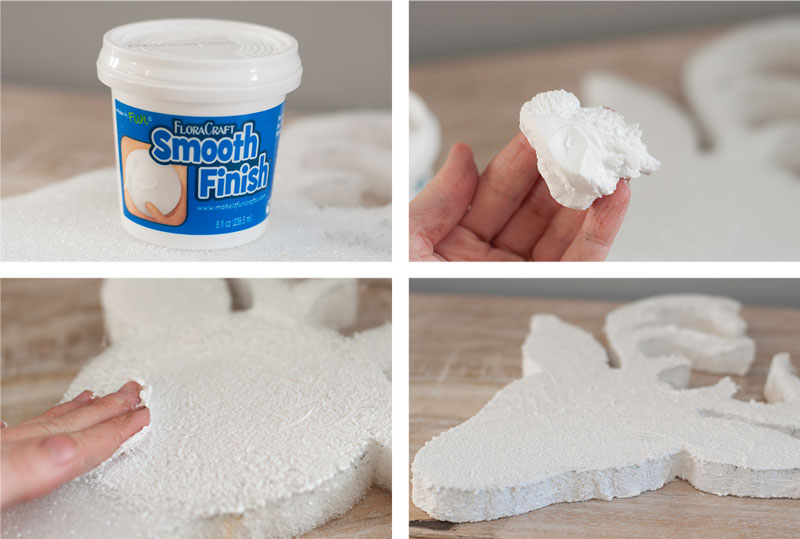
Once it’s dry, sand it down with some fine-grit sand paper. It makes the piece really smooth.
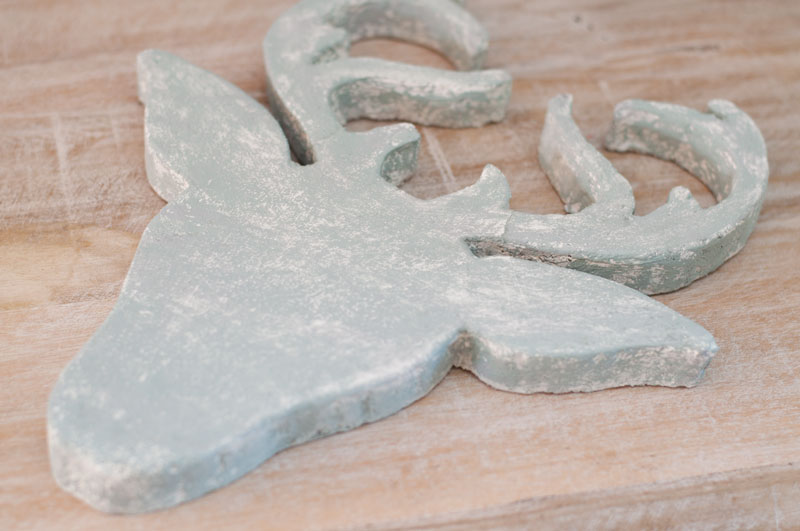
I painted the deer head with white chalk paint. Then, I dry brushed on some gray and blue chalk paint. Once it was dry I sanded it down again to give it a distressed look. (Side note: I did cover with some finishing wax to give it a smooth feel, but this step is optional.)
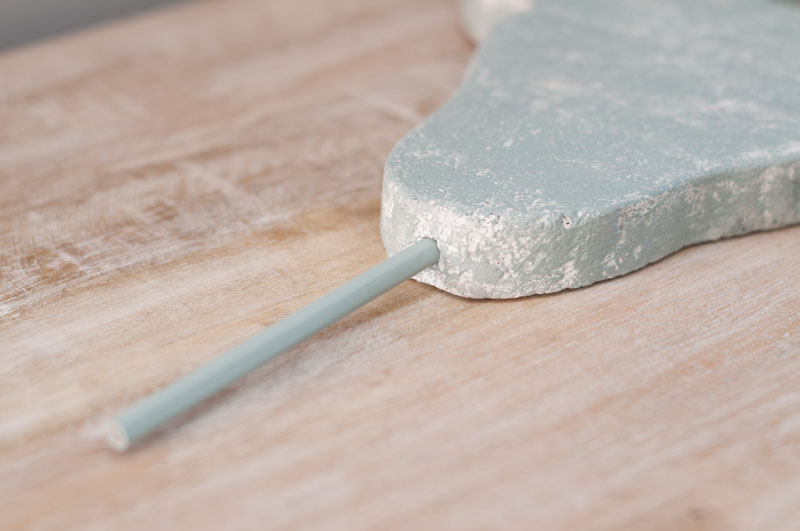
Then I painted a pencil (I didn’t have a dowel rod on hand, so I had to make it work!) and attached it to the bottom of the deer head.
Finally, I used a foam block for my stand. I covered the foam block with some jute which really gave it the look I wanted. Once it was covered, I placed the other side of the pencil into the foam. I used a touch of low-temp glue to help keep it in place.

I think this project turned out great. So many different options you can do with it! Maybe a crab for the Summer…stay tuned for that!
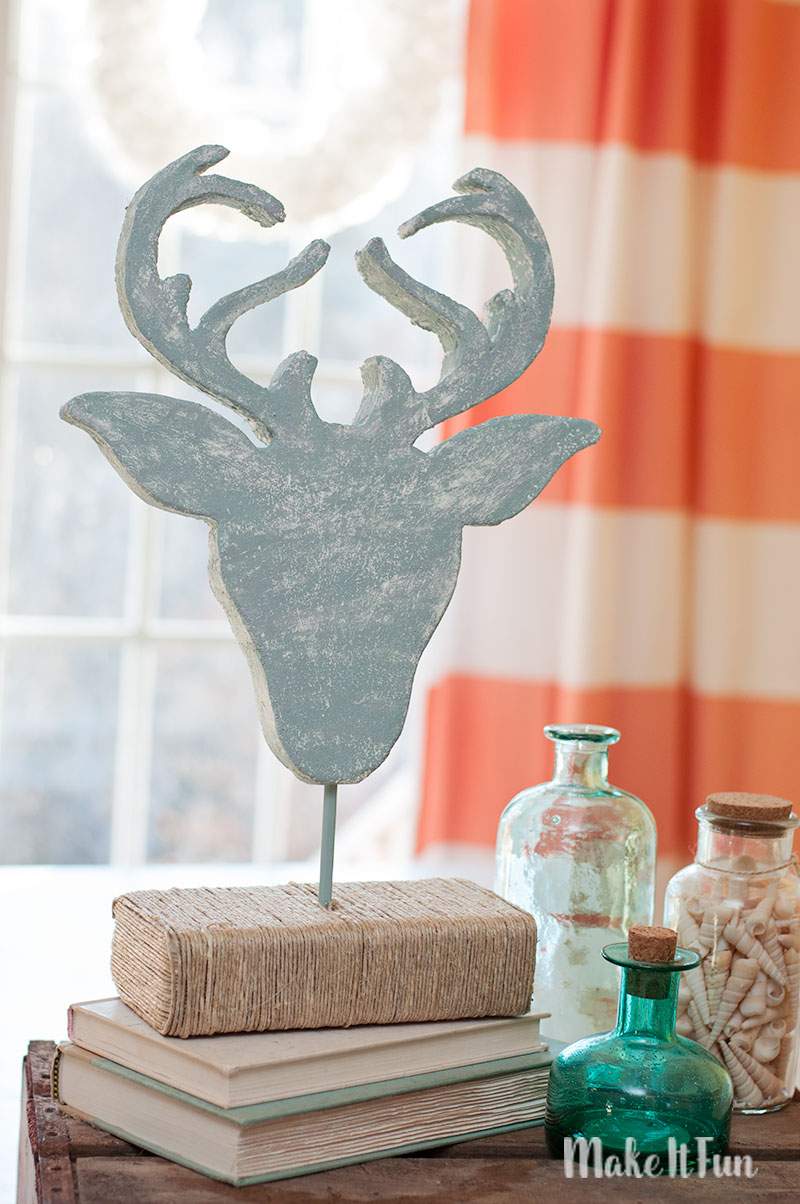
This is something you can keep up during the Winter or even all year long if that’s your style!! The colors fit perfectly with my style.


Leave a Comment
Want to join the discussion?Feel free to contribute!