
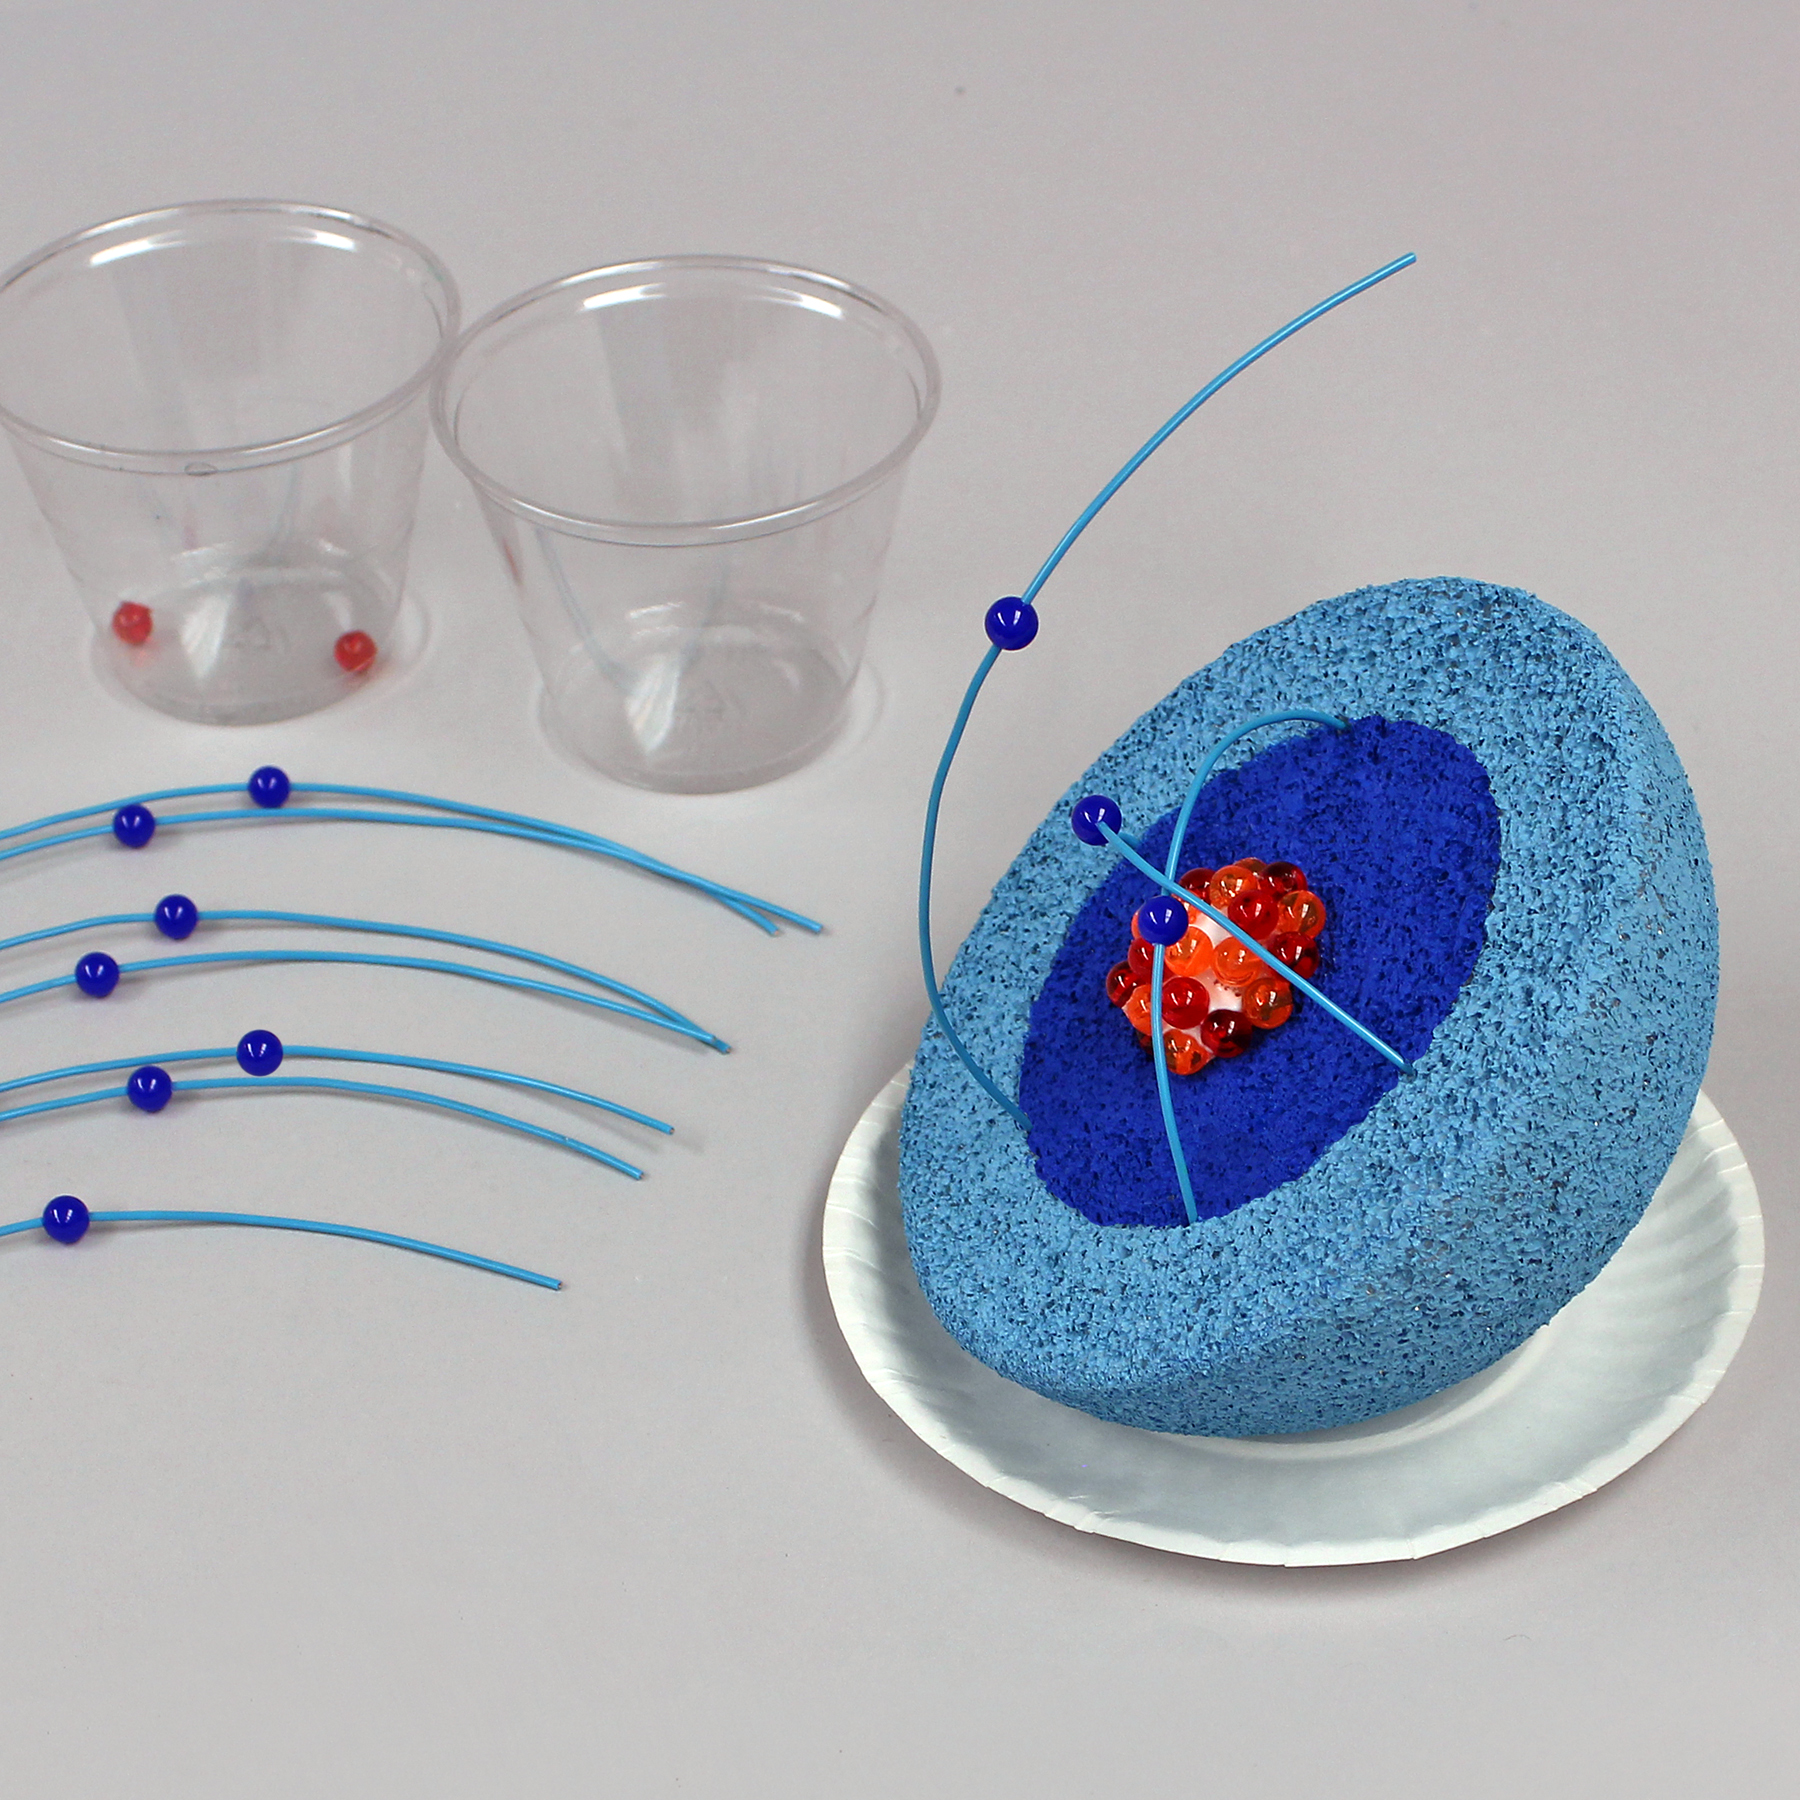
Teach Me! – Up ‘n Atom
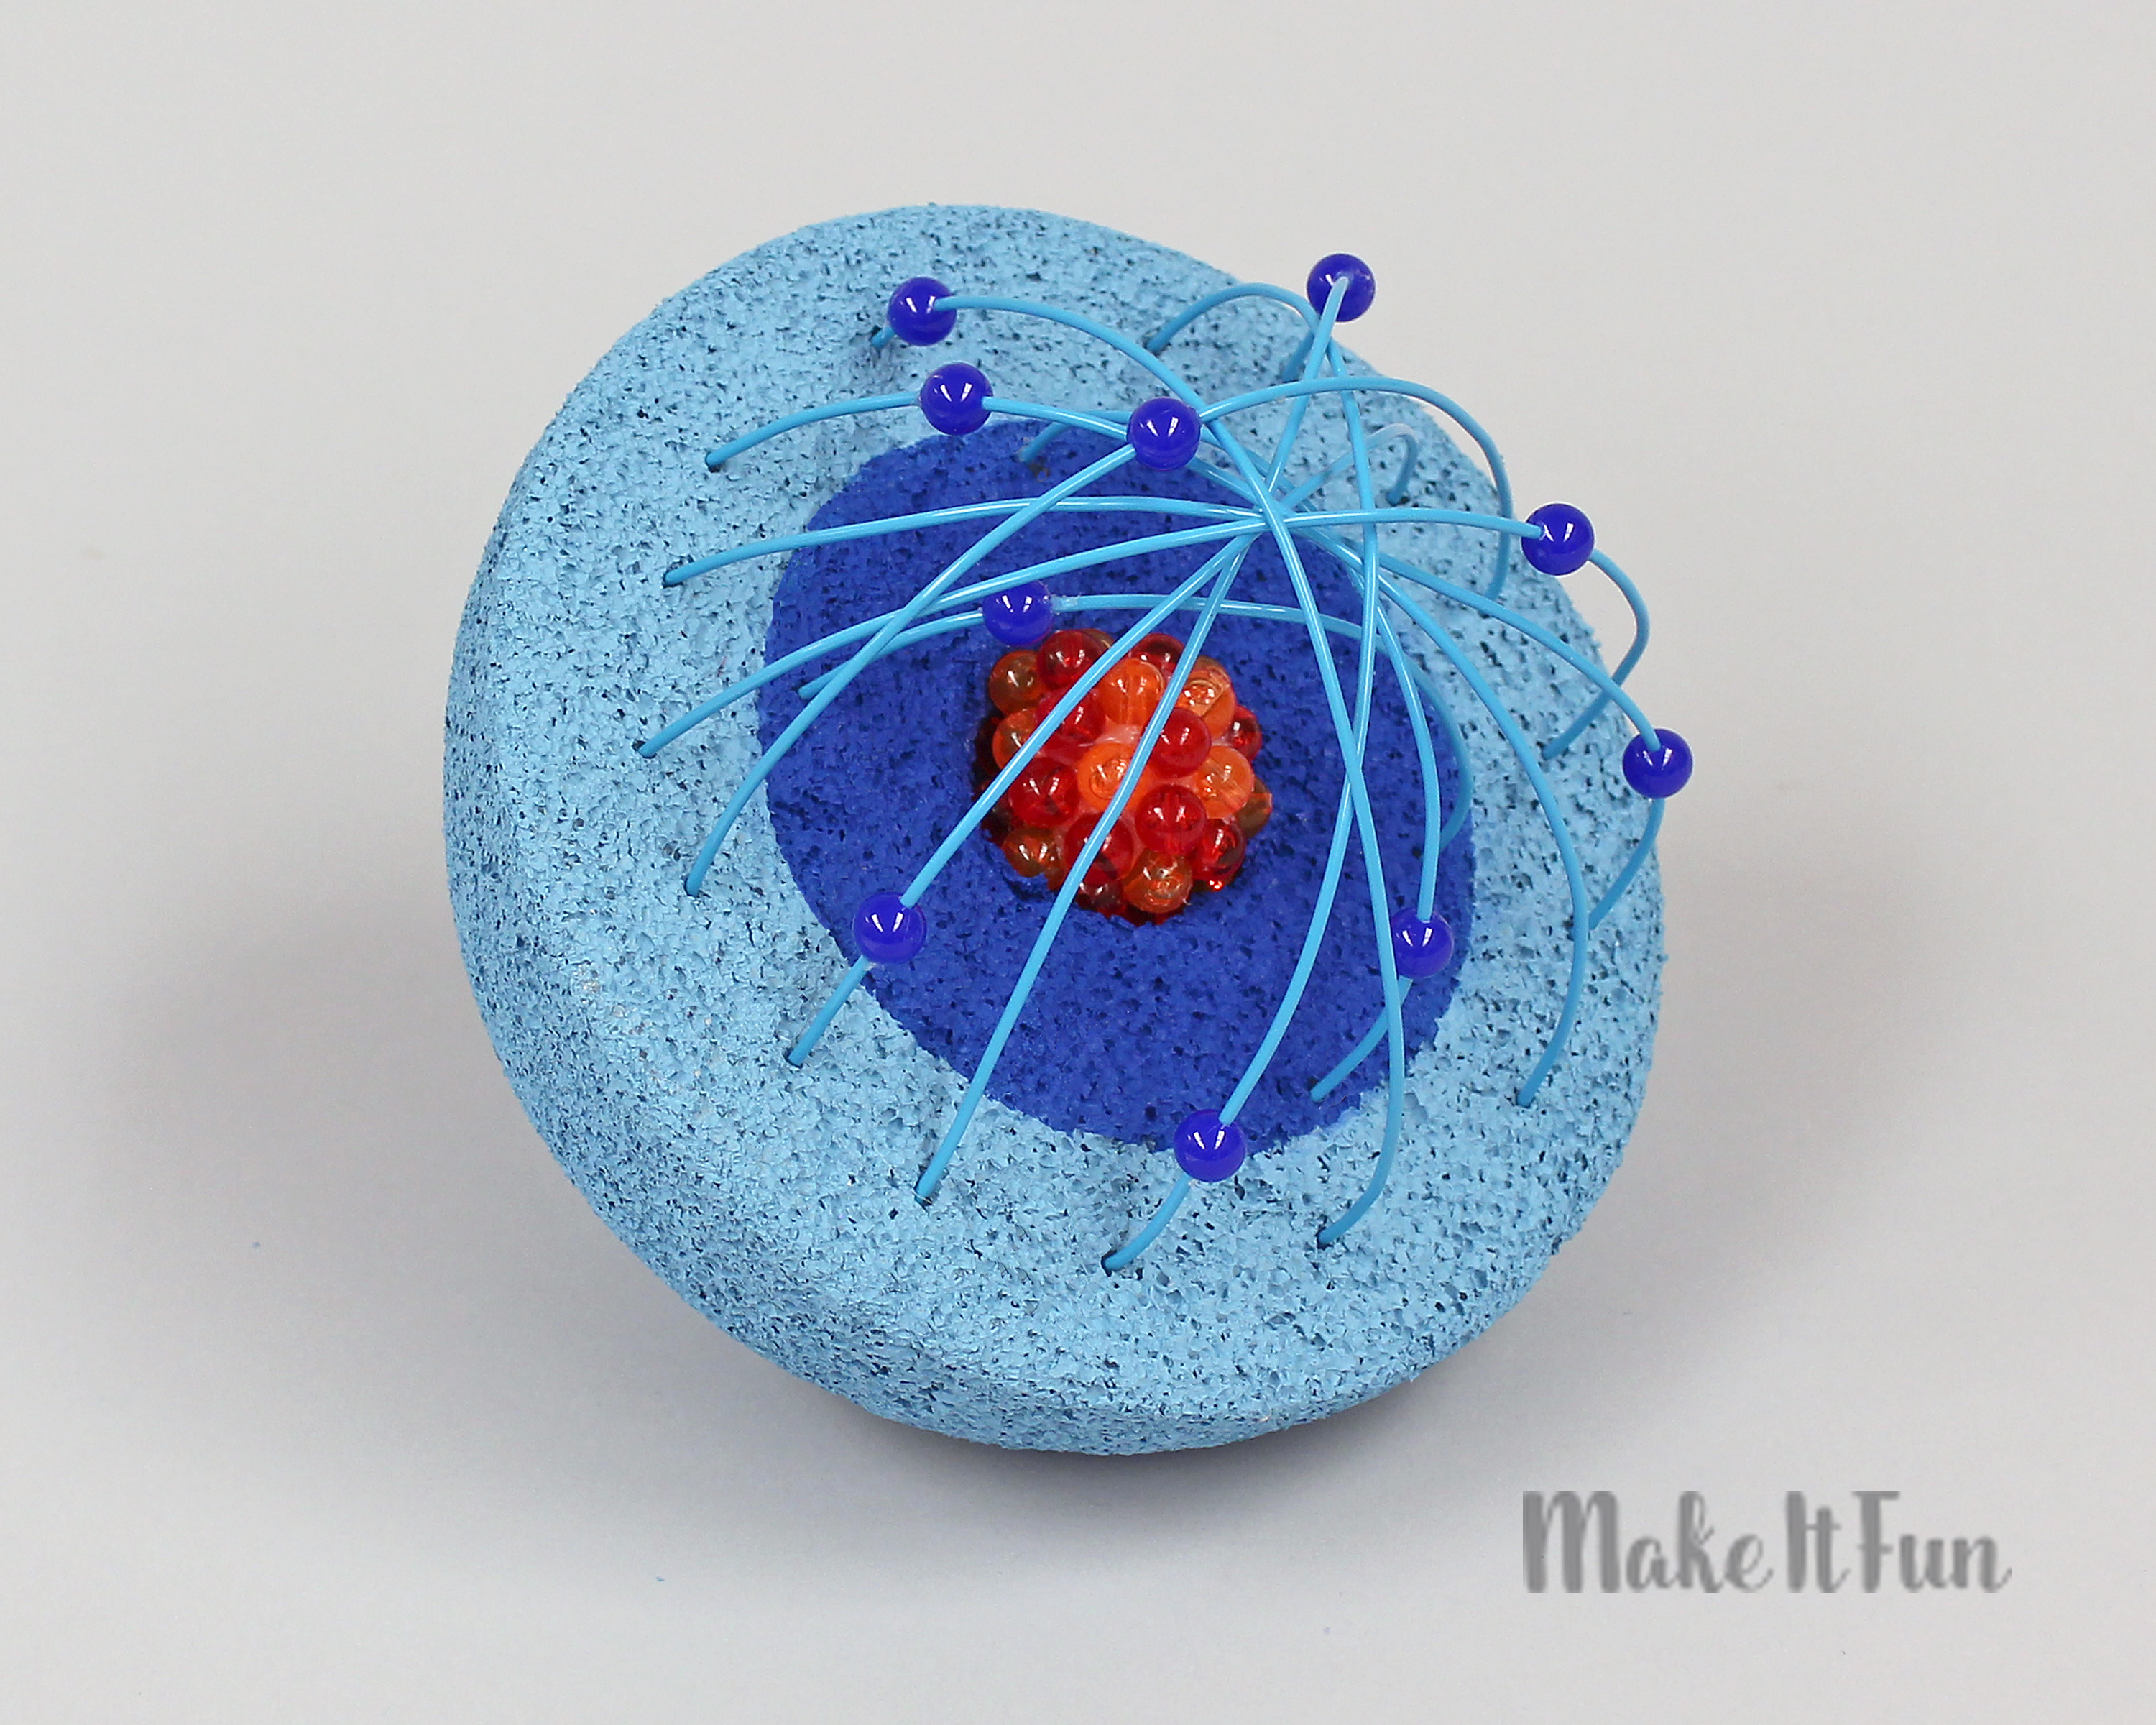
Fourth and fifth graders typically study the parts of an atom, as part of their science program. With this hands-on project, a child can learn the parts of an atom while using wires to replicate the orbits of the electrons inside. With hands-on learning projects like these, science can be a breeze!
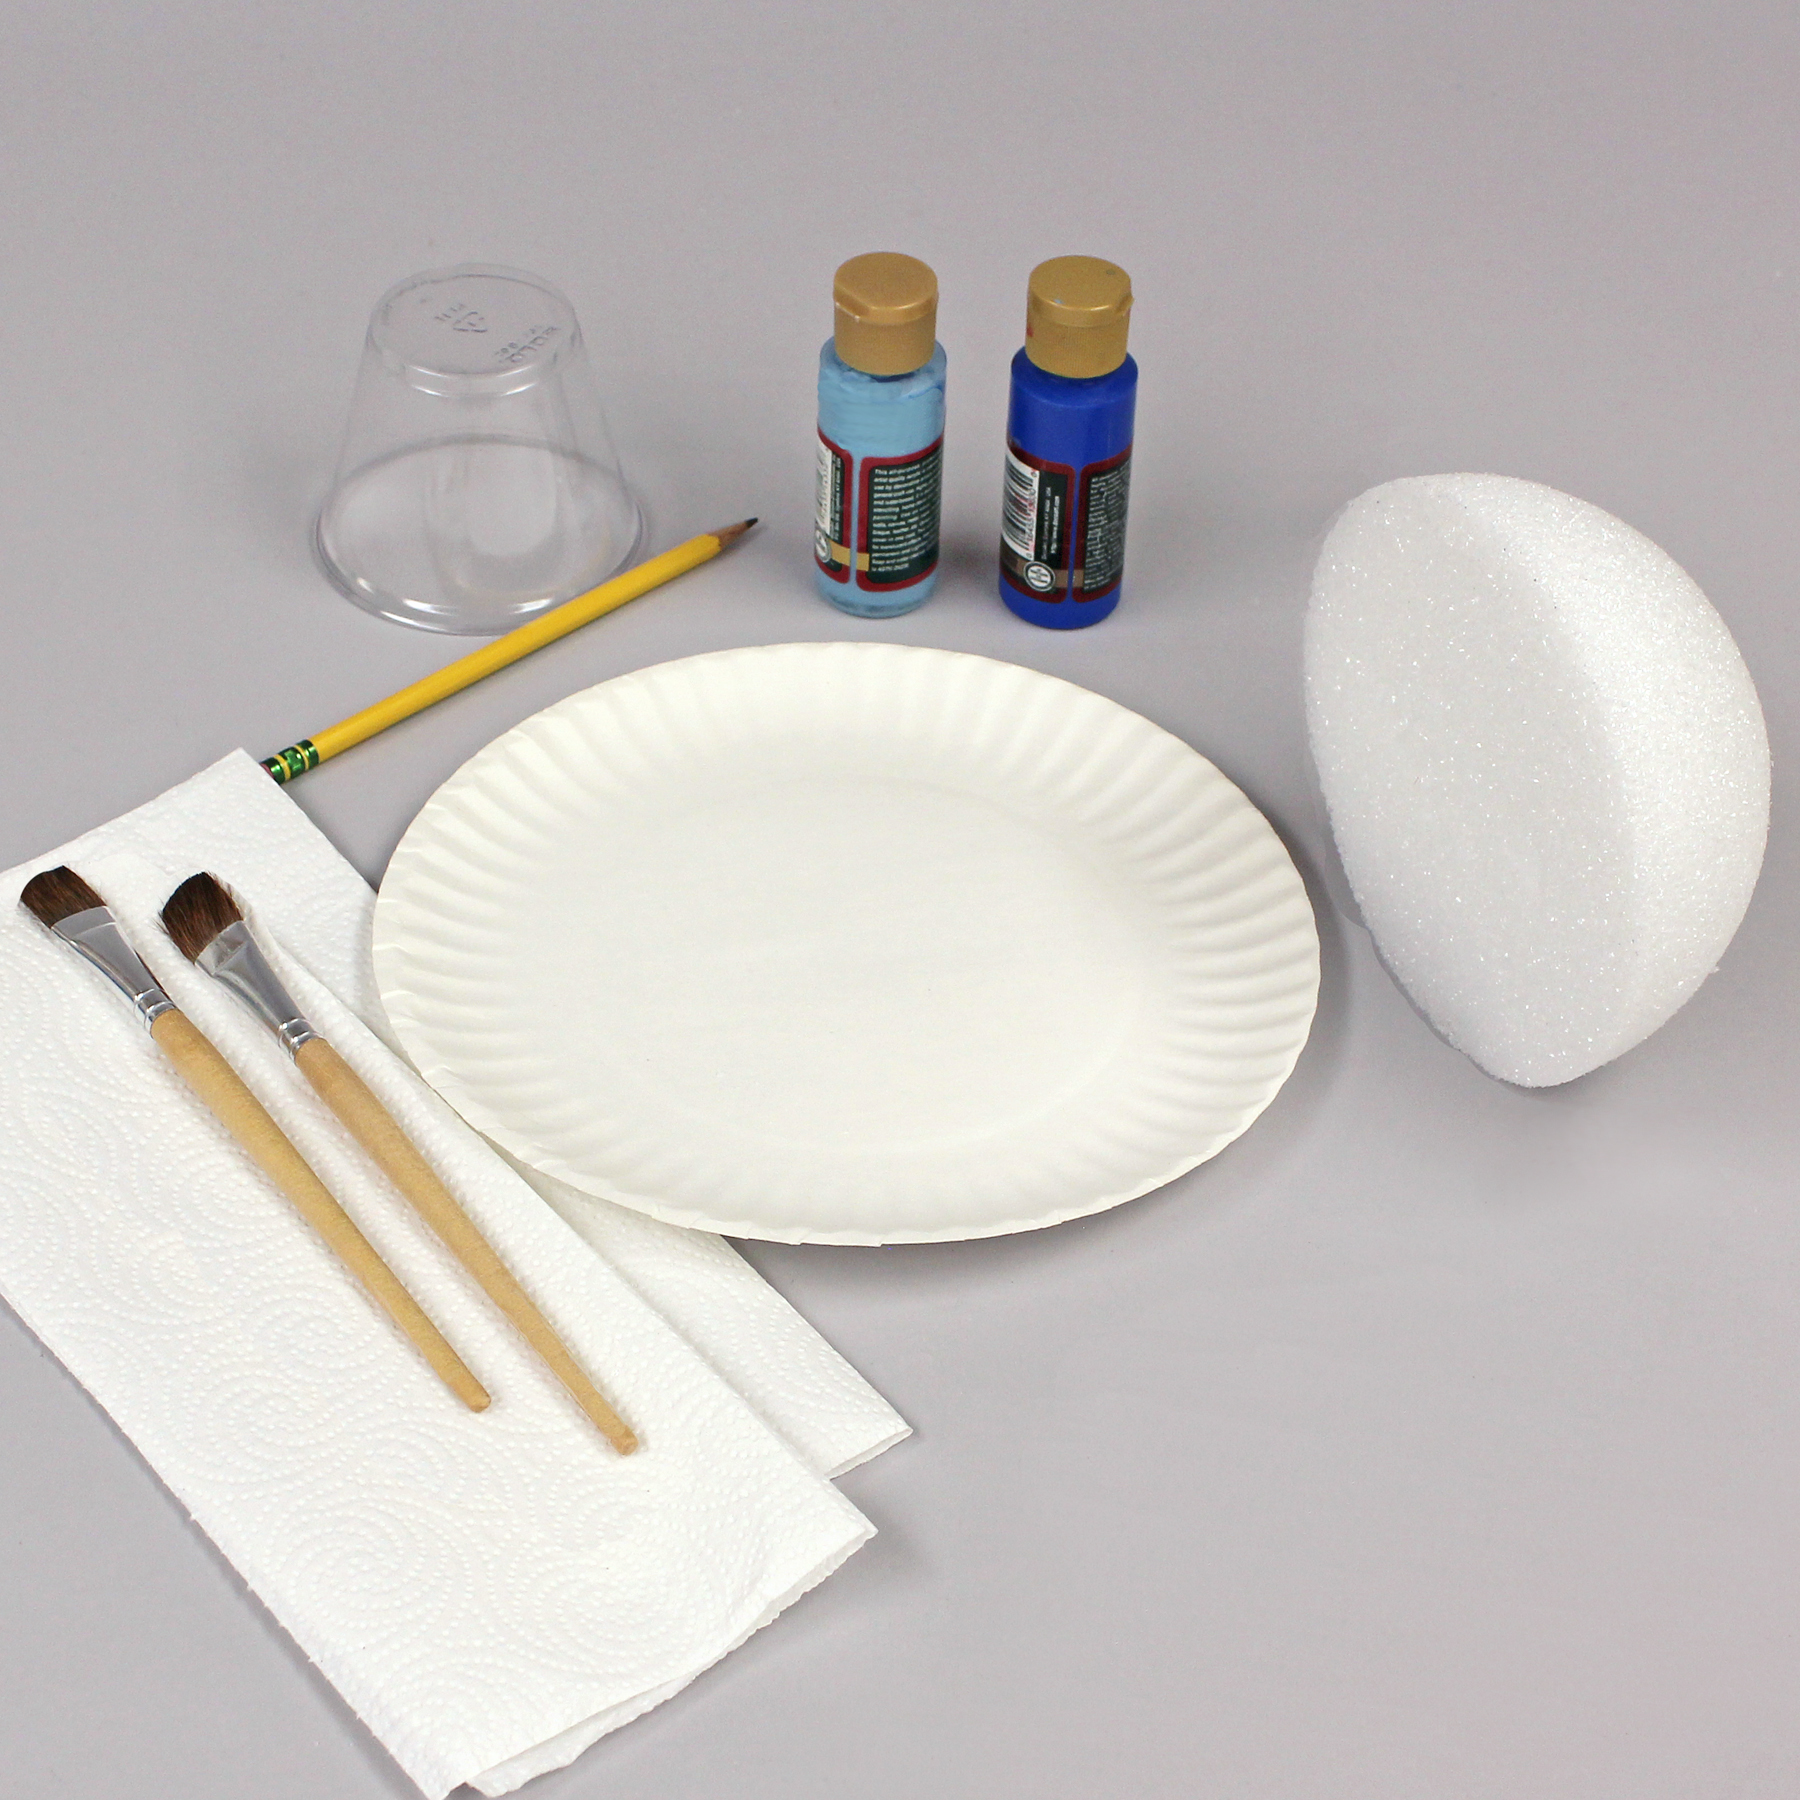
Supplies needed to make this project:
For Child:
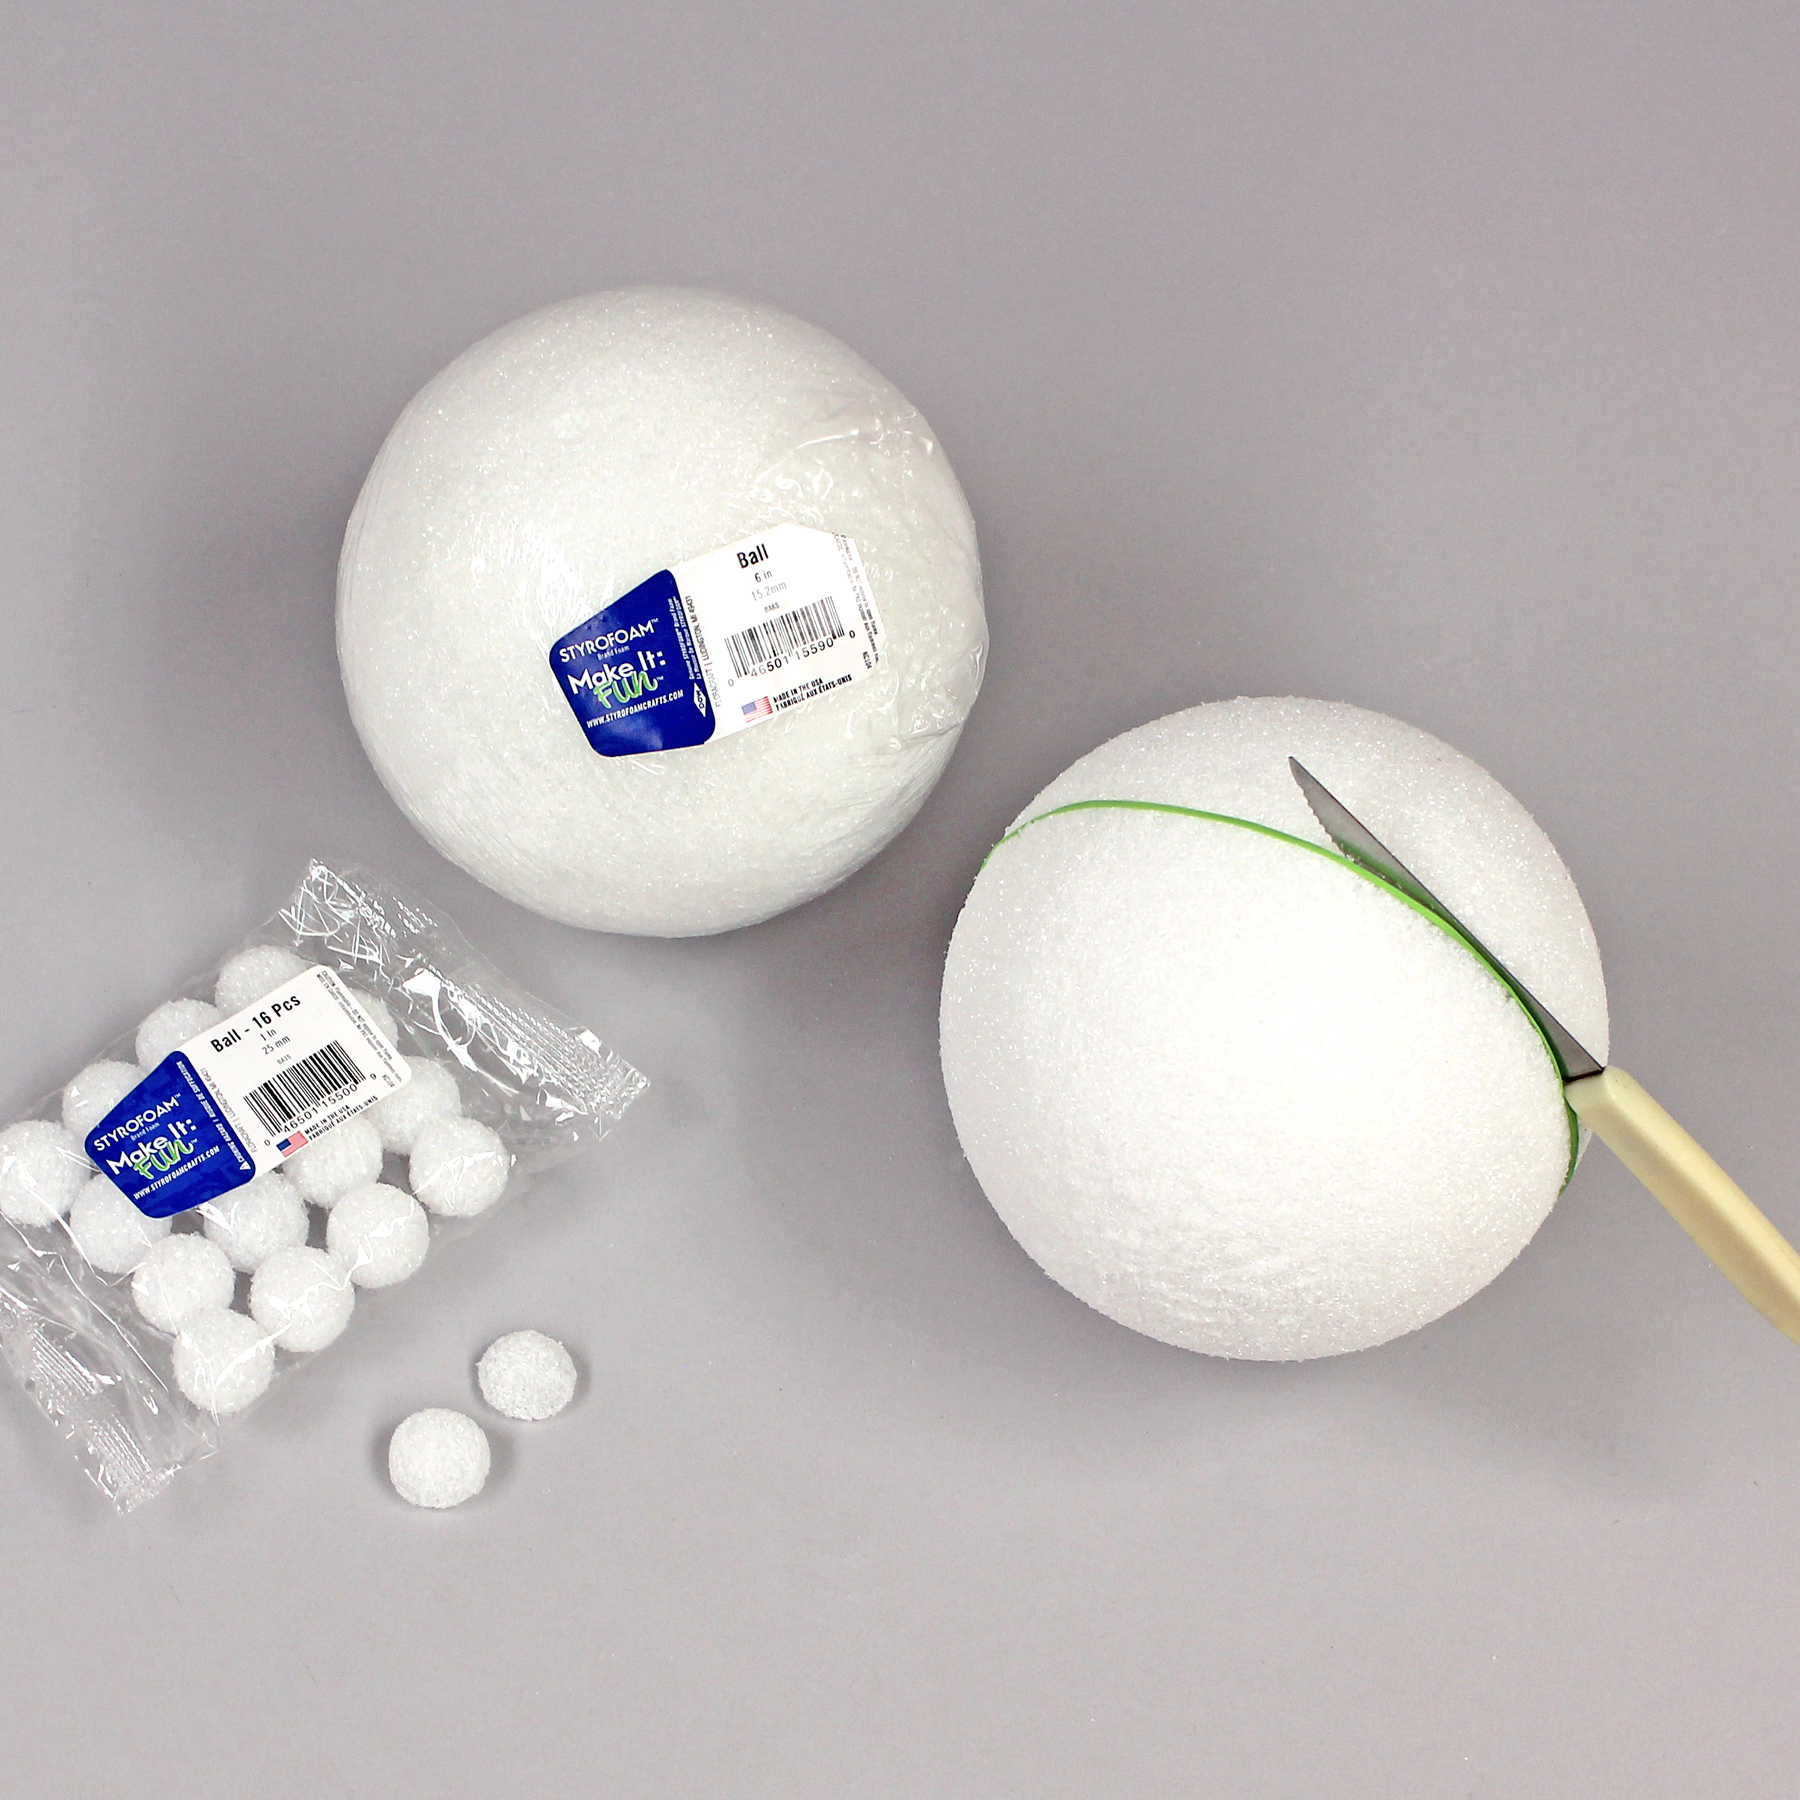
- FloraCraft® Make It: Fun® Foam: Ball, 6″ and 1″
- (7 ft) 18 gauge Plastic-Coated Wire: Blue
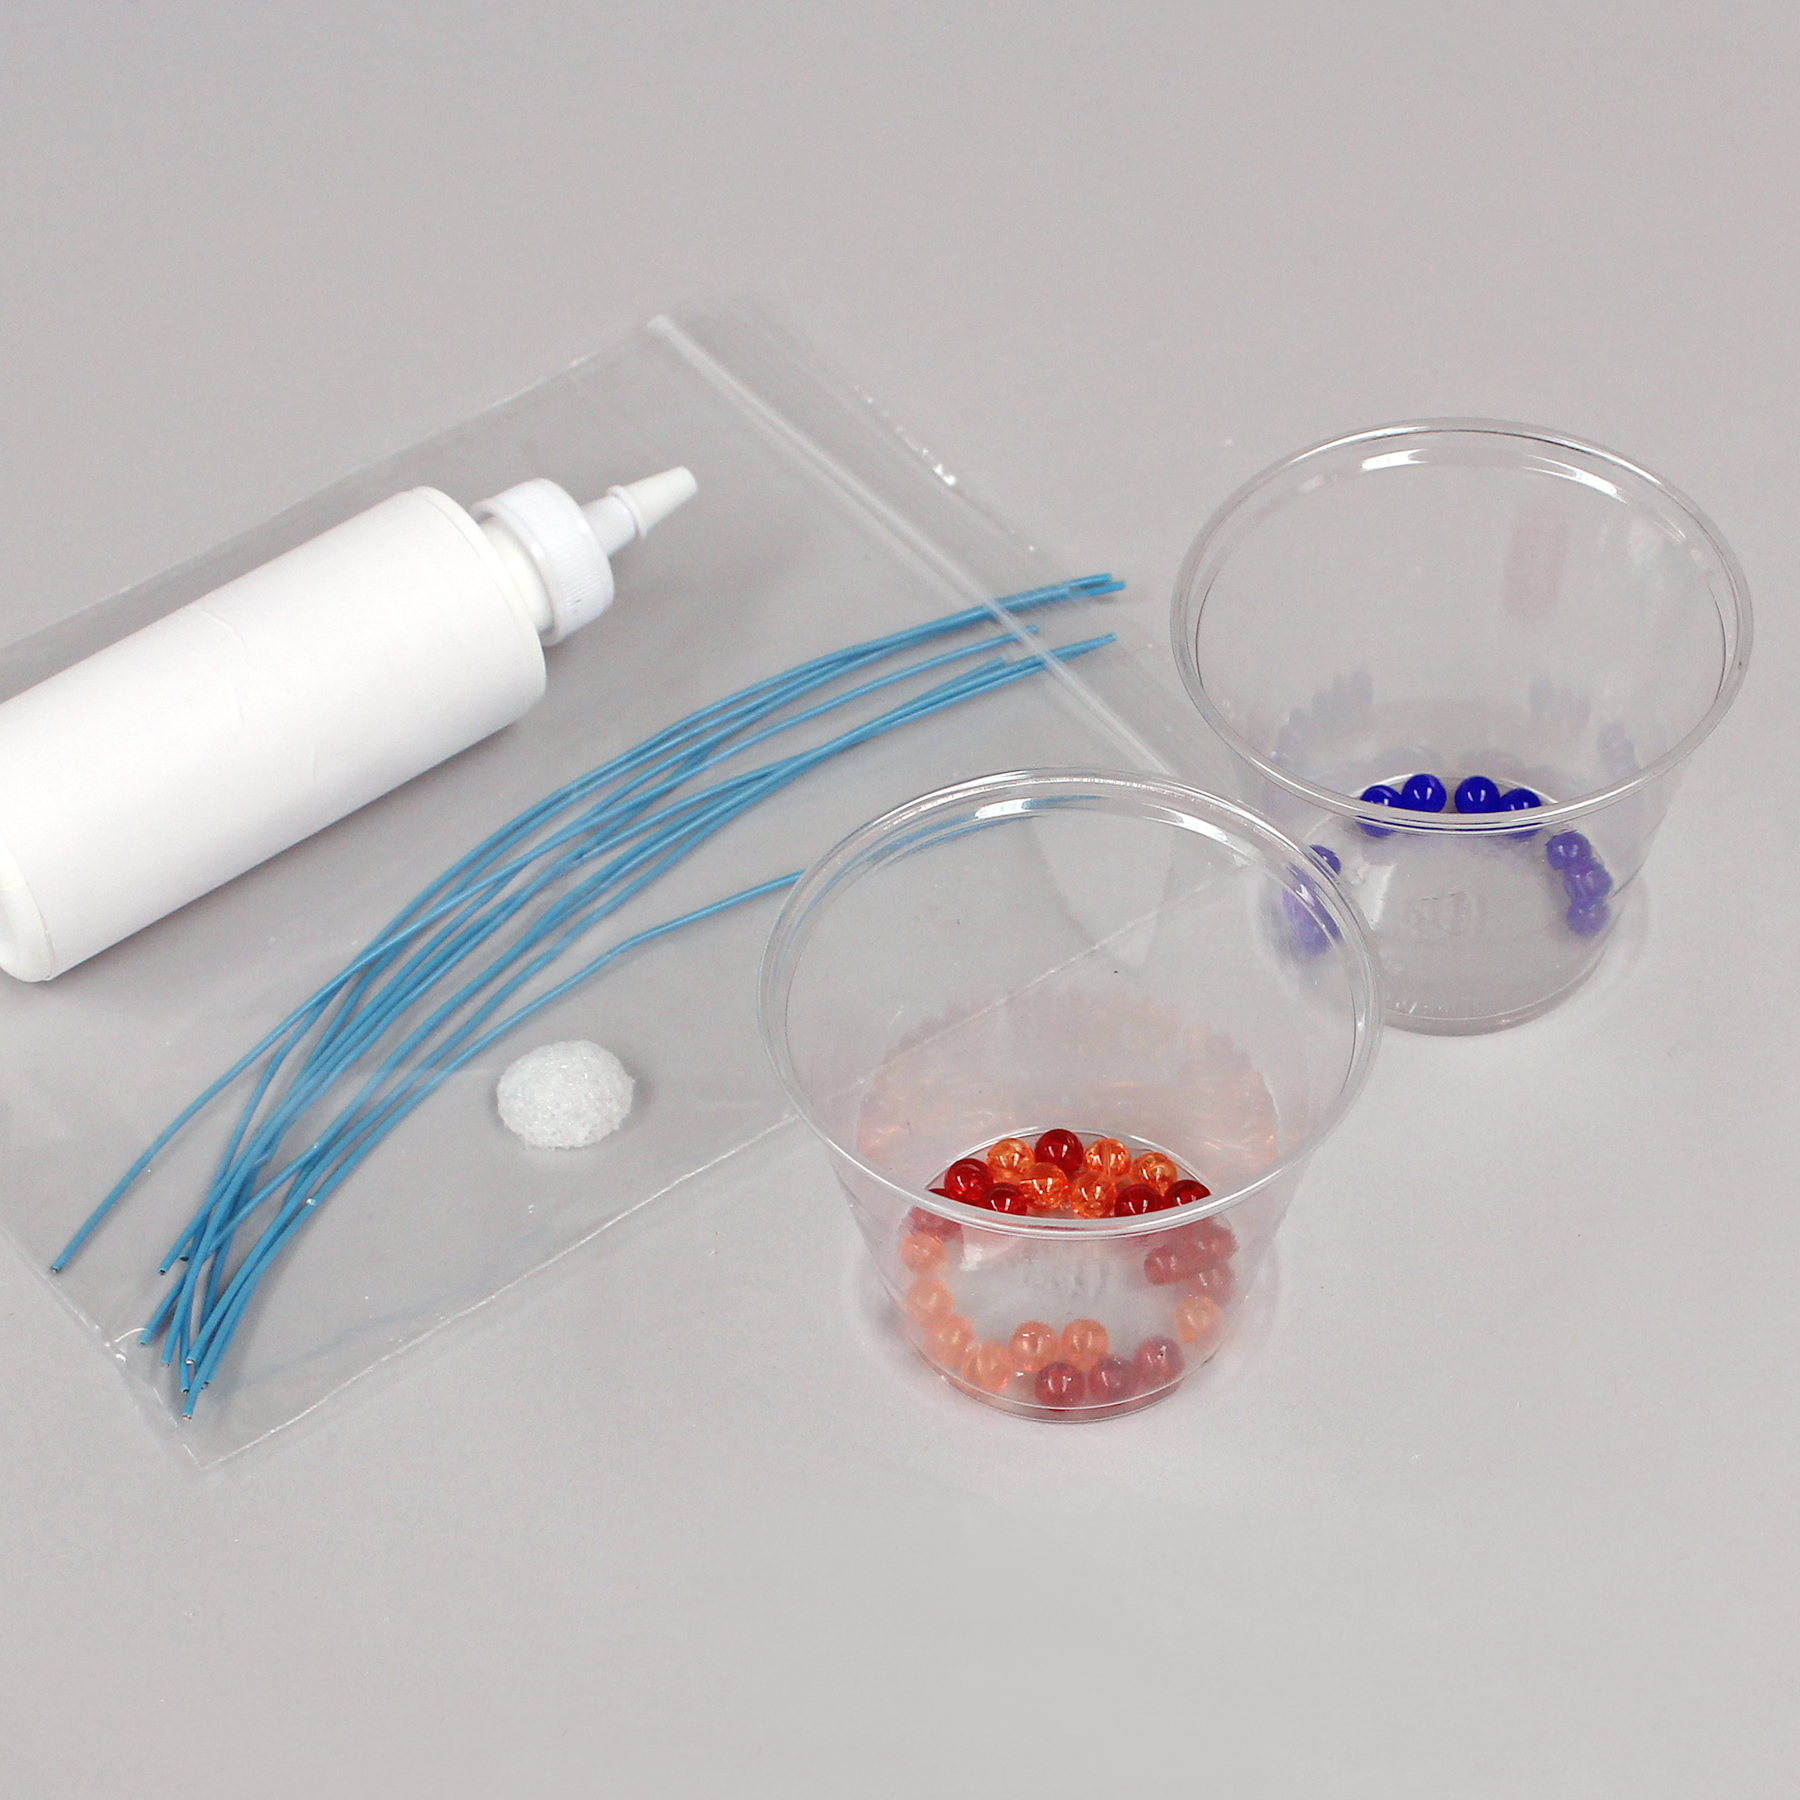
- 7 mm Plastic Beads: (12) Red, (12) Orange, and (10) Blue
- (2) Large Paint Brushes
- (3) Plastic Cups
- Pencil
- Ruler
- Thick White Tacky Glue
- (2) Paper Plates, (1 small and 1 large)
- Paper Towels
- Plastic Bag
- Paint Apron
For Parent or Teacher:
- FloraCraft® Design It:® Wire Cutter
- Acrylic Paint: True Blue and Salem Blue (lighter blue)
- Serrated Knife
- Pencil
- Ruler
- Rubber Band
- Low-Temp Glue Gun
- Old Newspapers or Plastic Tablecloth (optional)
- Plastic Bag (to hold parts)
- Plastic-Lined Garbage Can
- Paper Towels
- Bucket of Water or Sink
- Small Empty Squeeze Bottle
- Wet Wipes
Instructions:
Before working with the child
Use a serrated knife to cut the two foam balls in half. (Set aside one half of each for future projects.)
Optional: Create a cutting guide by wrapping a rubber band around the large ball so that one edge is in the middle. Rotate the foam ball to make it even all around. Then cut along that line, rotating the foam ball as you cut. Sand the cut surfaces by briskly rubbing them together over the garbage can until even.
Set the large half ball on the table so that the flat surface is tipped back a little. Notice where the bottom would be and use the serrated knife to trim off a 2″ diameter circle on this bottom. (Note: It should be about 1-1/2″ away from the bottom front edge.) Check to be sure this allows the ball to sit flat.
Use a wire cutter to cut the plastic-coated wire into the following lengths, two of each: 6″, 8″, 8-1/2″, 9″ and 9-1/2″. (Keep the wire as smooth as possible.)
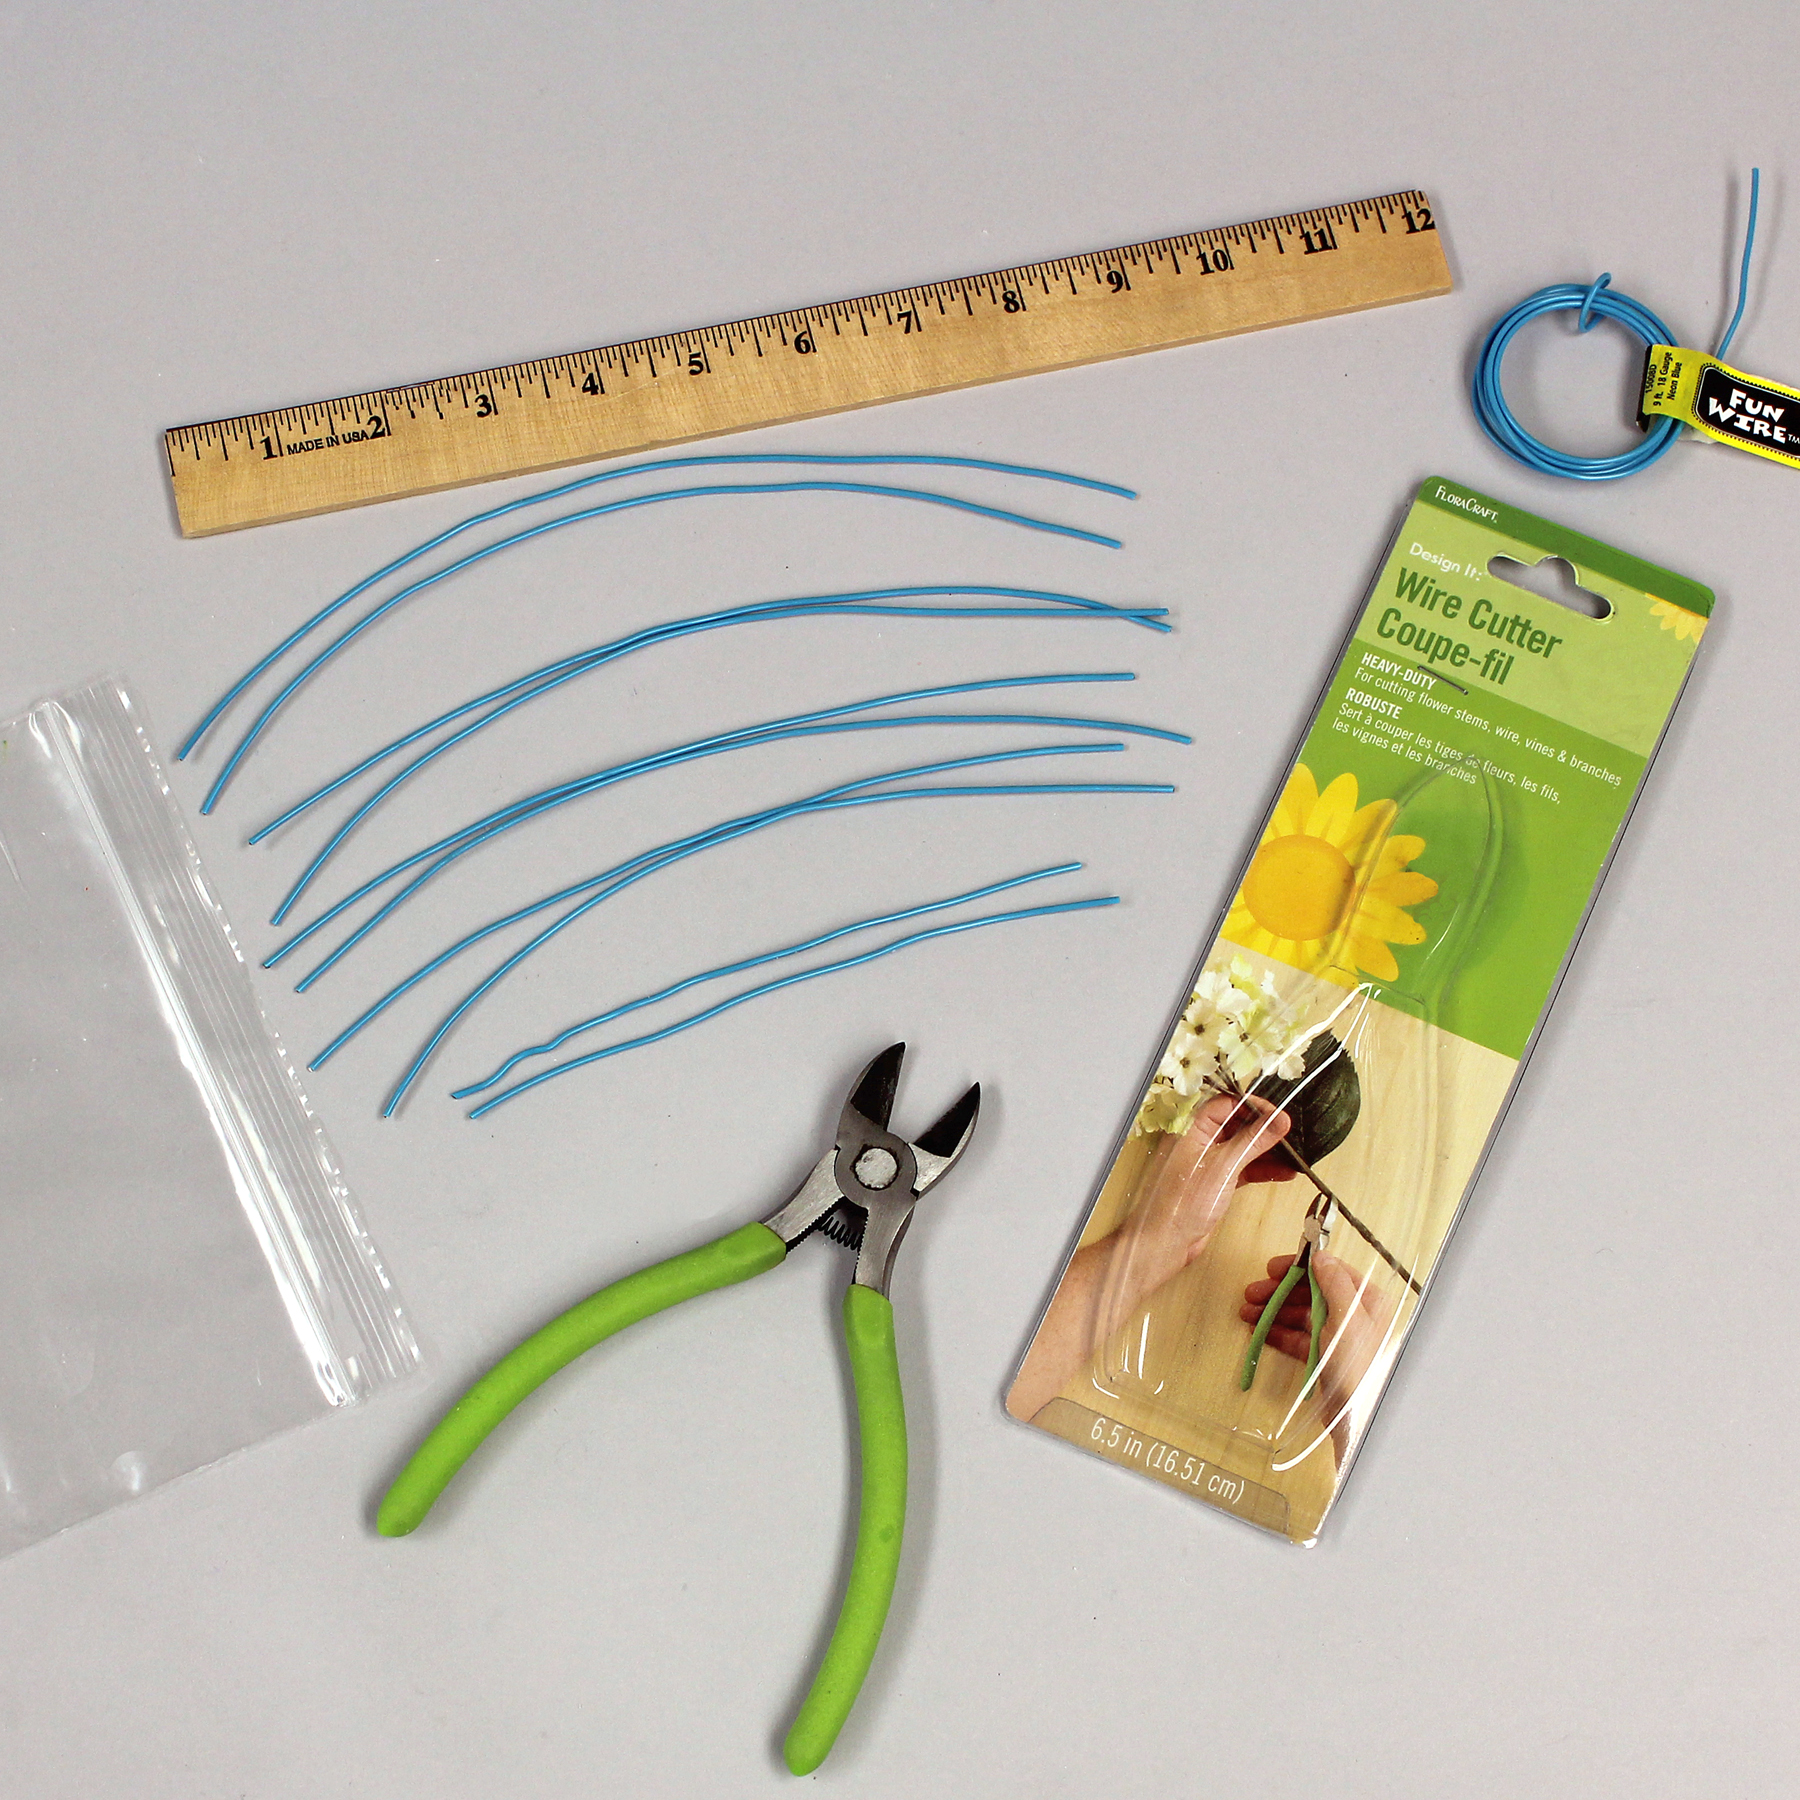
Put the wires and small half ball into a bag. Put the beads into a plastic cup.
Prepare the work area, covering the table for painting, if desired. At the child’s work space, set large and small plates, paper towel, paintbrushes, pencil, large half ball and plastic cup.
Do this part with the child
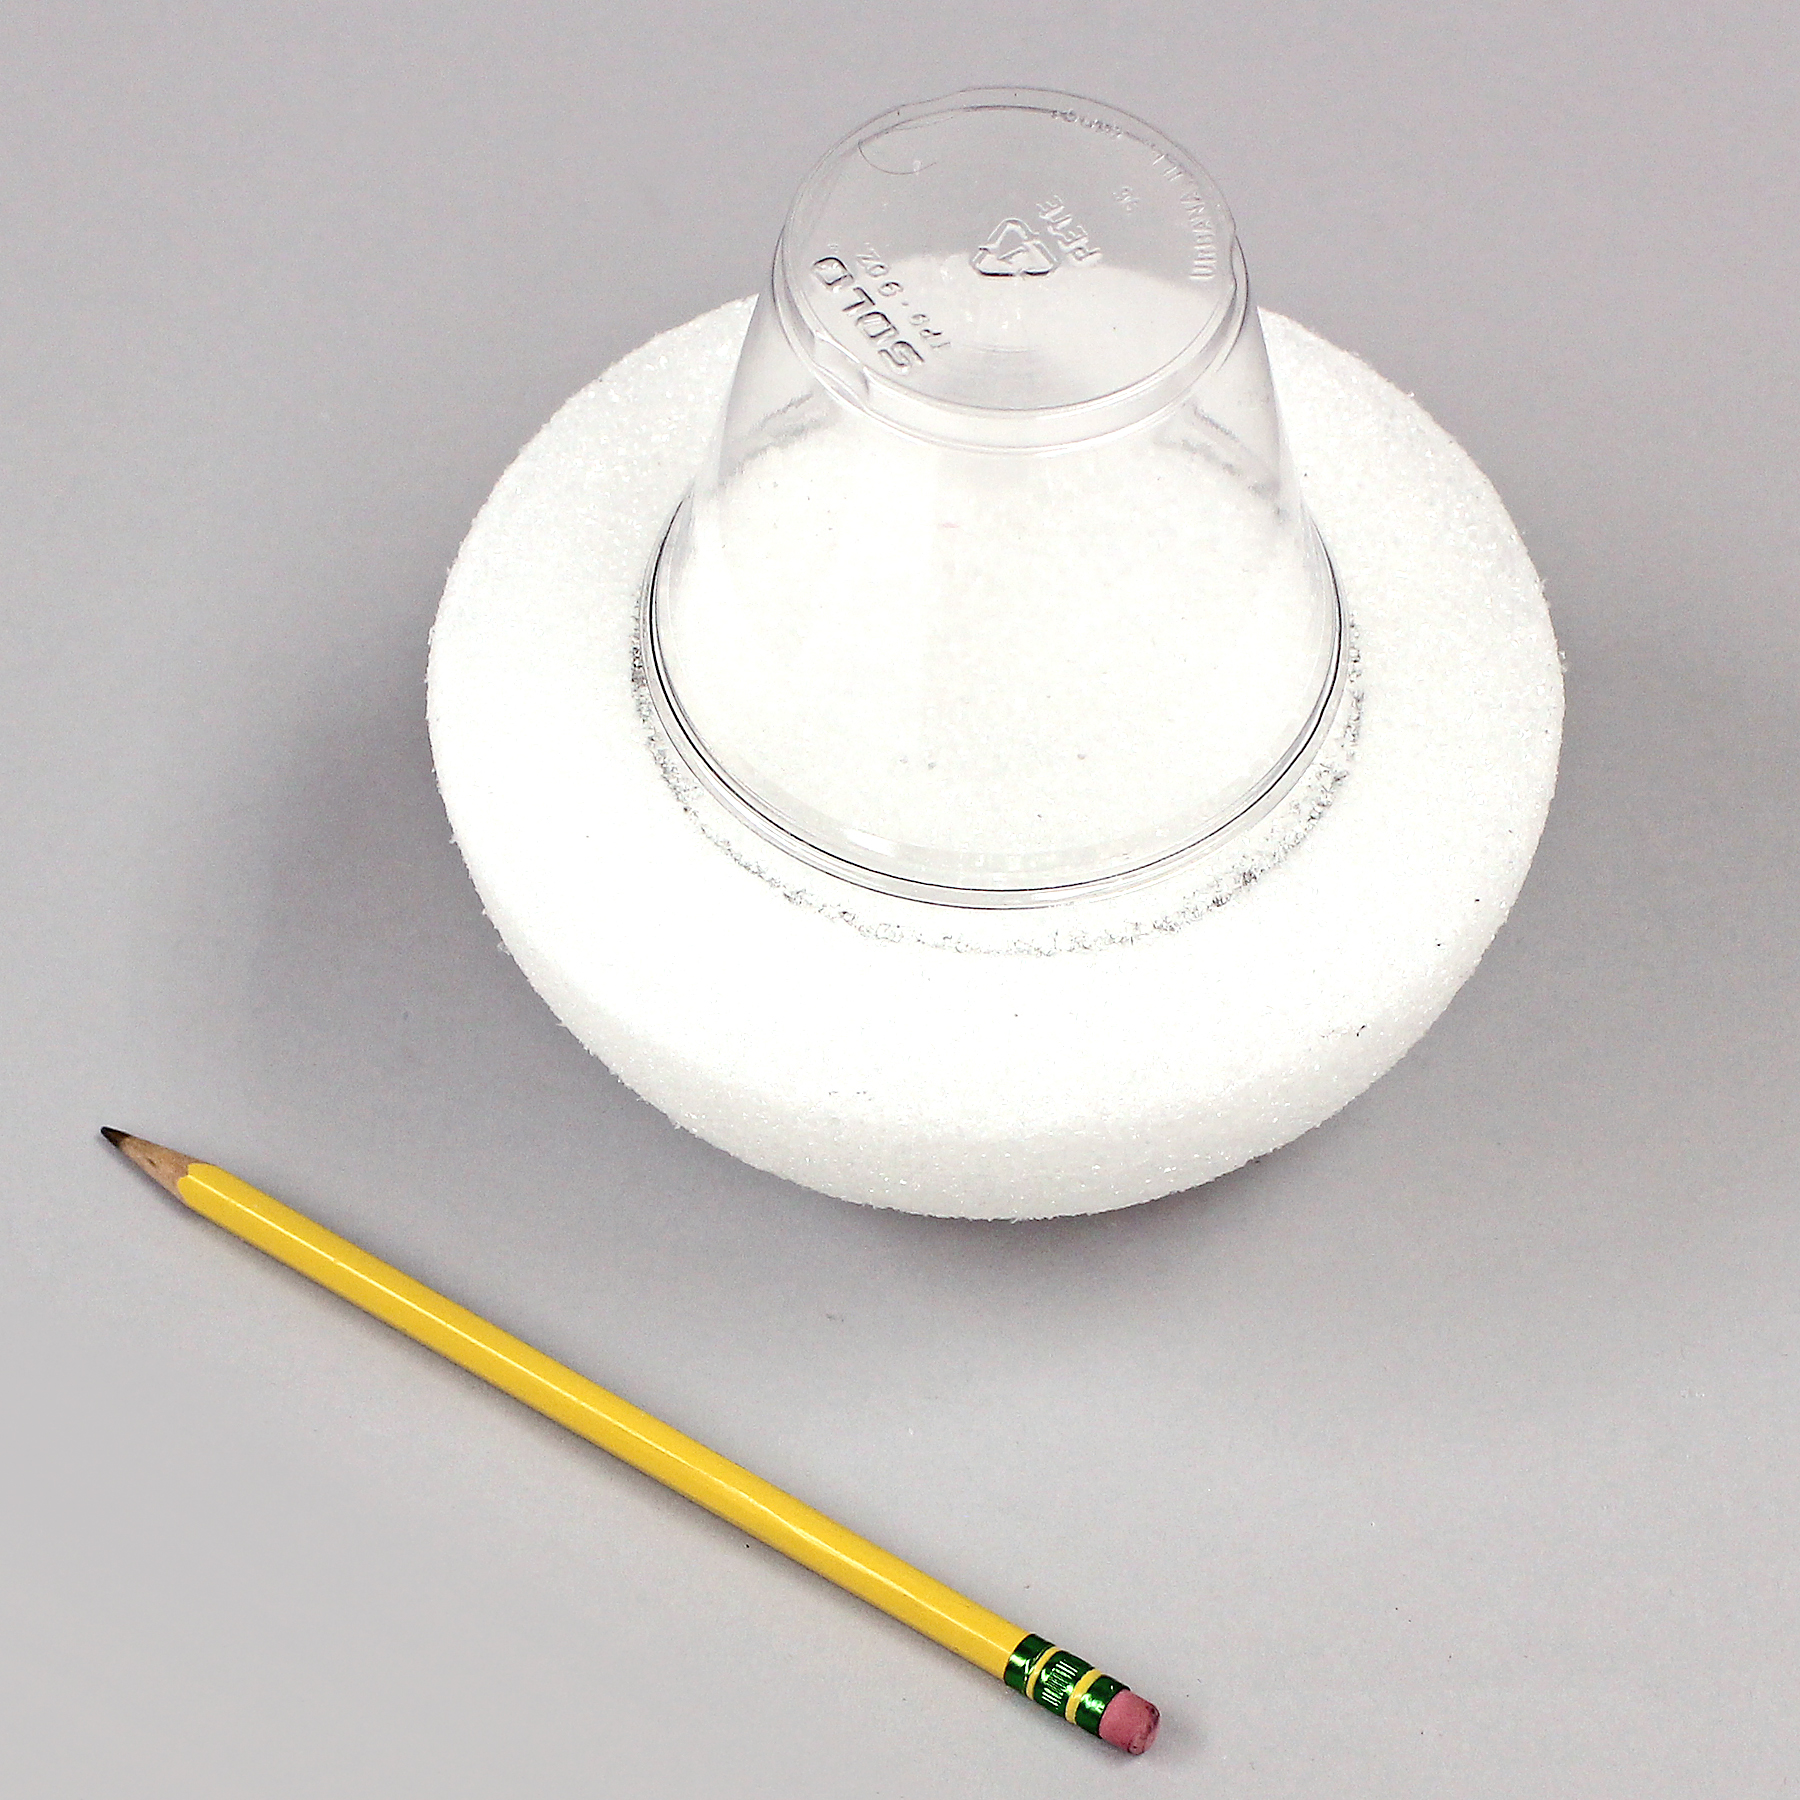
Have the child use a pencil to draw a circle guideline for painting the two energy levels or shells: K (light blue) and L (dark blue) as follows: Hold the large half ball while the child centers the cup onto the flat surface and traces around it with the pencil.
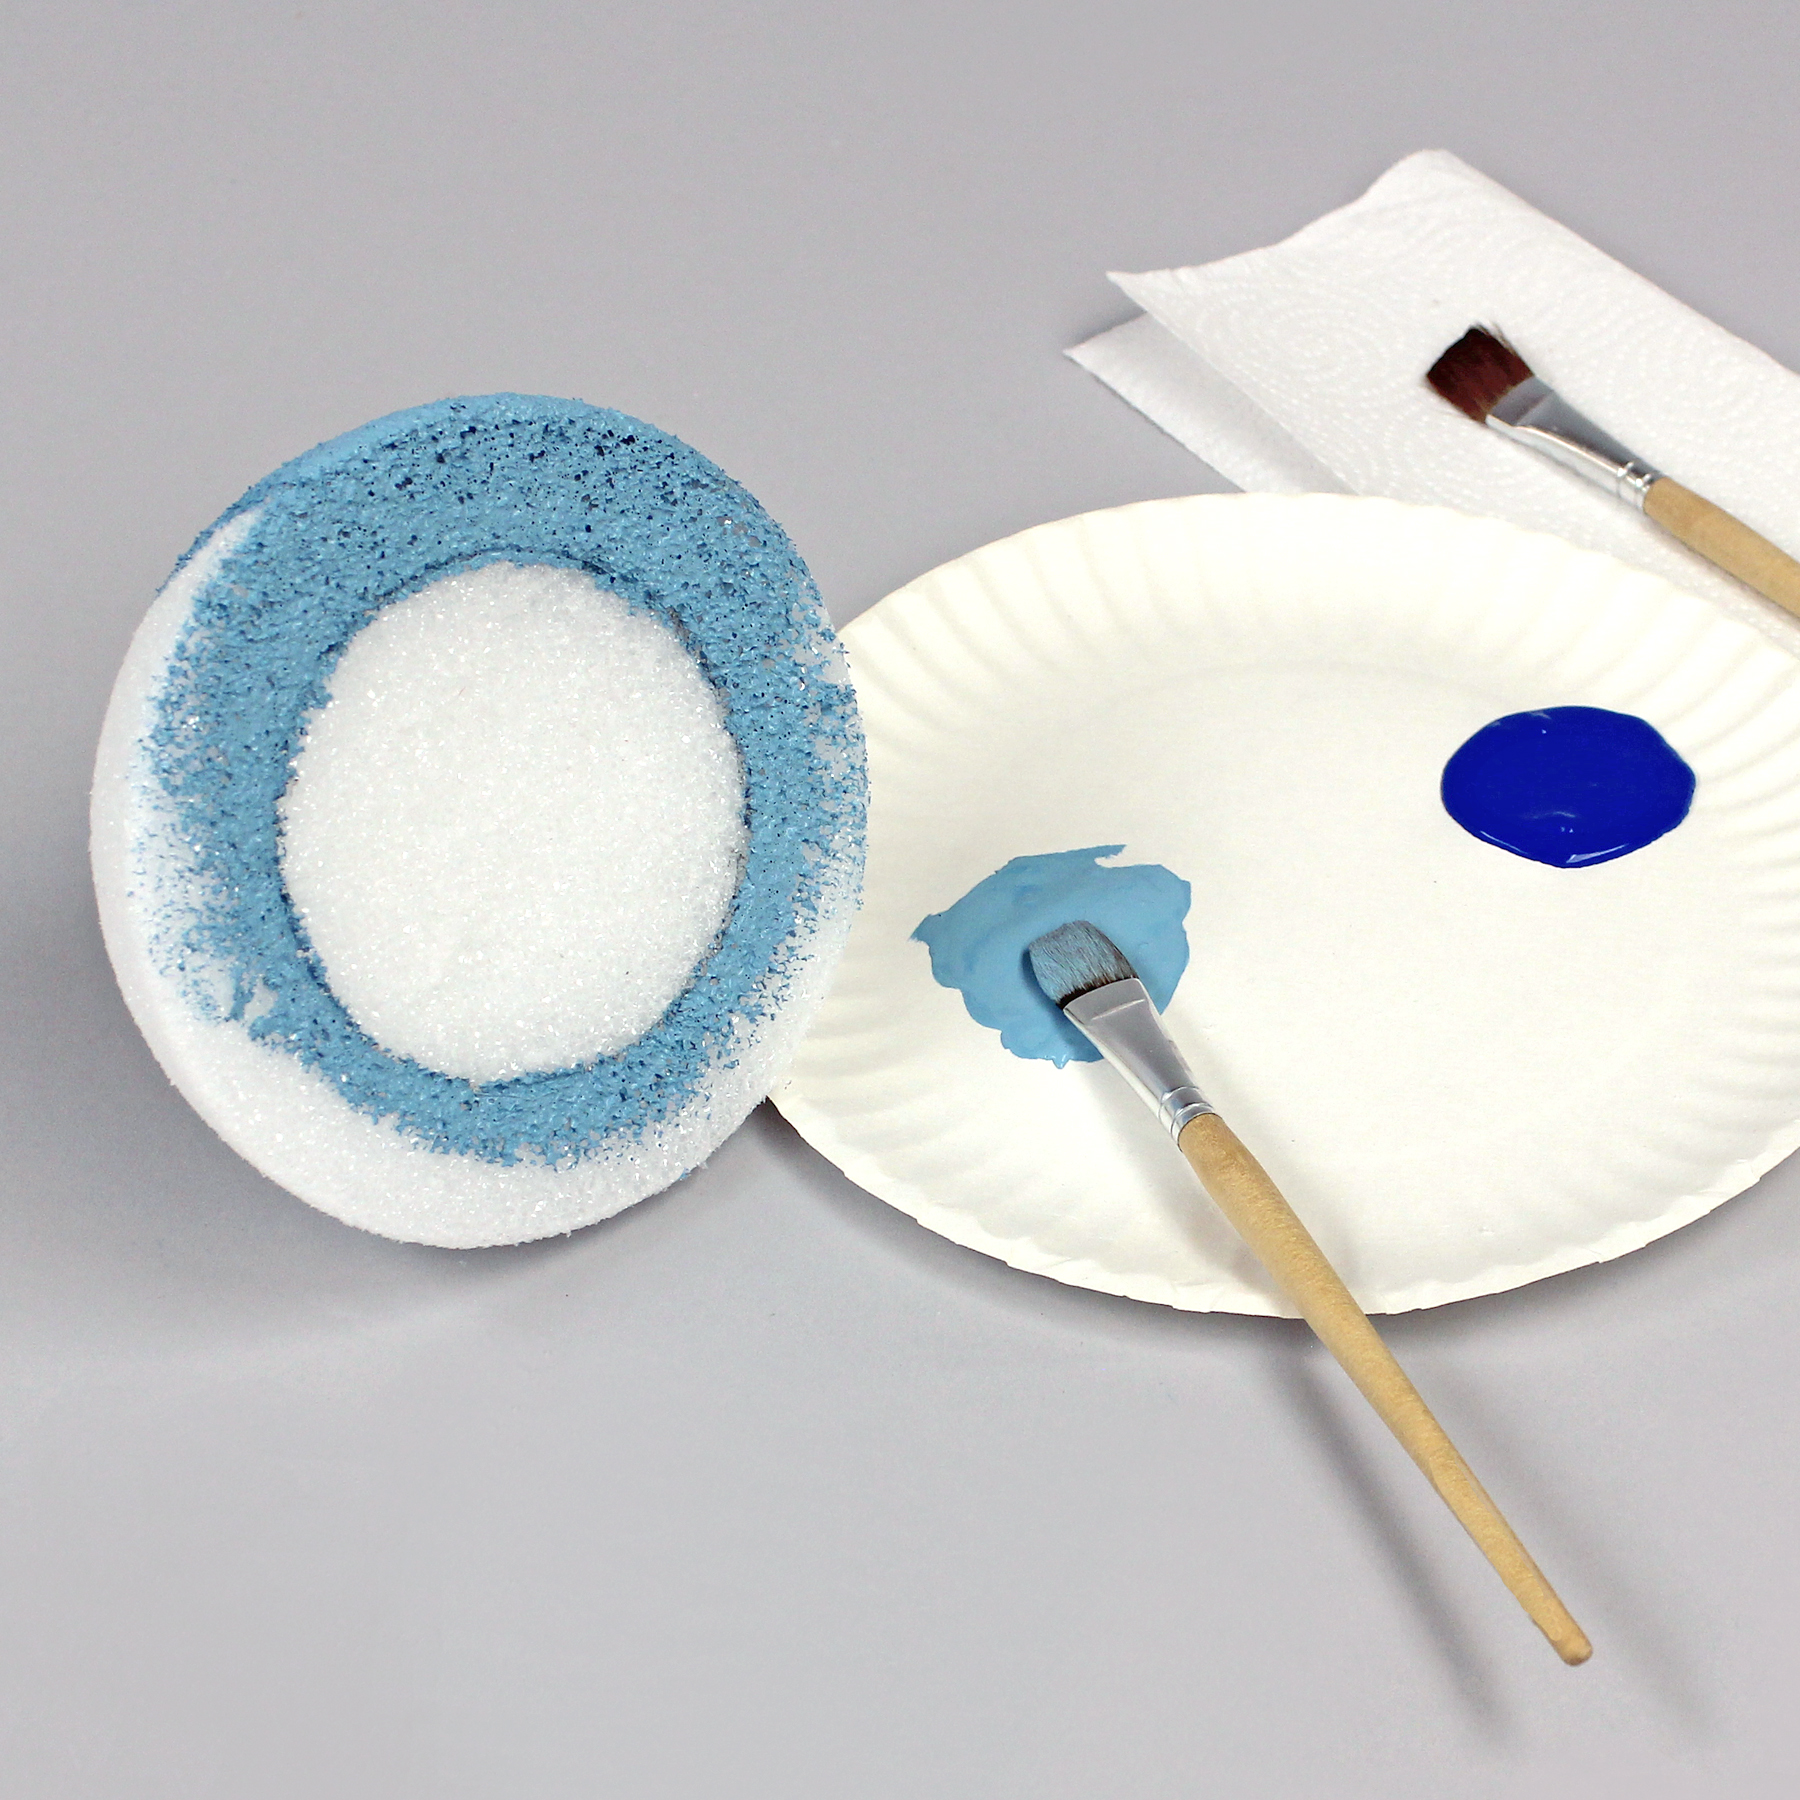
Have the child wear their apron and roll up their sleeves, explaining that this paint will not wash out of clothes. Squeeze light blue and dark blue paint onto opposite sides of the large plate.
Have the child paint the light blue starting by going around the outside of the pencil line. (This will allow it to dry some before the dark blue is painted next to it.) Then, the child can continue with the rest of the ball.
Then, with the other brush, have them carefully paint dark blue inside of the circle.
Ask them to wash their brushes in the bucket of water or sink. Put the half ball on the small plate in a drying area.
NEXT SESSION (or when paint is dry)
Gather the materials that you prepared and use the glue gun for the child to attache the 1″ half ball to the center of the atom as a basis for the nucleus. Momentarily hold until set.
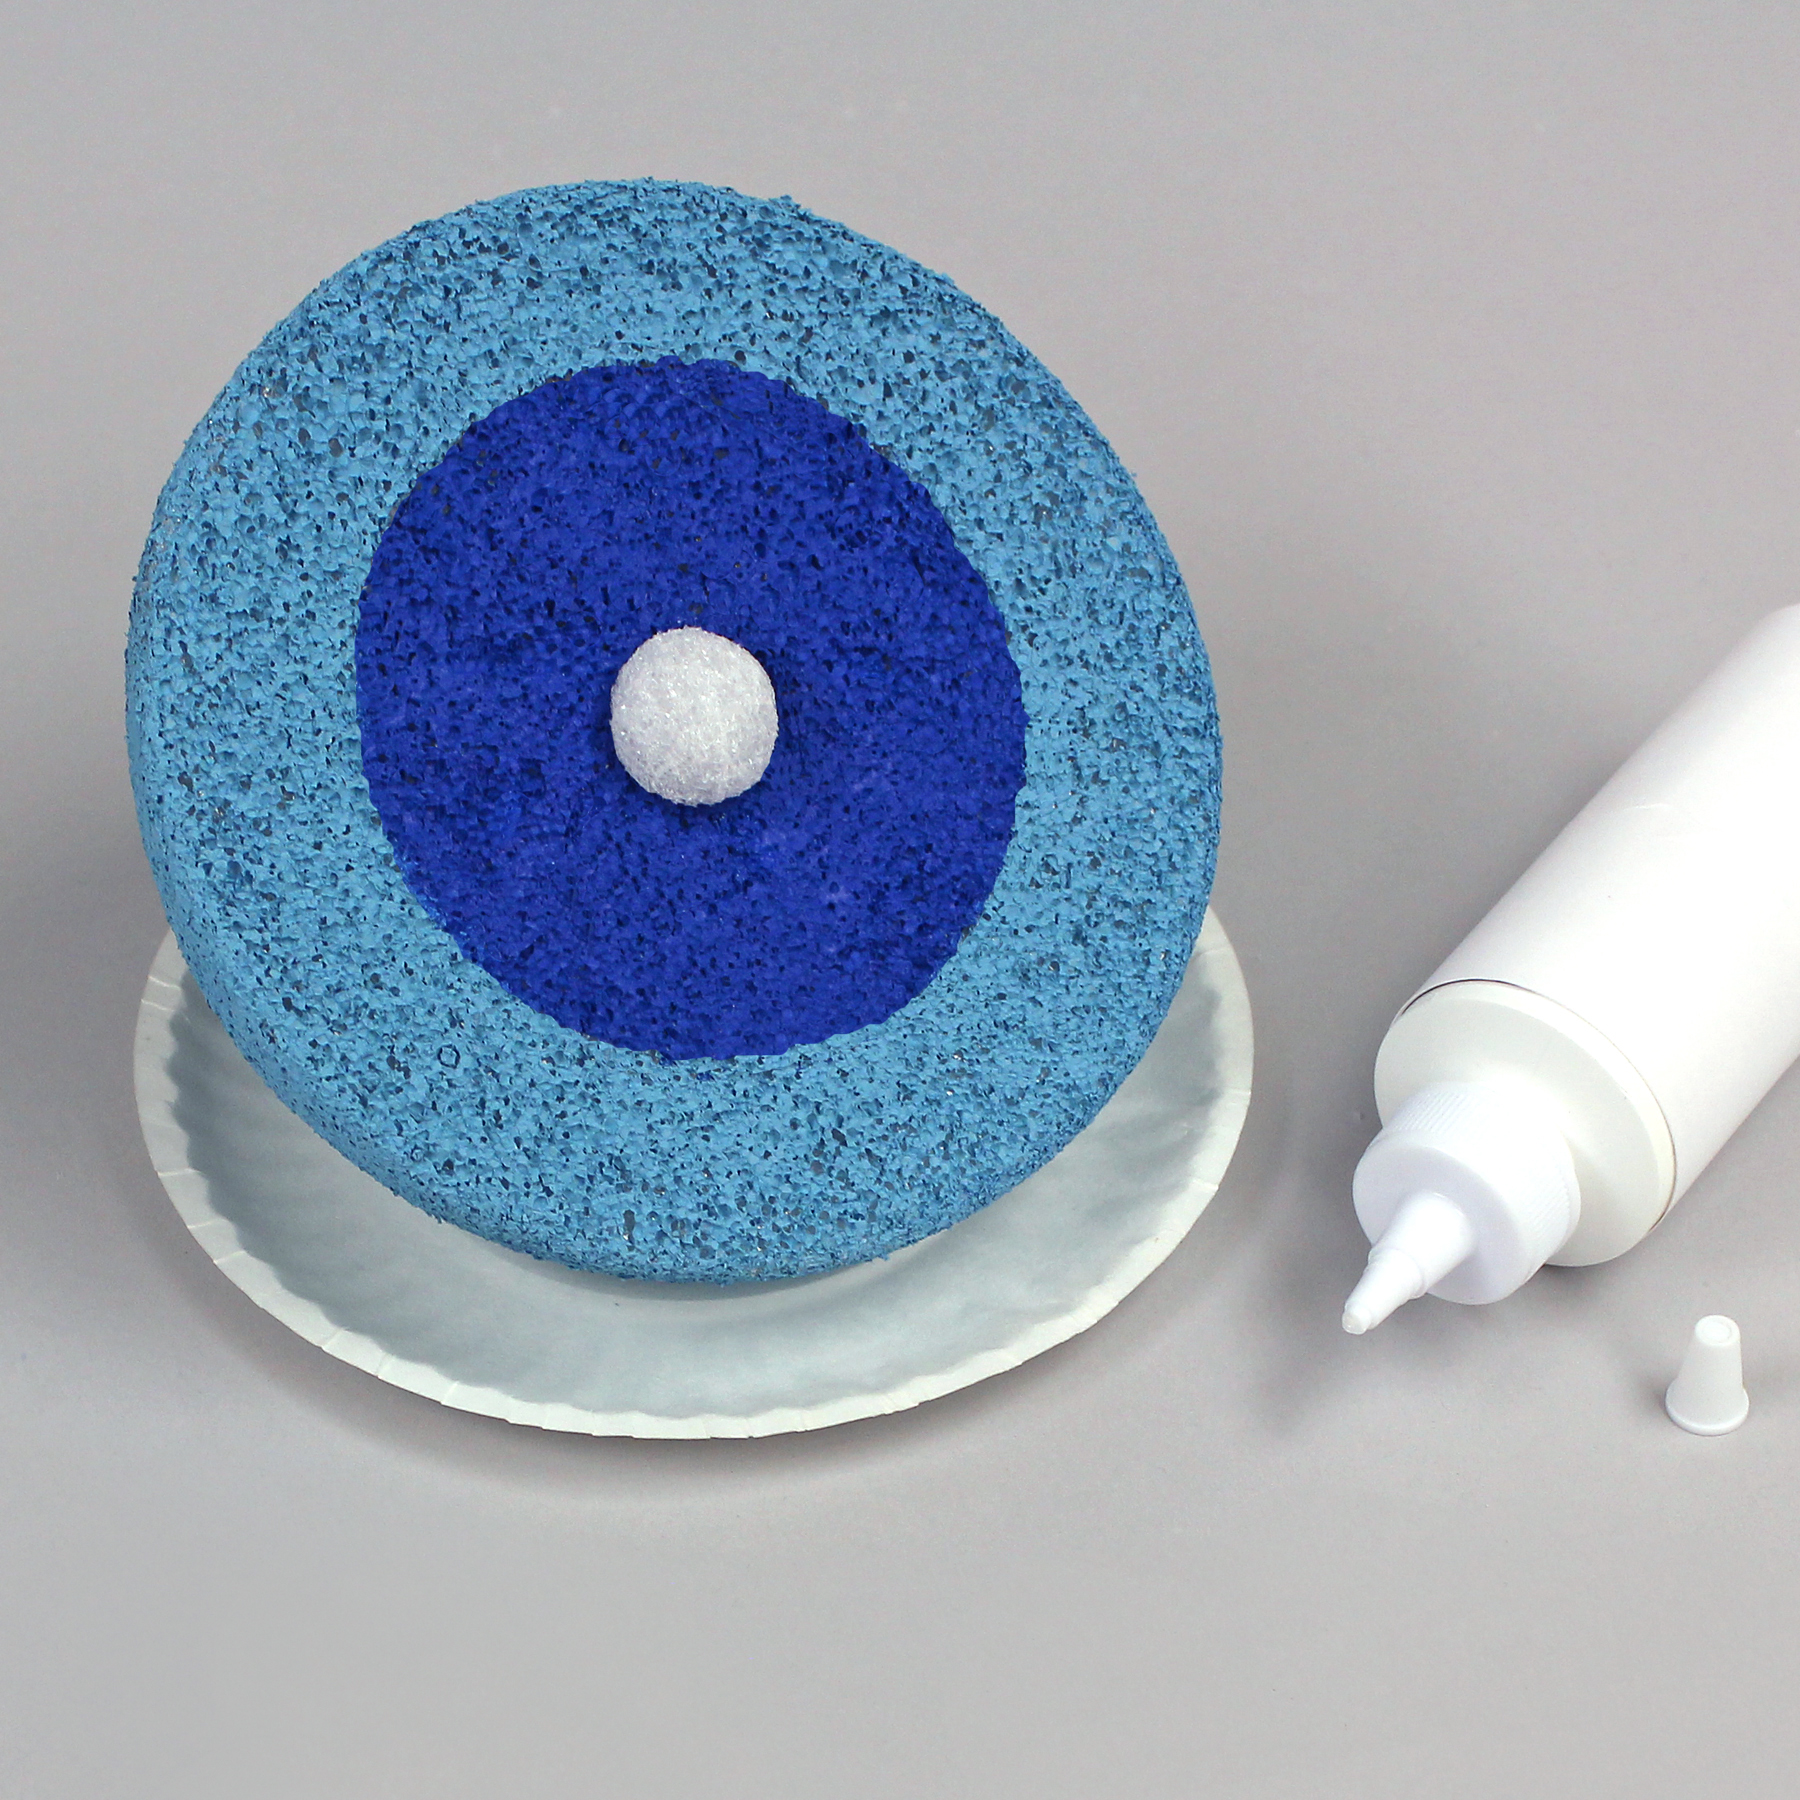
Ask the child to apply a generous amount of tacky glue all over the small half ball. Then randomly arrange orange and red beads (protons and neutrons) all around the base of the half ball. Add additional glue if needed and fill in the rest of the area with as many orange and red beads as will nestle into one another. Let dry.

Have the child thread one blue bead (electron) onto the middle of each of the wires (orbits). Then, have them arrange the wires on the table according to length – from the two shortest up to the two longest.
Explain that the ends of the two shortest wires need to be inserted into the dark blue (L shell) area, with one wire overlapping the other. Have the child insert each of those wires, close to the edge of the dark blue, going down about 1/2″ into the foam. (Note: The wire should naturally curve to fit.)
Then explain that the remainder of the wires will go into the light blue (K shell) area, similarly overlapping one another, layer by layer, going from the shortest lengths up to the longest lengths. (Note: When finished the wires should be spaced about 3/4″ apart in a circle in the light blue.)
The child may move the beads to various places on the wire, representing the electrons orbiting around the nucleus.
Tips & Ideas:
- Check the nozzle of the tacky glue bottle to be sure that it’s clear. If not, bend open a paper clip. Remove the bottle cap and insert the paper clip wire into the nozzle (from the inside), forcing any dried glue out of the nozzle (not down into the glue bottle). Test it to be sure that it’s clear.
- Before painting, show the child how to compress the cut edge of the foam. Place the foam half ball at an angle, on the table. Press the edge down, to round it, rocking it back and forth a little and rolling it all around to get an even, circular edge.
- To help hold the foam while painting, insert the point of the pencil into the bottom. Then, hold the pencil to finish painting.
- If the acrylic paint seems too thick, put a few drops of water on on the puddle of paint. This will go down into the pores of the foam more easily.
More…
For more information on this project and other learning activities, click here to visit the Make It: Fun Learning Center.


Leave a Comment
Want to join the discussion?Feel free to contribute!