
Teach Me! – Shish-Kebab Values
Kids love COLOR! And we have a great way to teach them how to mix paint to make all the colors. Designed for second and third graders, this interactive color burst can be modified for the skill and interest level of the child. (But don’t be surprised if you discover that YOU love mixing colors as much as the kids do!)
Supplies needed to make this project:
For Child:
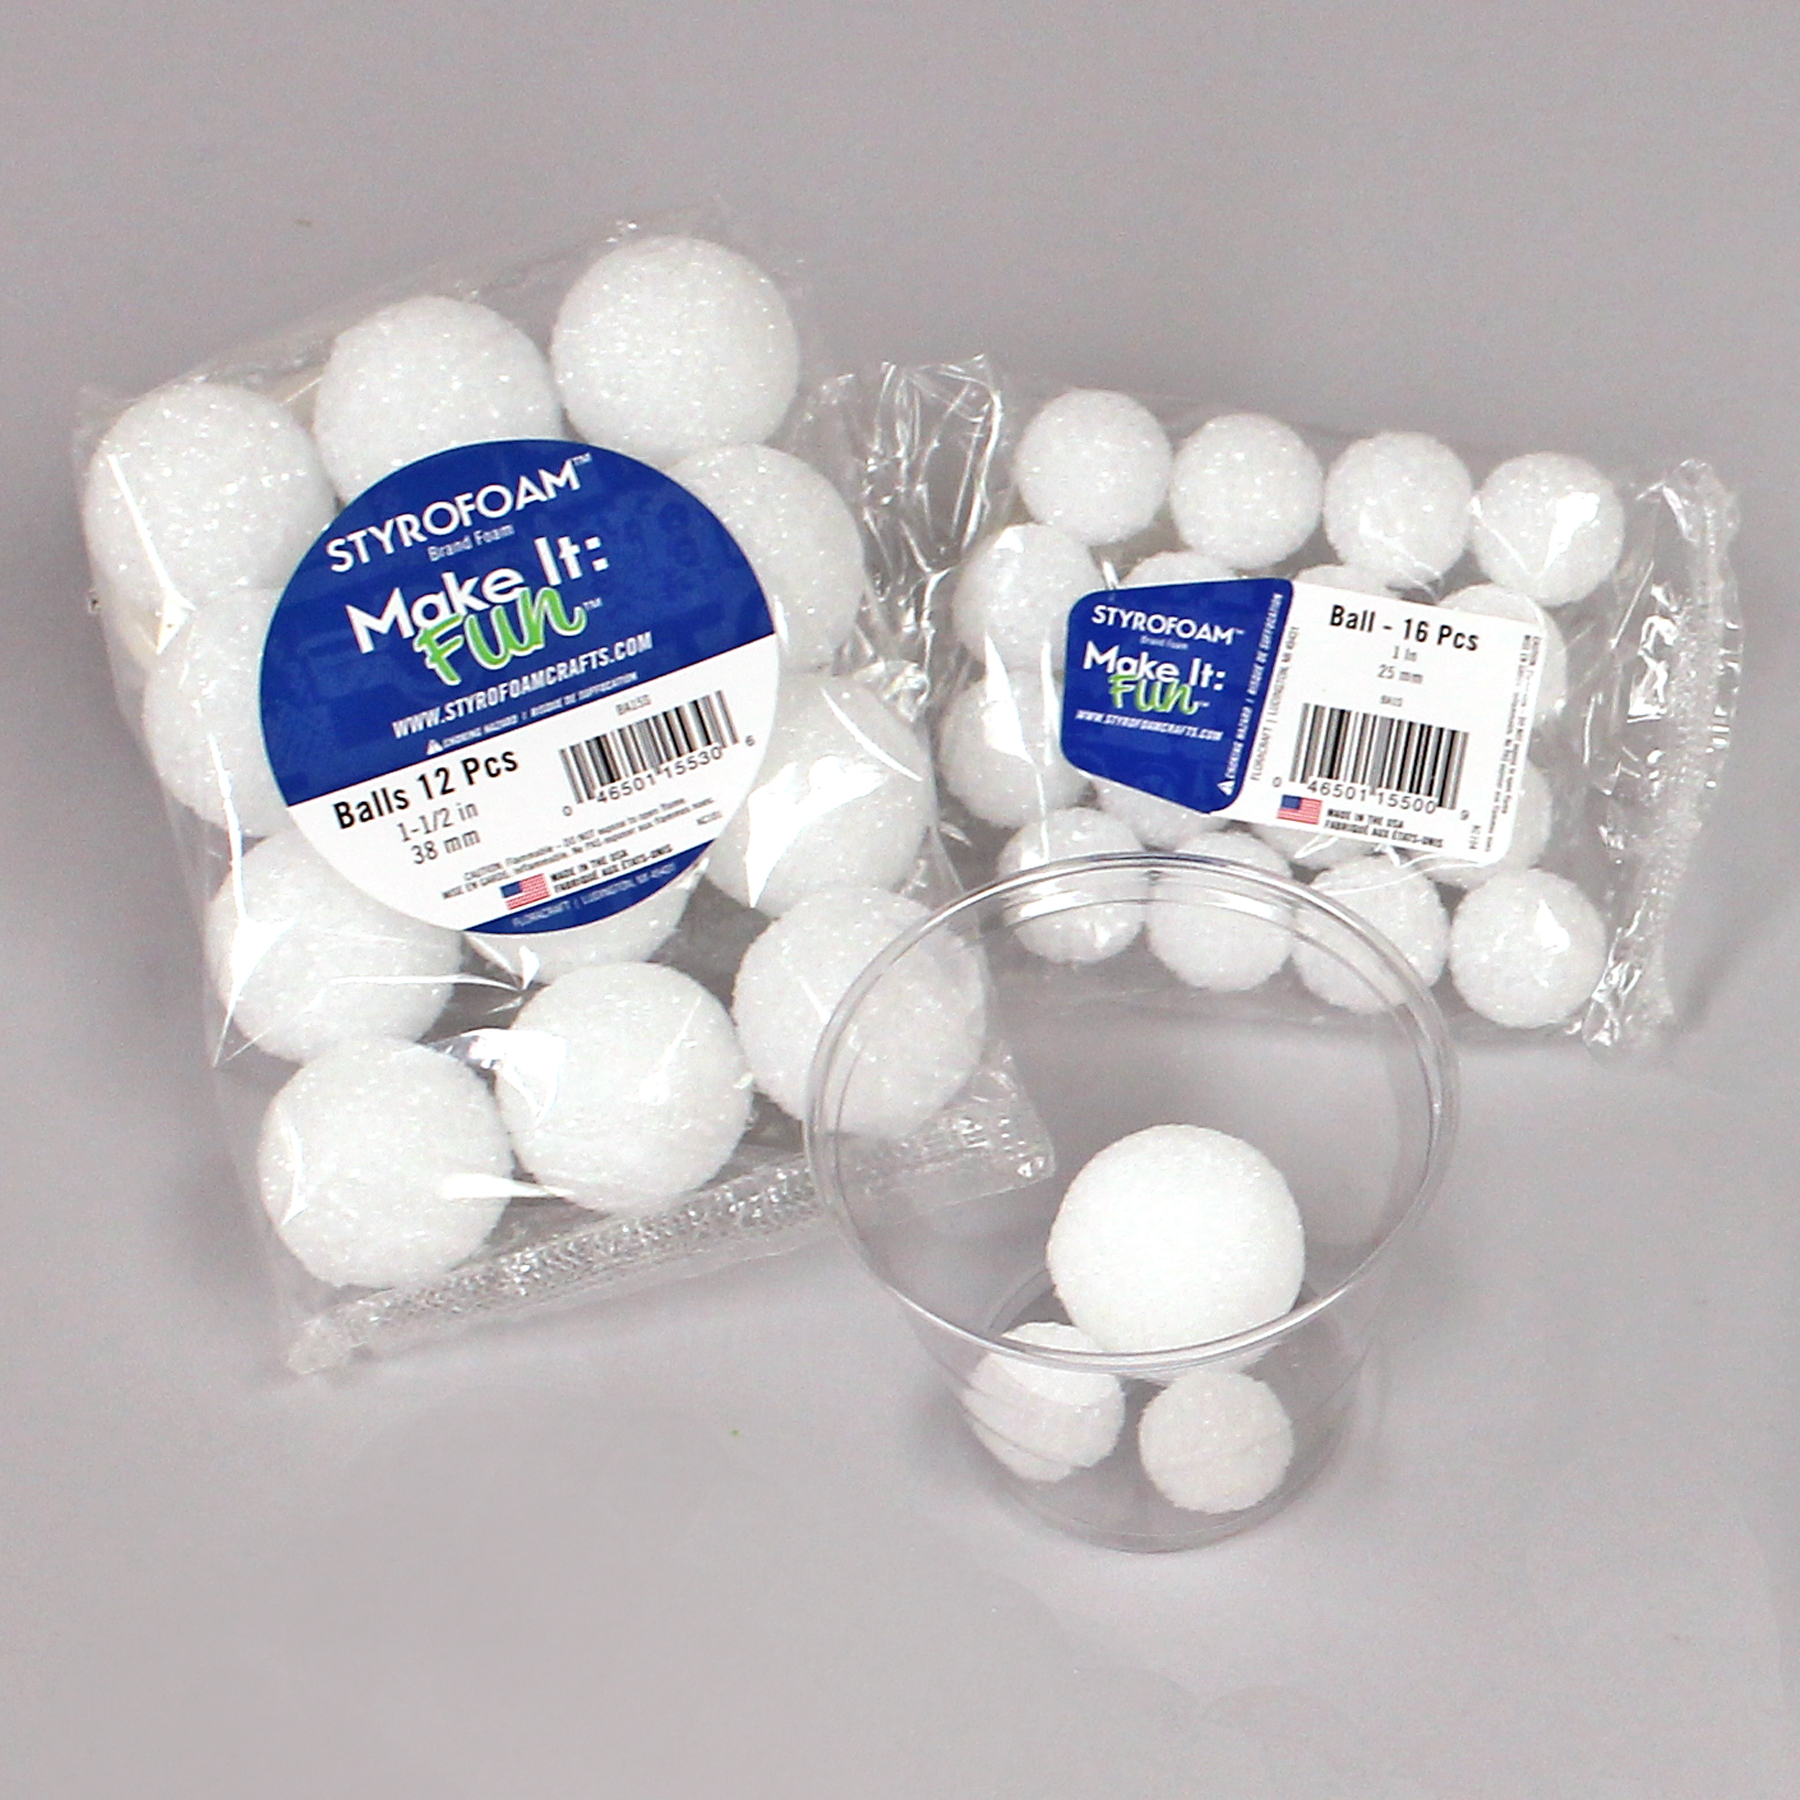
- FloraCraft® Make It: Fun® Foam Balls: (24) 1″, (12) 1-1/2″ (1) 3″
- FloraCraft® Make It: Fun® Foam: Scrap Piece (to hold foam balls while paint dries)
- (36) Toothpicks
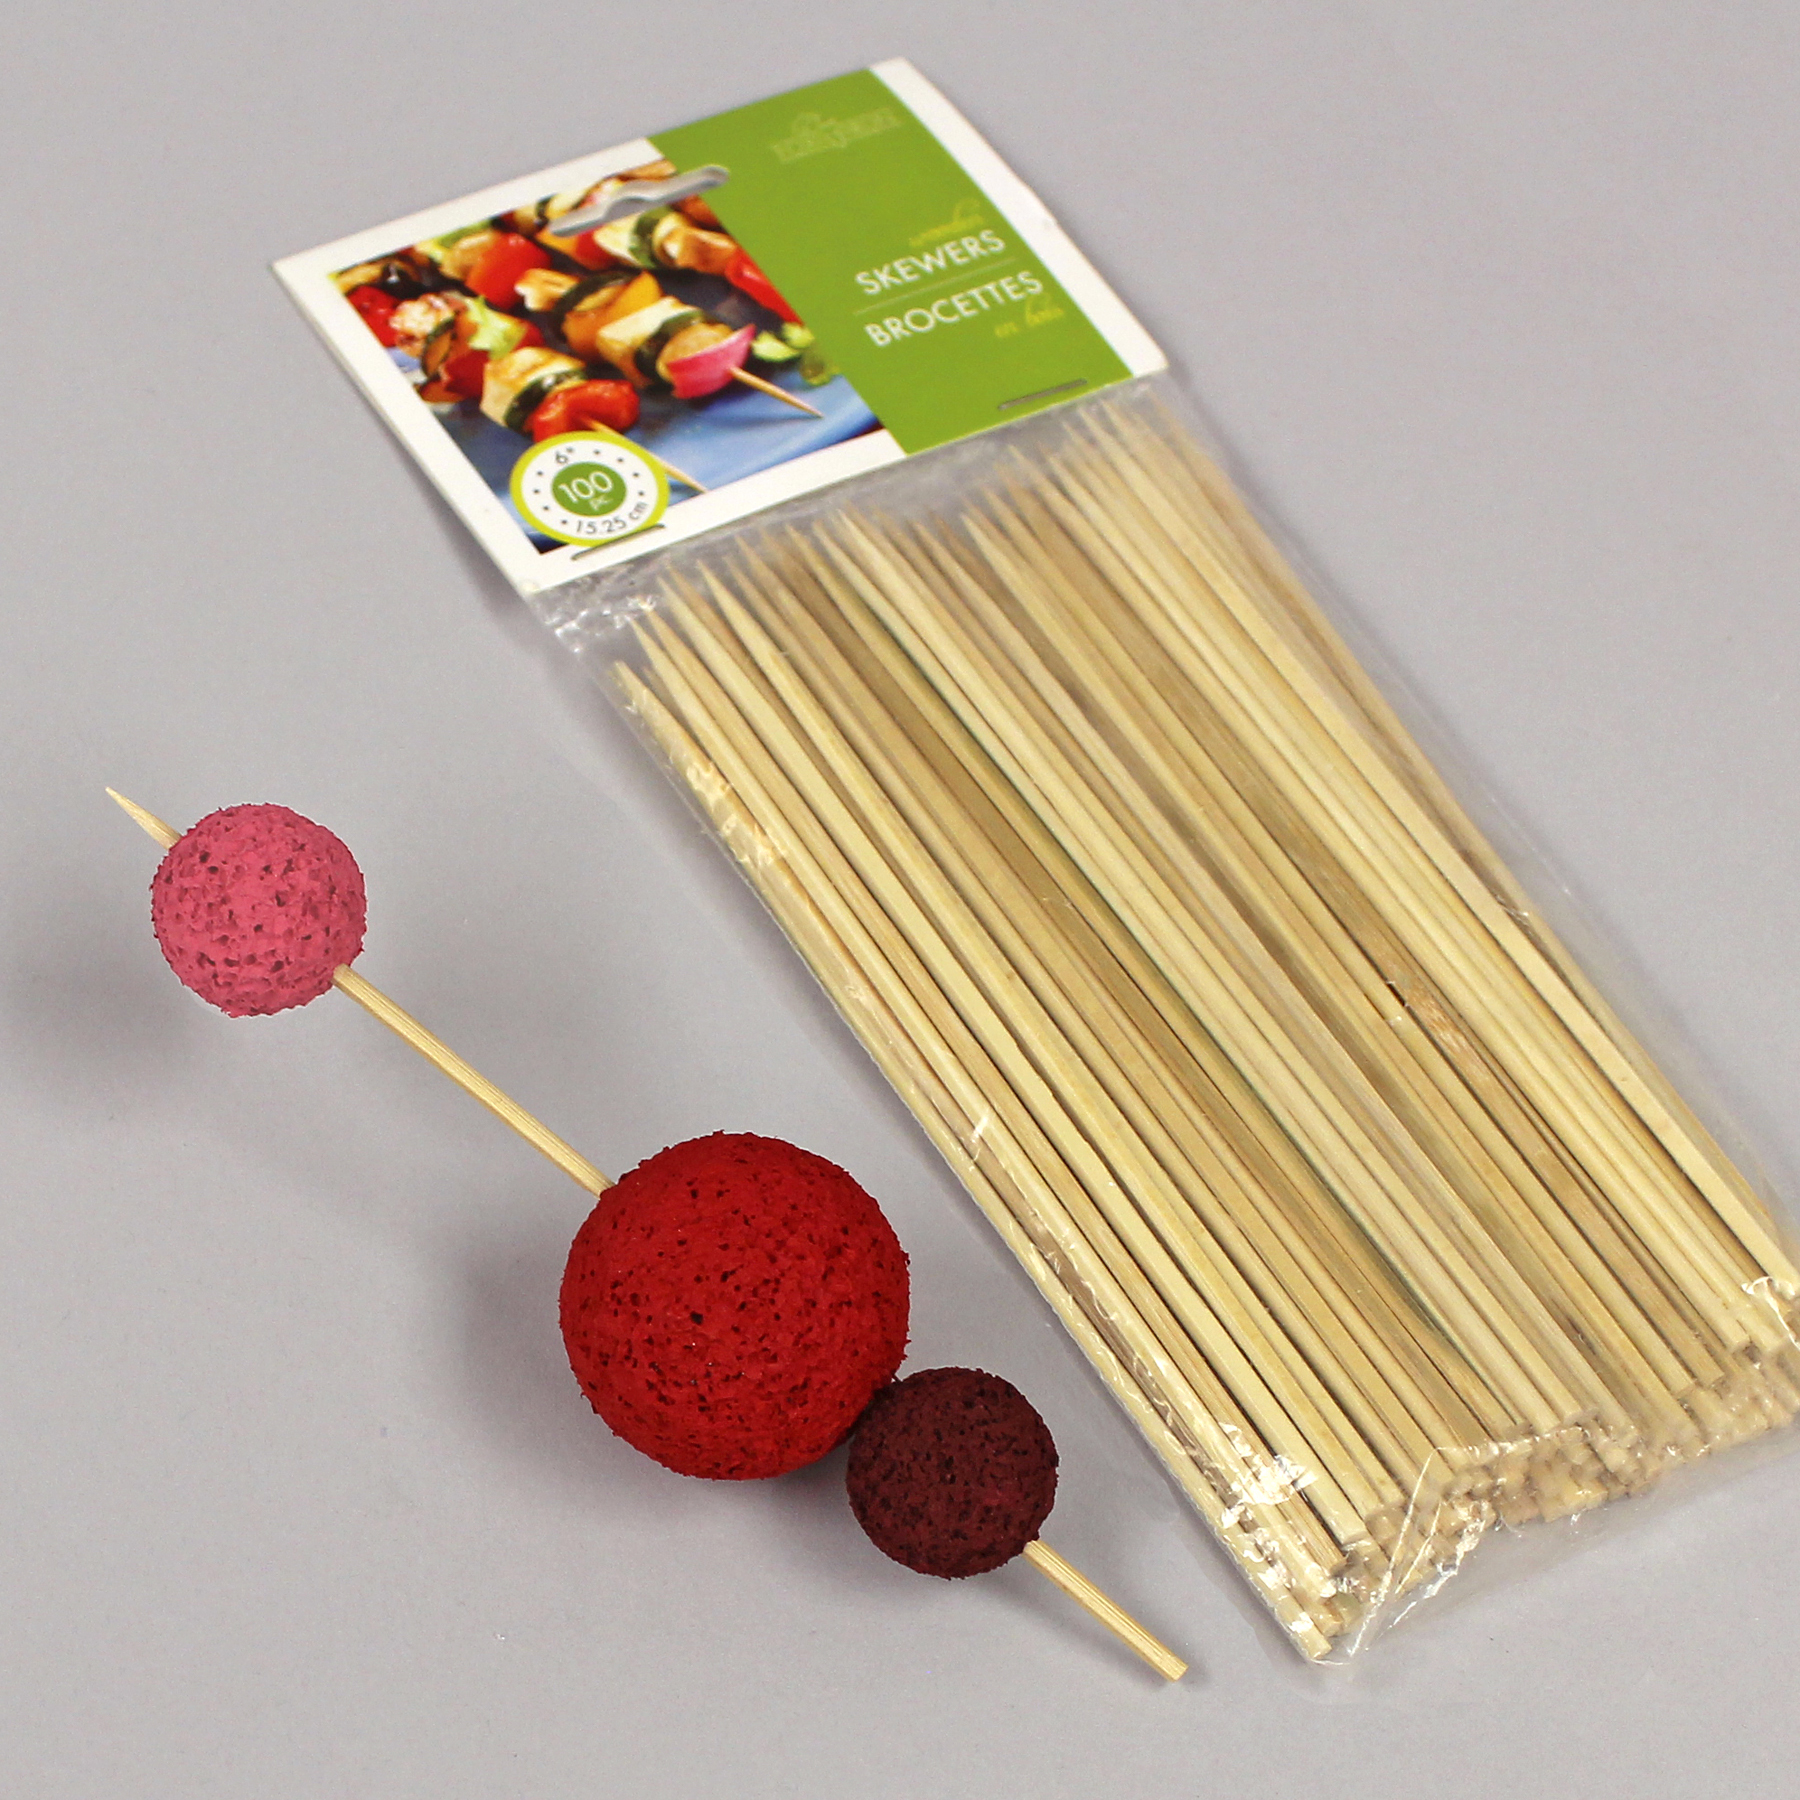
- (12) 6″ Bamboo Skewers
- Paintbrush
- (2)Plastic Cups
- (9) Paper Plates
- Paper Towels
- Wet Wipes
- Paint Apron
For Parent or Teacher:
- Acrylic Paint: Bright Yellow, Primary Red, True Blue, Lamp Black, Warm White
- Pencil
- Ruler
- Serrated Knife
- Low-Temp Glue Gun
- Old Newspapers or Plastic Tablecloth (optional)
- Plastic-Lined Garbage Can
- Paper Towels
- Water
For One Spinner Stand (optional):
- FloraCraft® Make It: Fun® Foam Disc: 1″ x 8″
- (7) Paper Straws: Assorted Colors
Instructions:
Note to parent or teacher
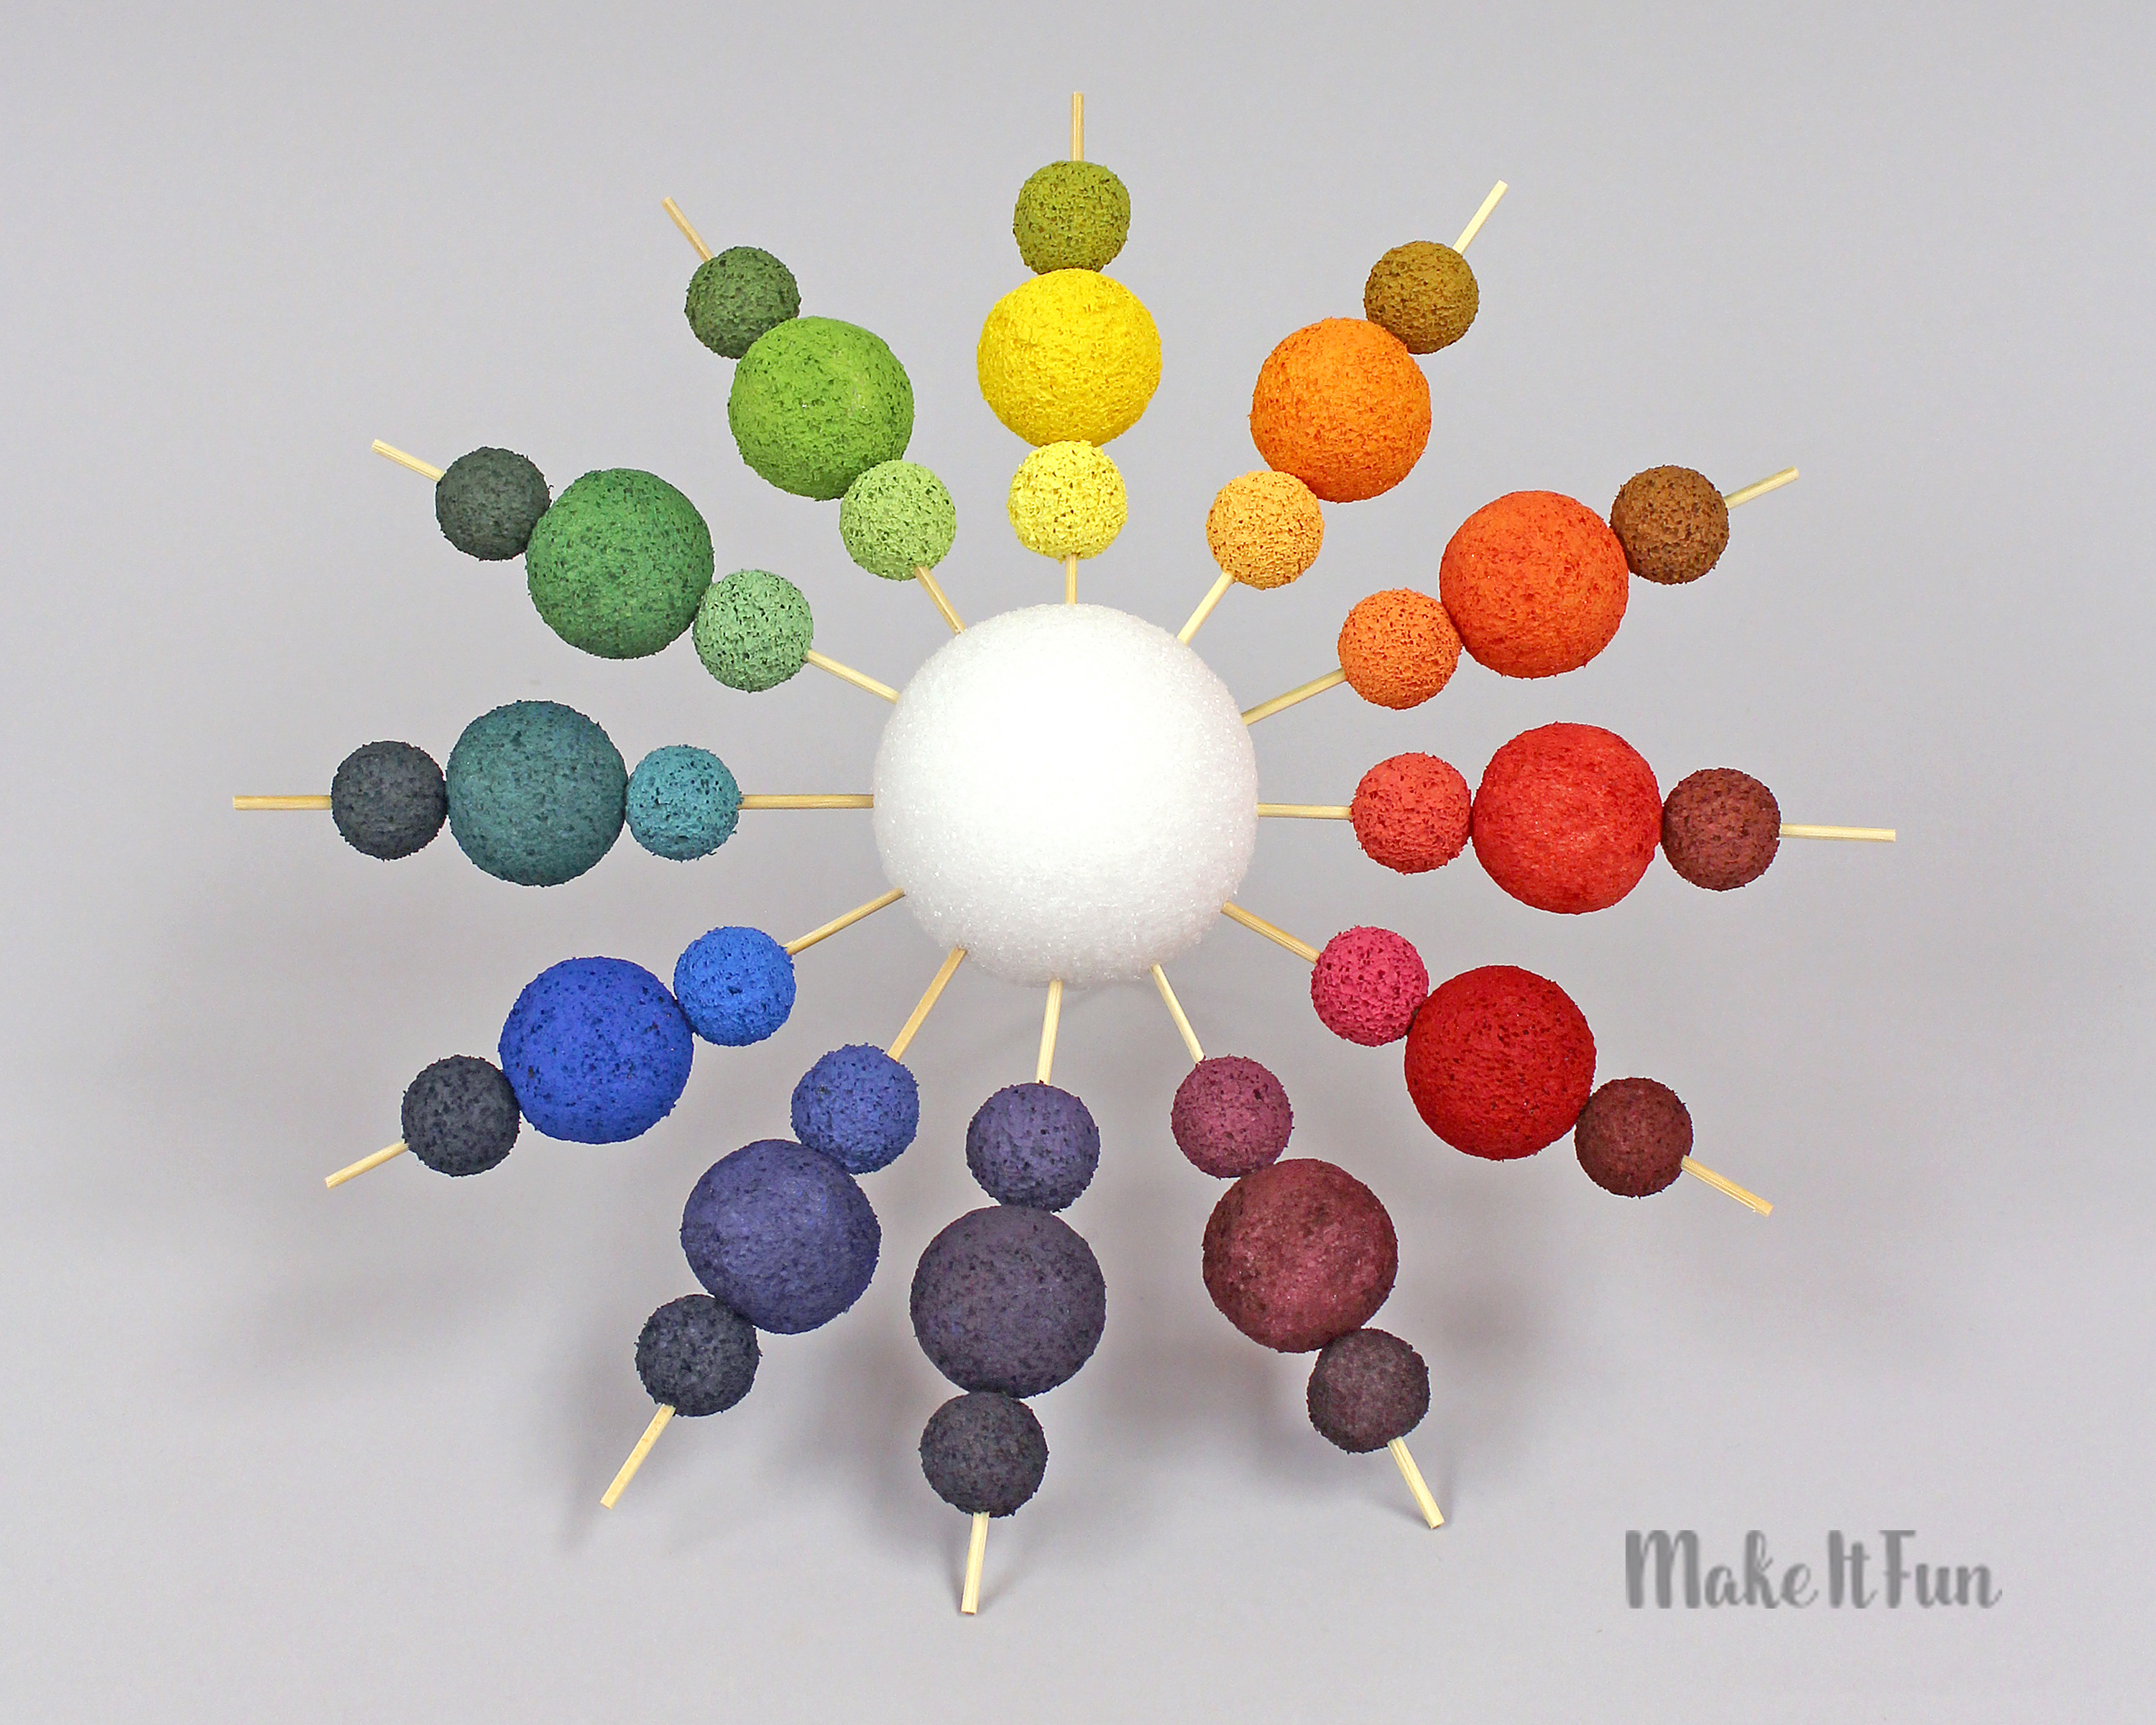
The three primary colors (yellow, red, and blue) are used to mix the three secondary colors (orange, violet, and green). Then, the six intermediate colors (yellow orange, red orange, red violet, blue violet, blue green, and yellow green) are made by mixing one primary and one secondary.
Optional: Instructions are included for making tints (by adding white) and shades (by adding black) to each of the twelve colors. Also, making the stand is optional, but it does allow color spinning, which students enjoy. Before starting, read through all instructions and consider the modifications in the Tips & Ideas at the end.
Plan for two class sessions with drying time in between them.
Before working with the child
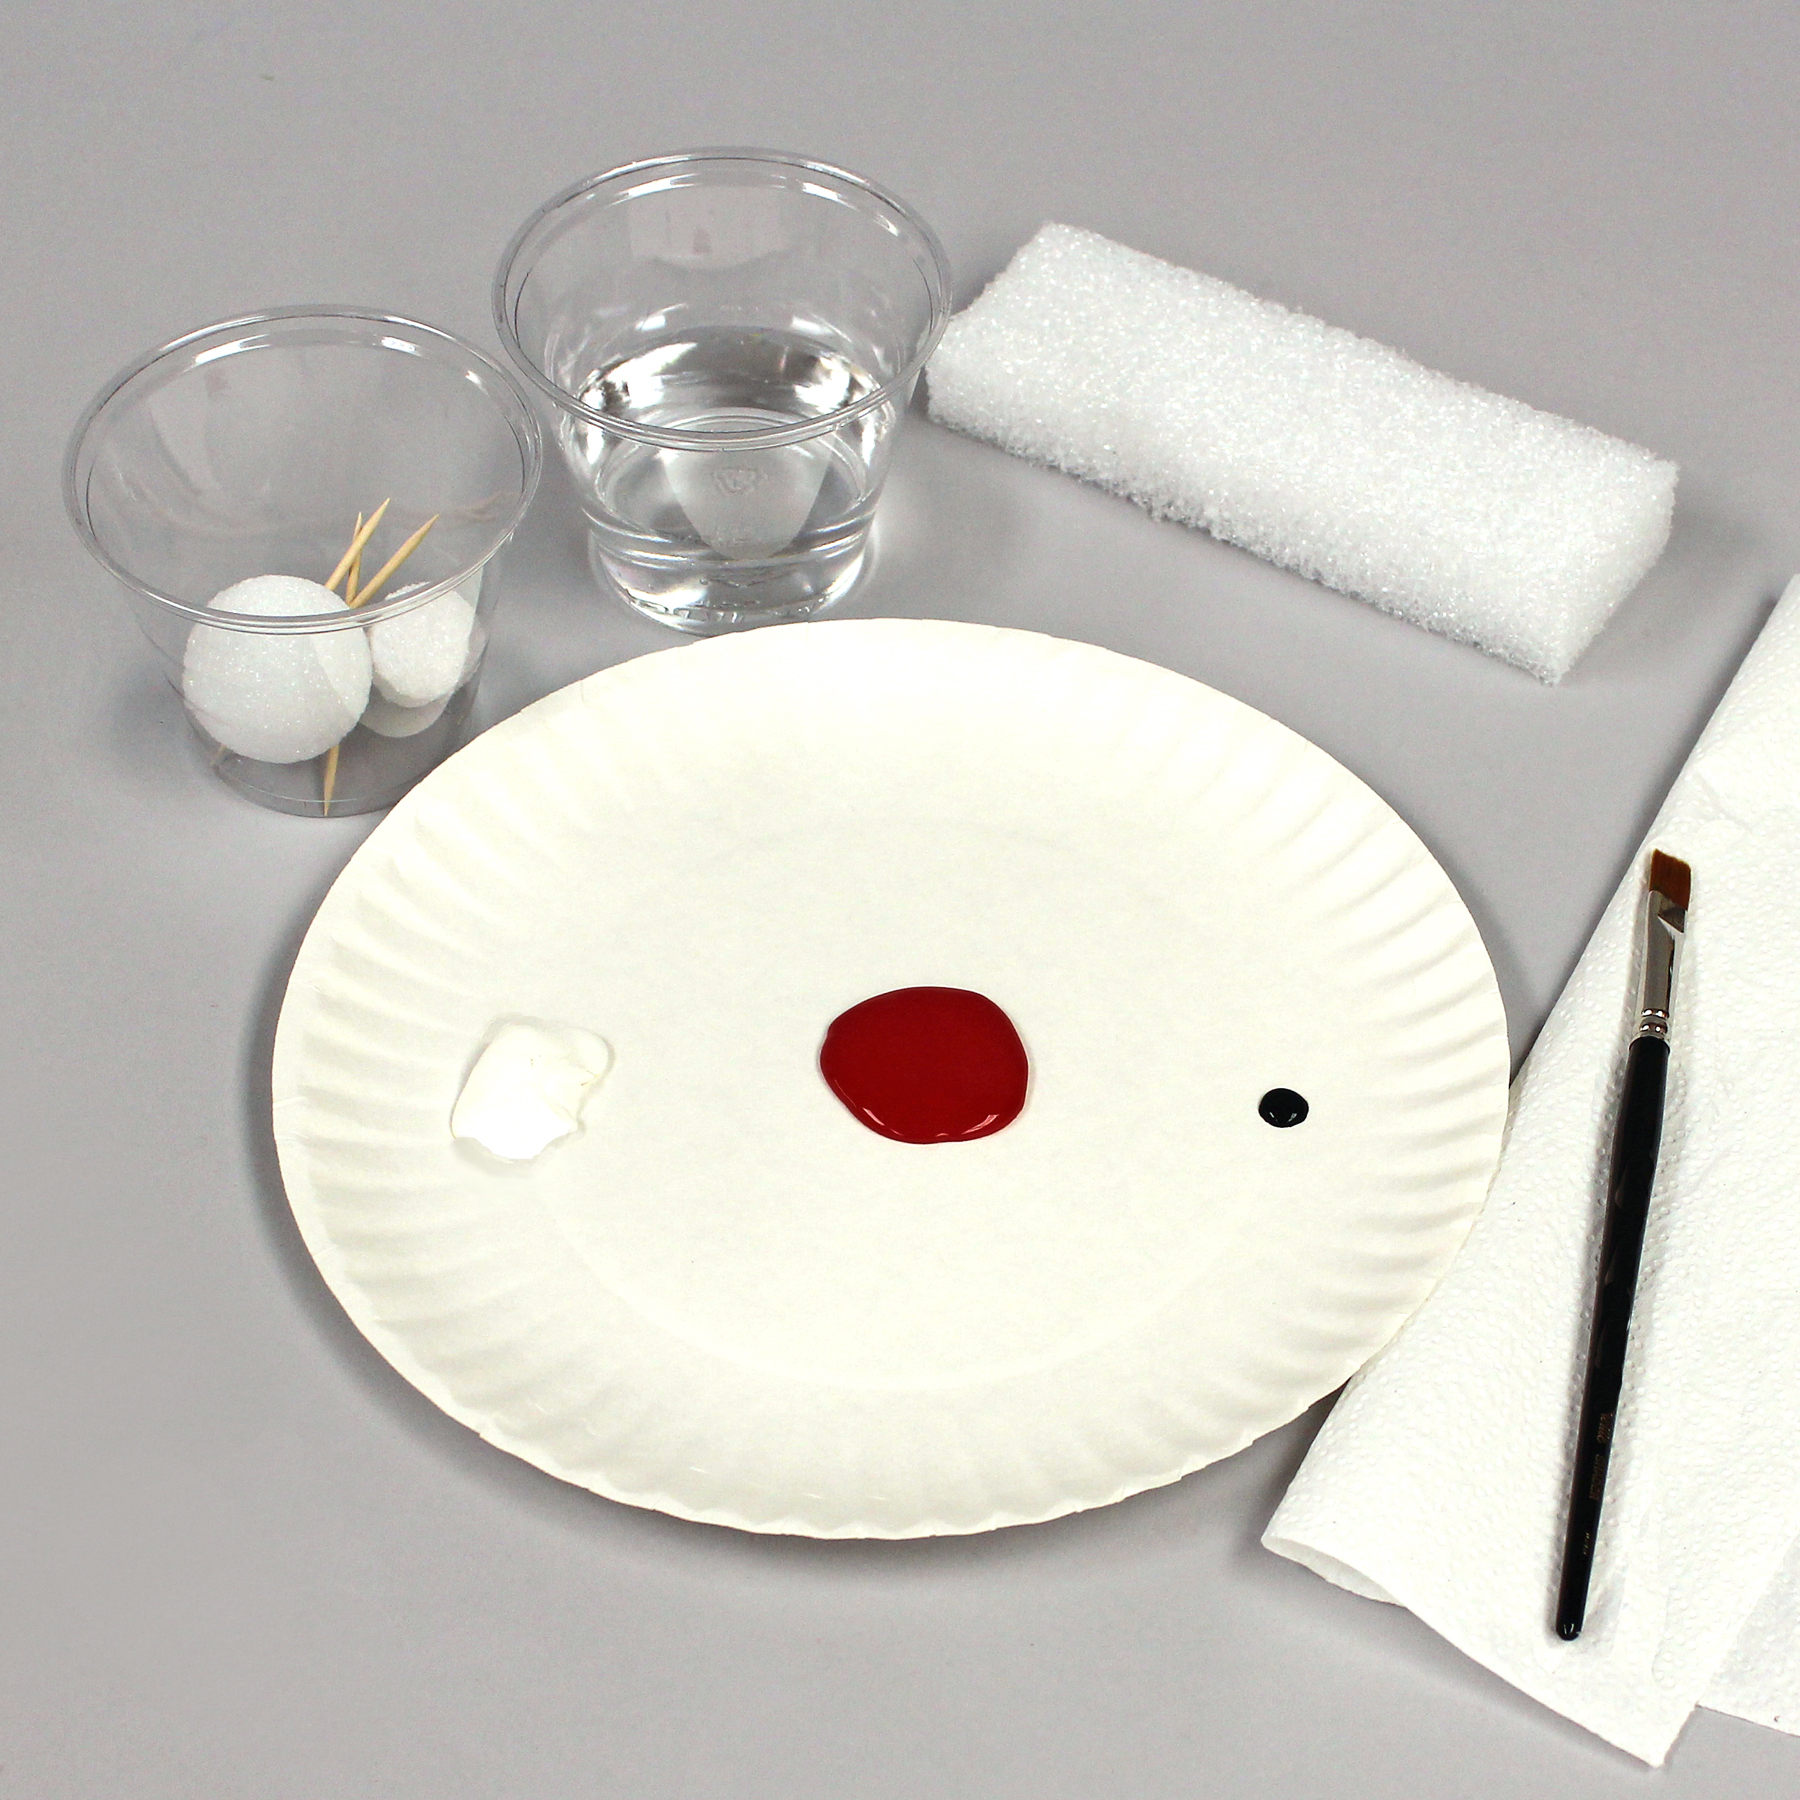
Open the packages of foam balls. Put two 1″ and one 1-1/2″ balls in one plastic cup.
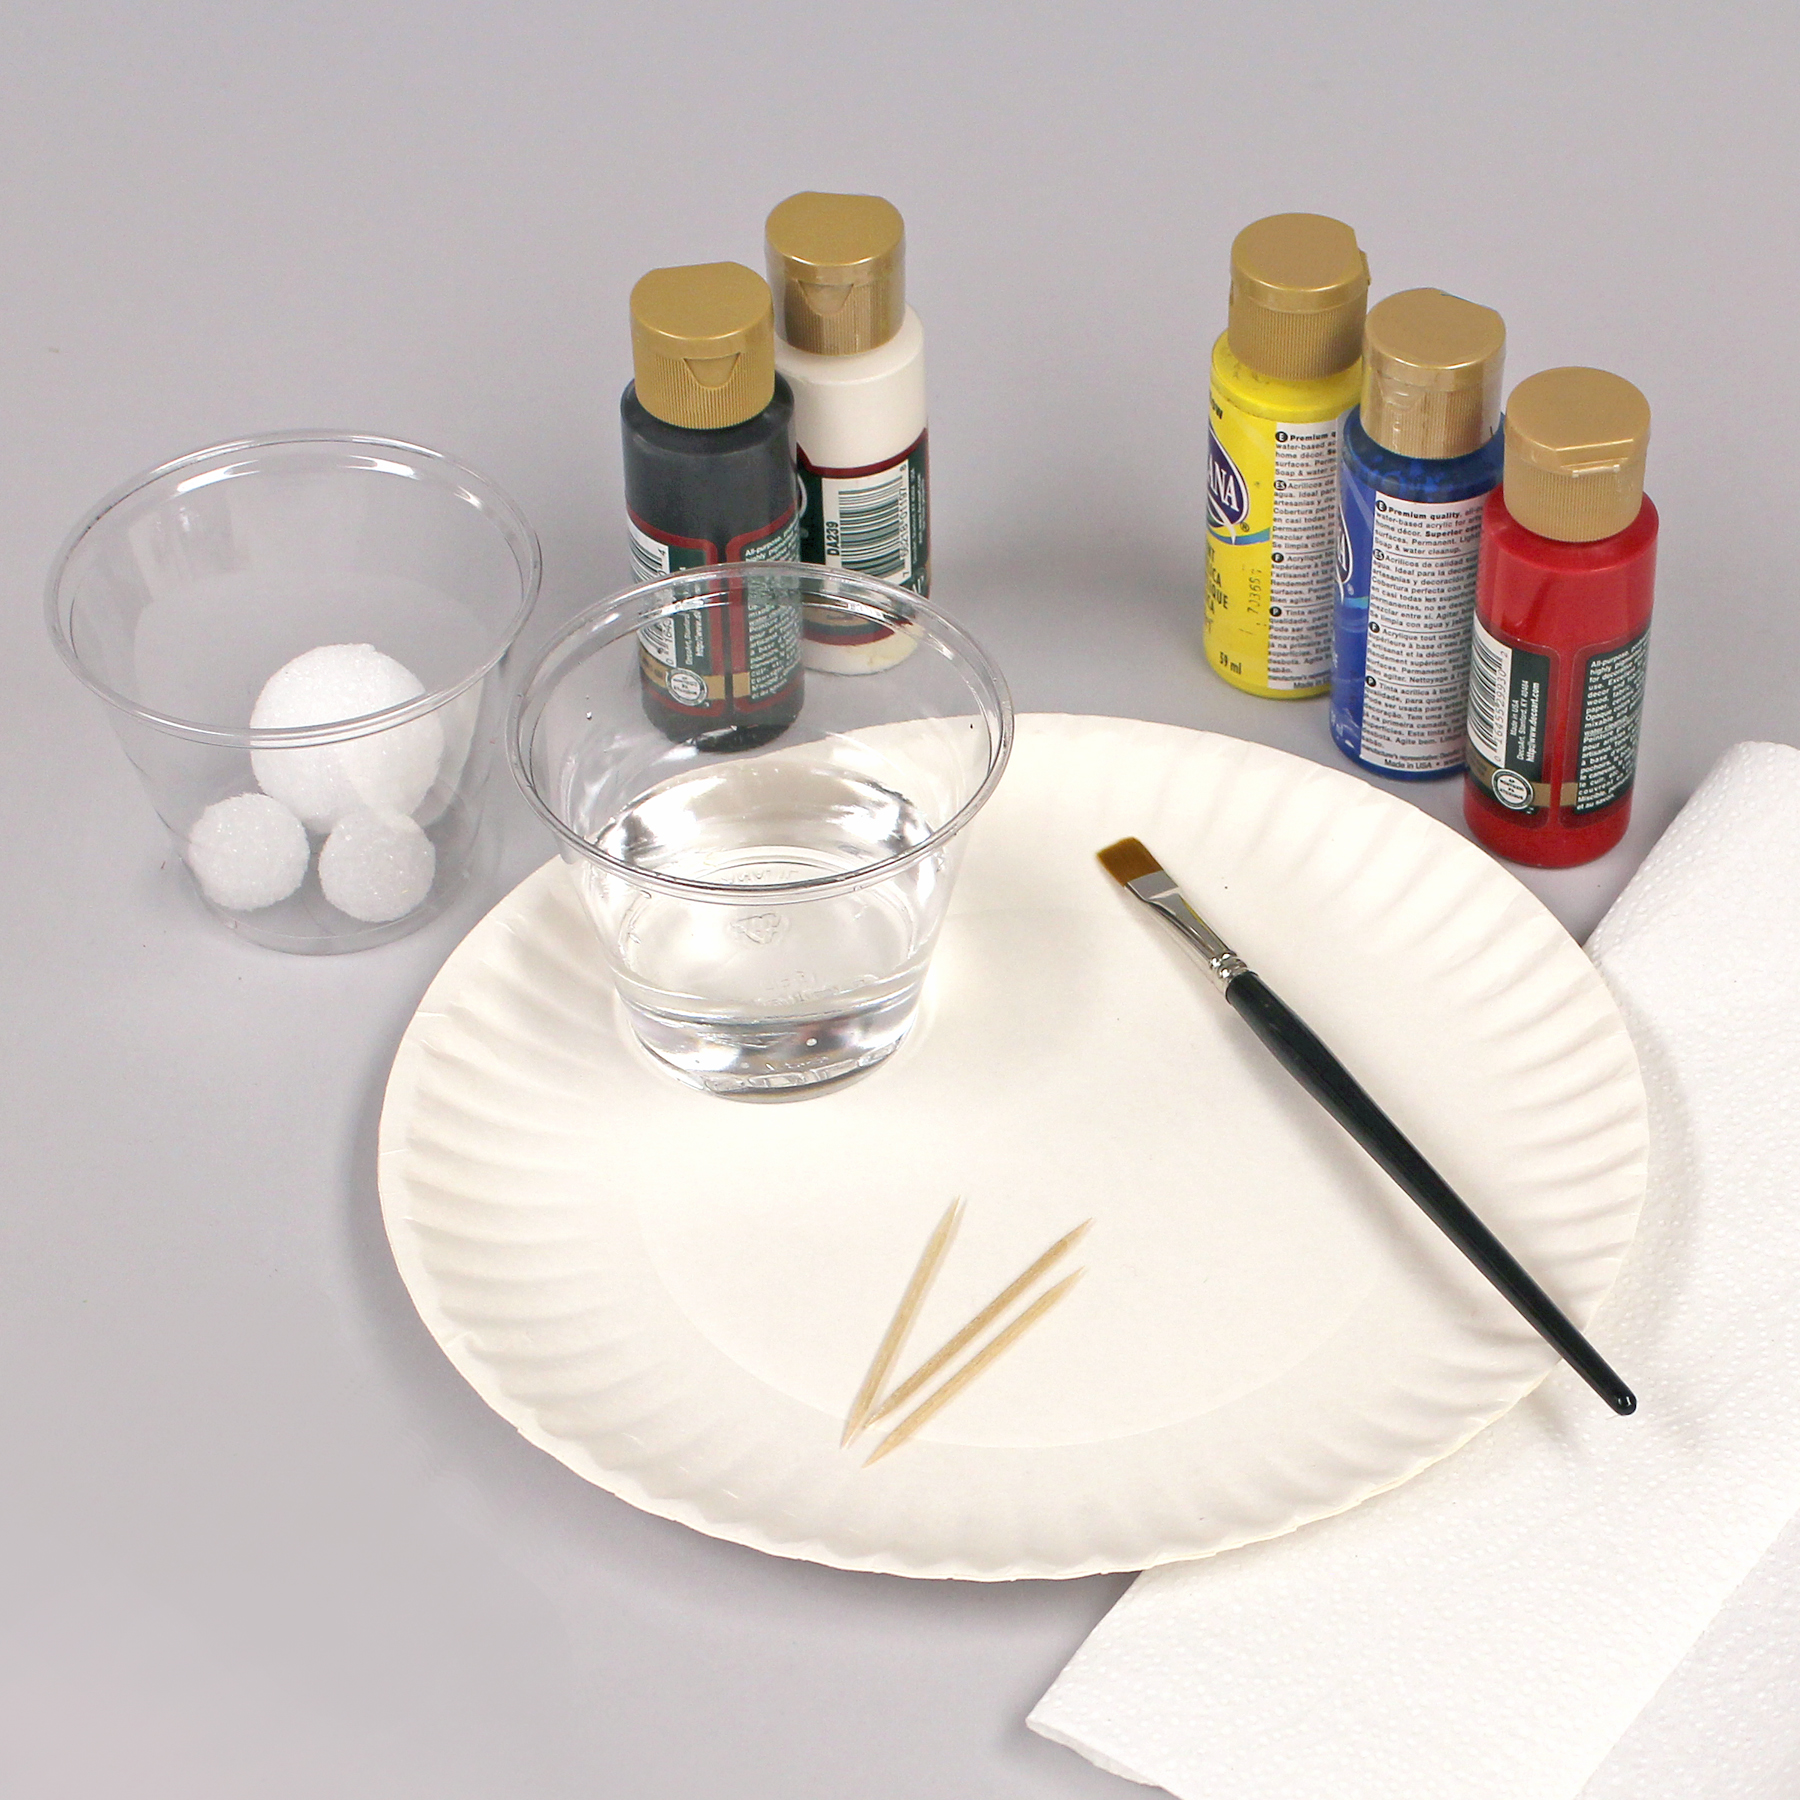
(Optional) Cover painting area with newspapers or plastic tablecloth. Then, assemble paint bottles, cup of foam balls, cup of water, one paper plate, toothpicks, drying foam scrap, paintbrush, paper towel and wet wipes.
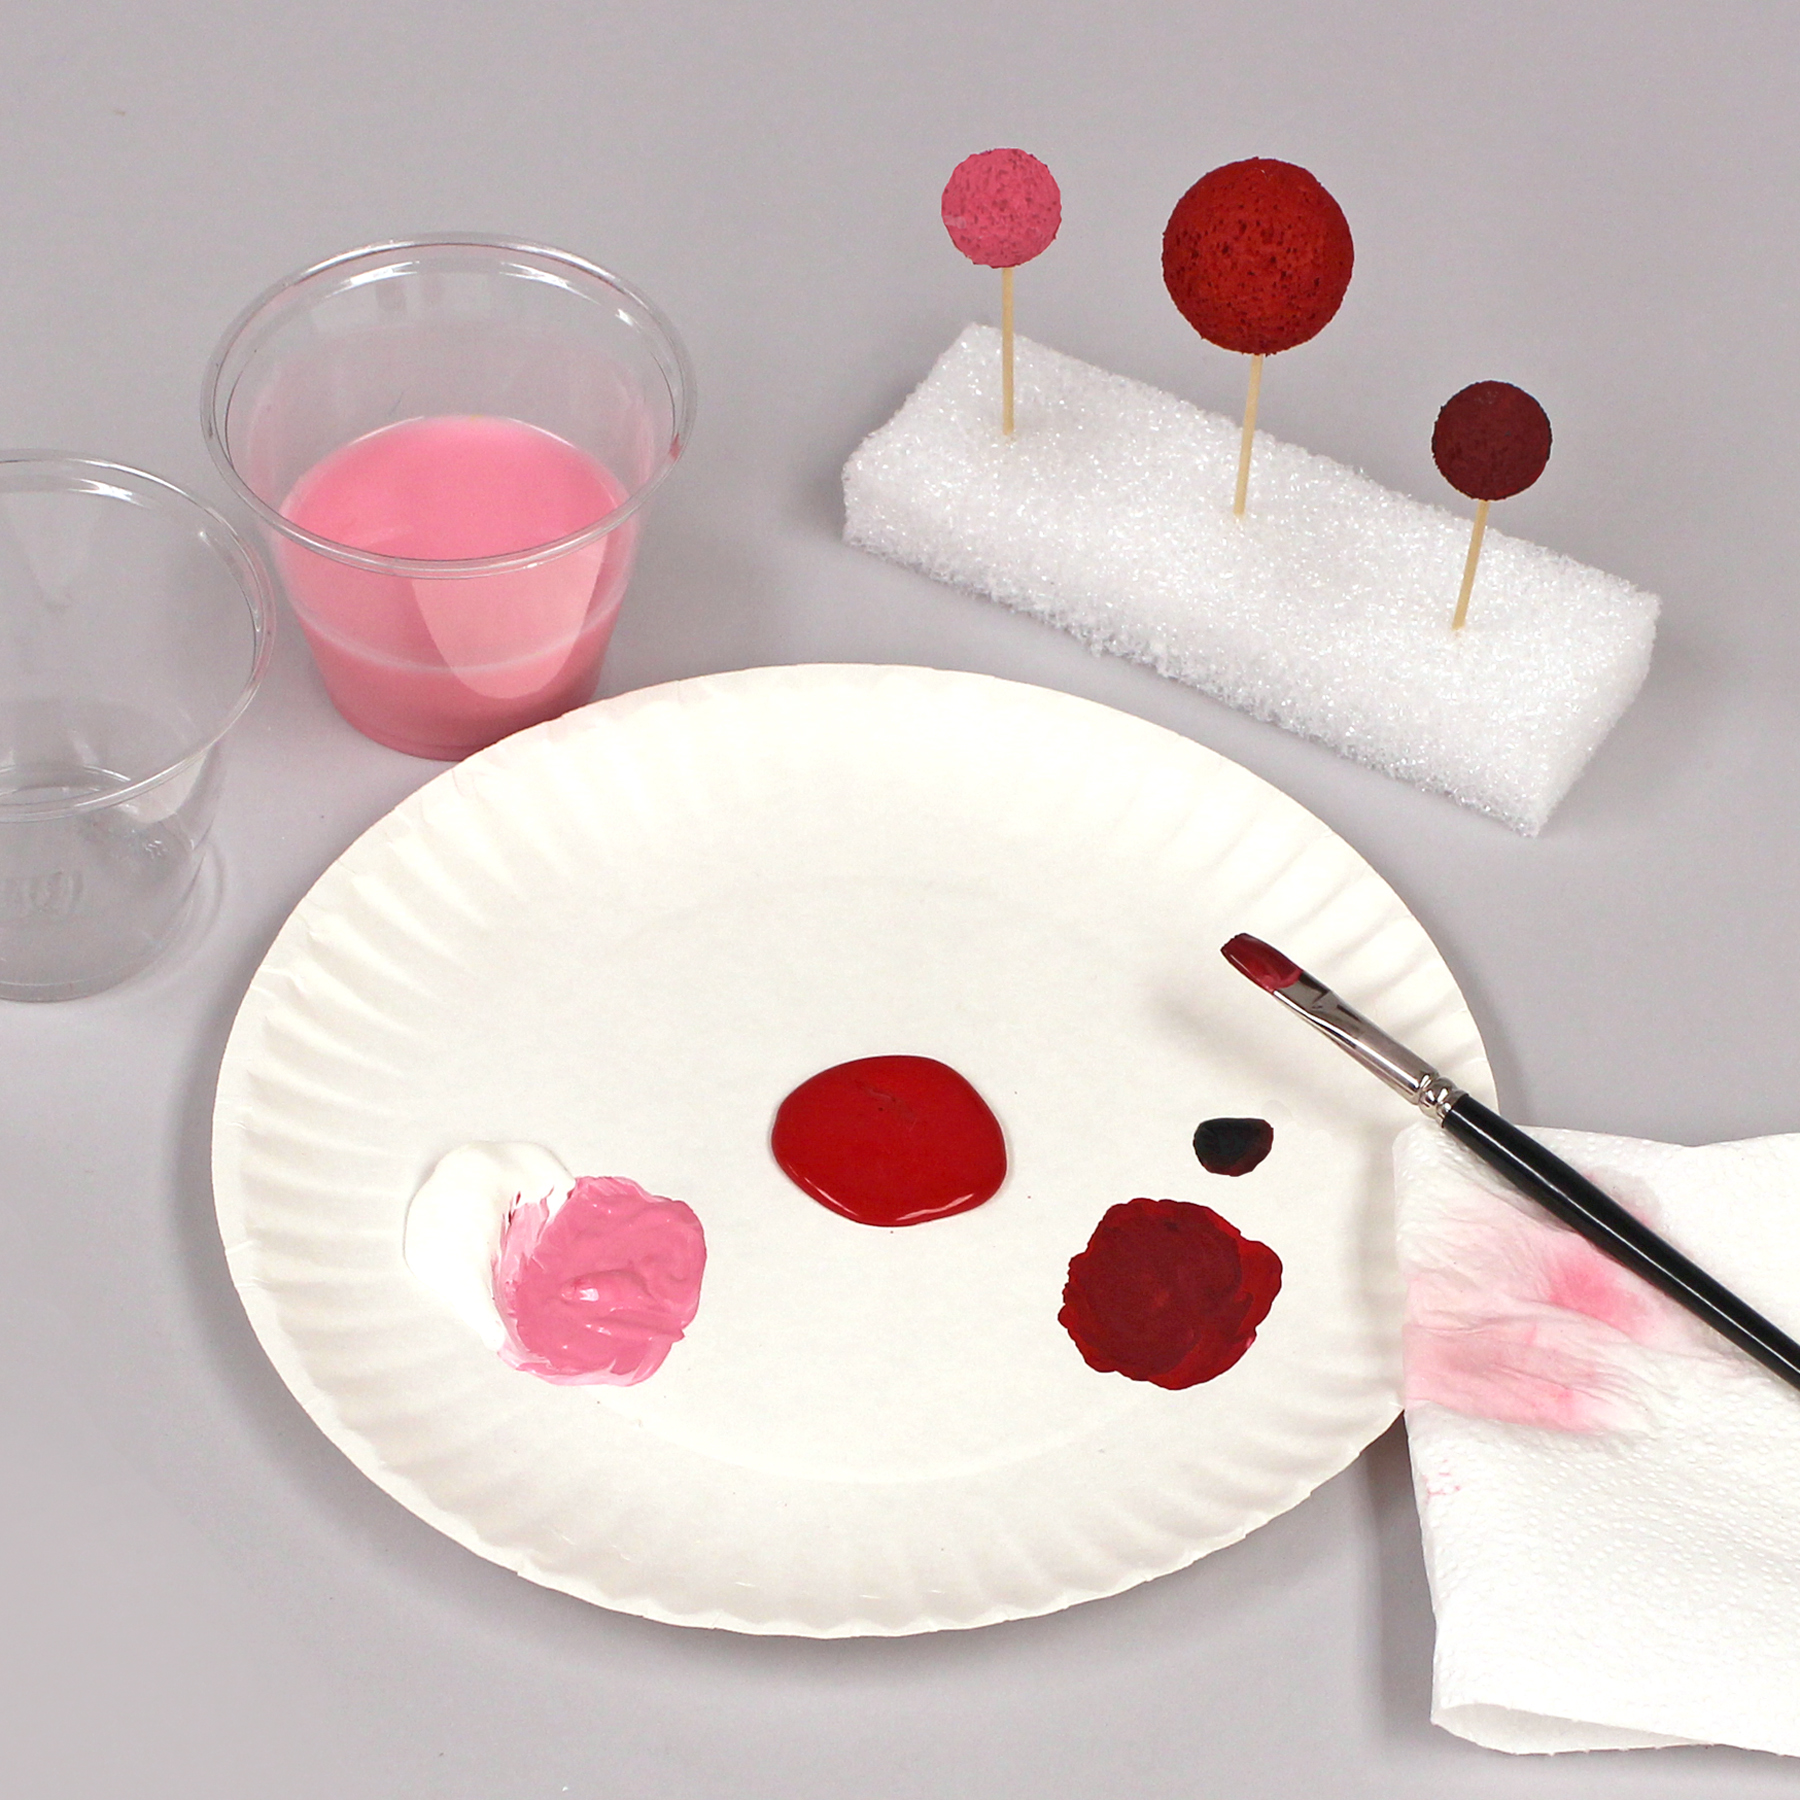
Just before you begin, squeeze about 1-1/4″ diameter circle of red (primary color) paint into the center of the plate. Add a 3/4″ diameter circle of white paint onto the far left side of the plate. Add a 1/4″ diameter dot of black paint onto the far right side of the plate.
Do this part with the child
Mixing and Painting
Have the child put on their apron and roll up their sleeves, explaining that this paint will not wash out of clothes. Review the three primary colors, how to mix the three secondary colors and the intermediate colors.
Explain that there are three primary colors and the first one they can paint is red. Show them how to pinch the ball and paint all around their fingers. Then, still firmly holding the ball with one hand, insert a toothpick (about 1/2″) into it with the other hand. Finish painting the ball, put the paintbrush onto the plate (not into the water) and insert the toothpick and ball into the drying foam. (Note: If the paint seems thick when applying, dip the brush in water to slightly thin.)
Have the child take the same paintbrush and pull half of the white paint away from the white puddle on the plate. (Explain that they want to keep their primary color, white and black as pure as possible.)
Without adding any primary color, mix with the brush. Explain that it takes very little primary color to make white turn into the tint. Discuss that there are hundreds of values of a tint, but that you’d like them to find a tint that is a medium value – not too light or too dark. Show how to make the color more intense or less intense by adding white or a very small dot of primary color. Paint a small ball, insert a toothpick and set it in the drying foam.
Wash the brush in the water, explaining that they should start with the white because their water will get too dirty if they start with black. Gently dry it off on a paper towel and rewash a couple of times.
With the clean, fairly dry brush, pull a little of the primary color over to the right, near the black dot. Take the smallest amount of black by dipping only the tip of the bristles in and mix in the new paint area. Remind the child not to mix the black with the white or the tints and shades. Paint the last foam ball, insert a toothpick and put it into the drying foam.
Repeat the same process with the other two primary colors: Yellow and blue.
You may want to take a break here, and continue later.
To make one secondary and the adjacent intermediate colors (and their tints and shades) at the same time, make three identical plates and place them in triangle formation. The top plate will be the secondary color plate. Pull most of the yellow into the center and add just a little bit of red to make orange. Adjust the color as needed to get orange and then have the child paint a large ball that color.
With the left plate show them how to pull yellow into the center and add a little more red to this one to get red-orange and they can paint a large ball that color. With the right plate show them how to pull all of their yellow to the center and use the smallest amount of red possible to make yellow-orange and paint a large ball that color.
Help them use what is left of their center mixtures of paint to mix the tints and shades. (If they run out of that center mixture, they need to mix more and be sure to duplicate the color.) Help the child create rows on the foam block, to keep the tint and shade foam balls in line with their main color balls, so that they don’t get confused as to which ones go together.
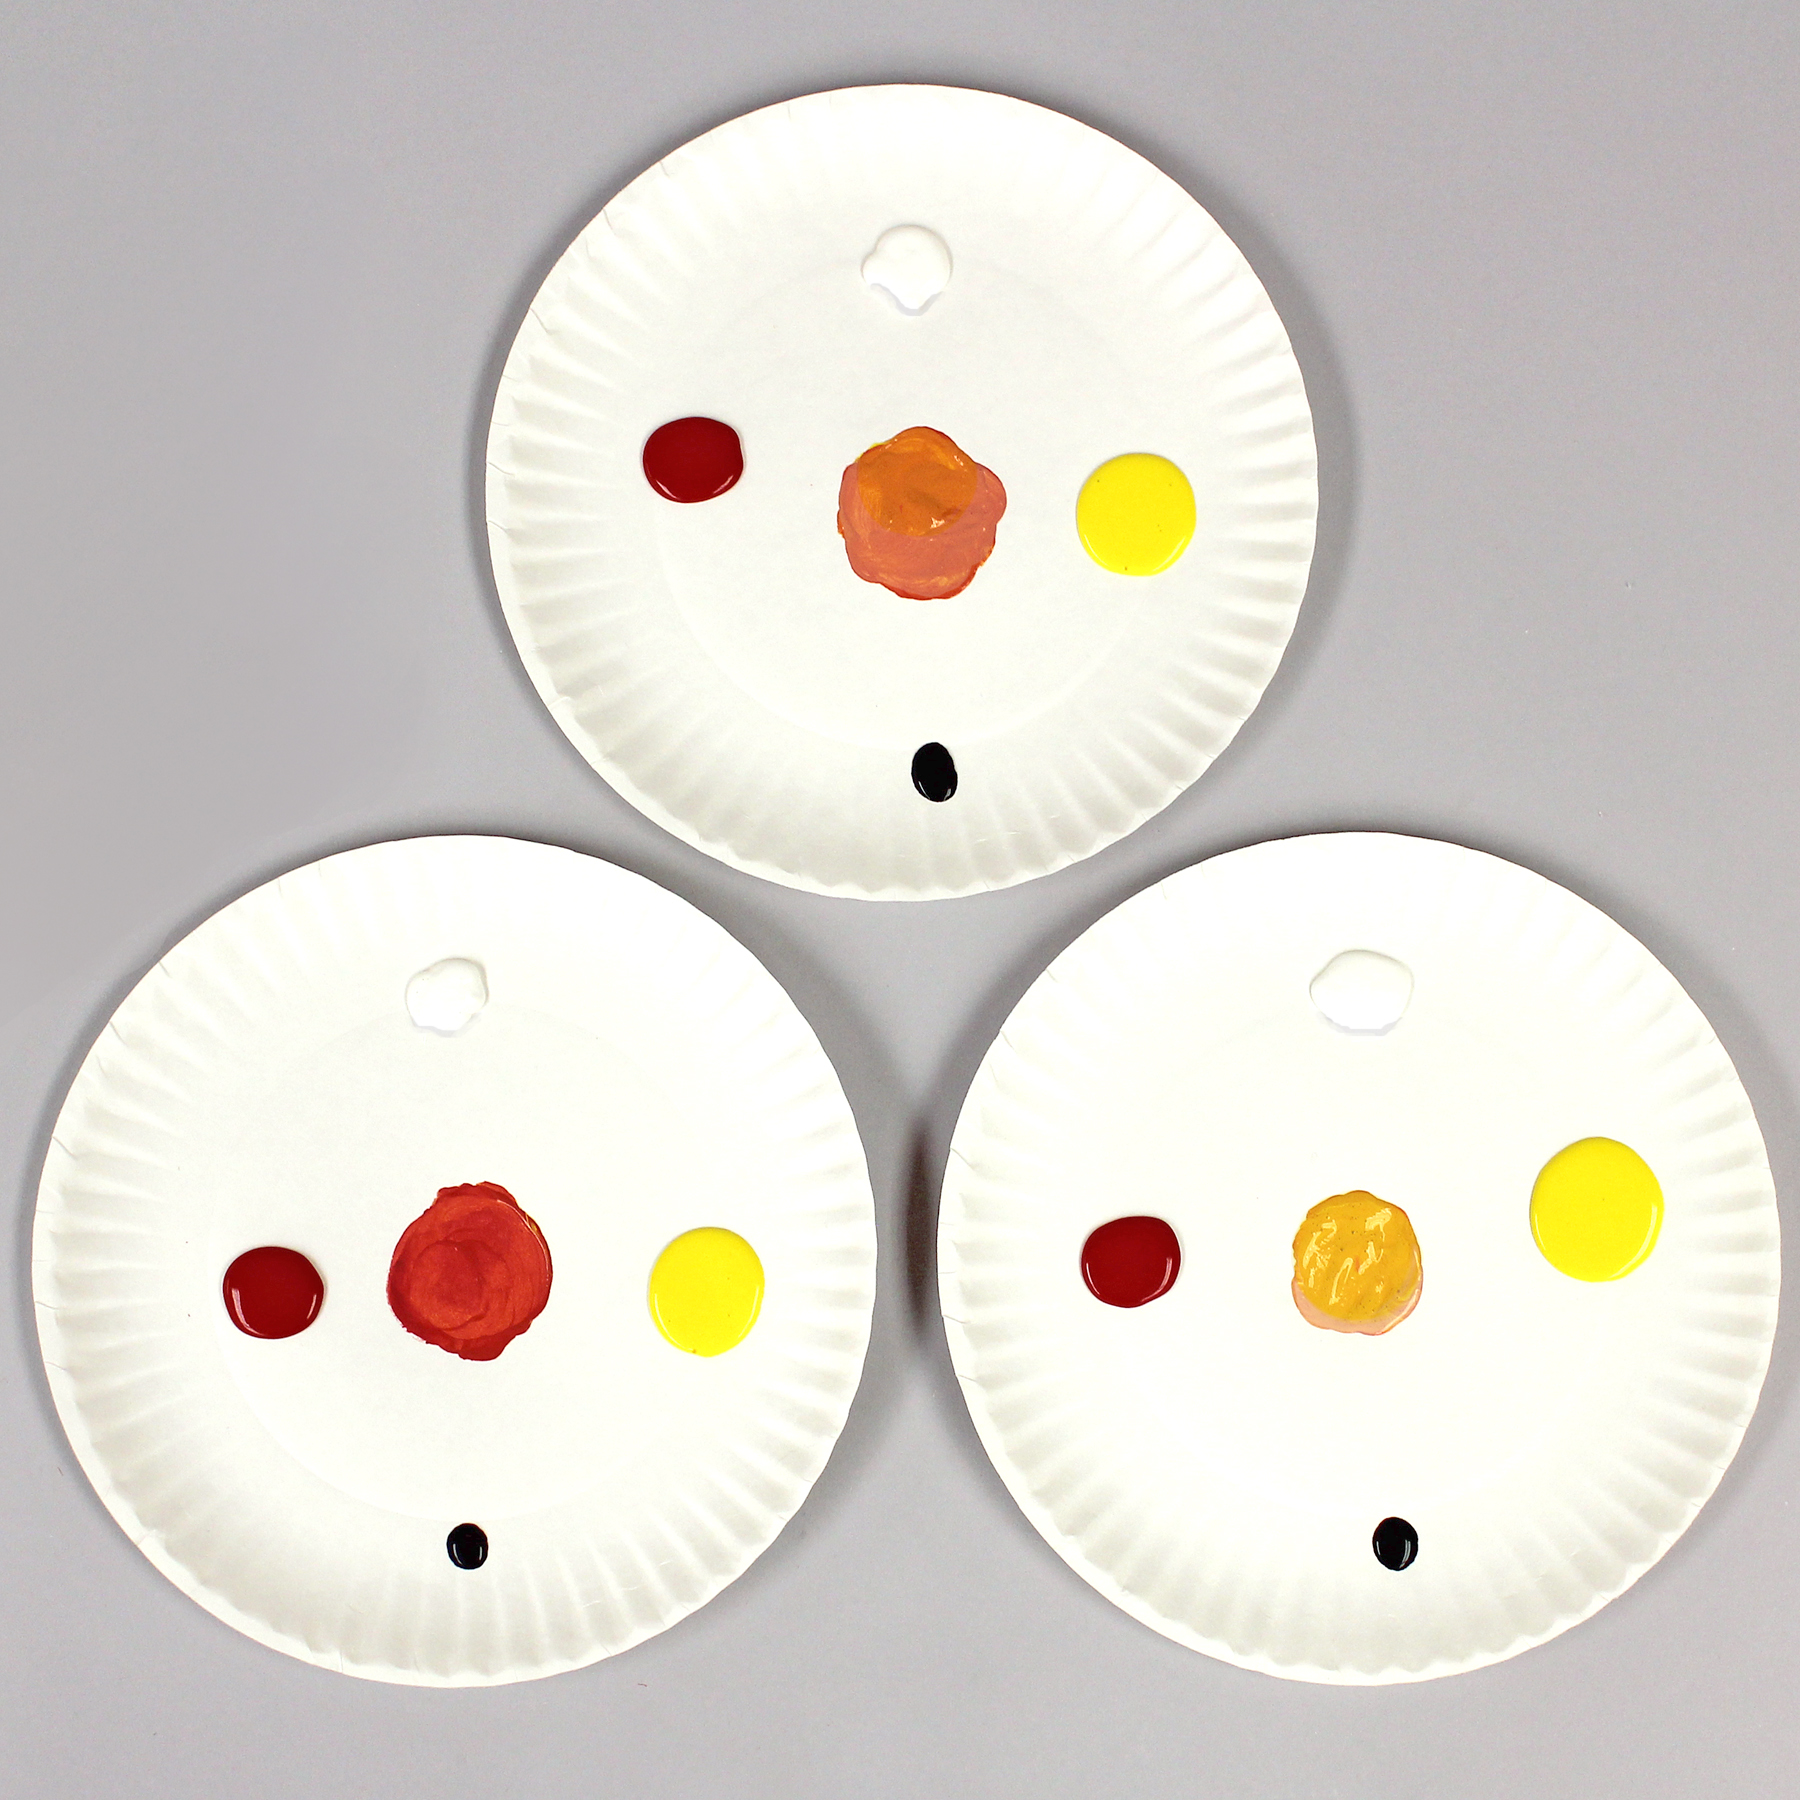
Repeat this three-plate process with another secondary color, Green and the Intermediate colors, Blue-green and Yellow-green.
Repeat this three-plate process with the third secondary color, Violet and the Intermediate colors, Red-violet and Blue-violet.
Let all the painted foam balls dry overnight.
Next Session
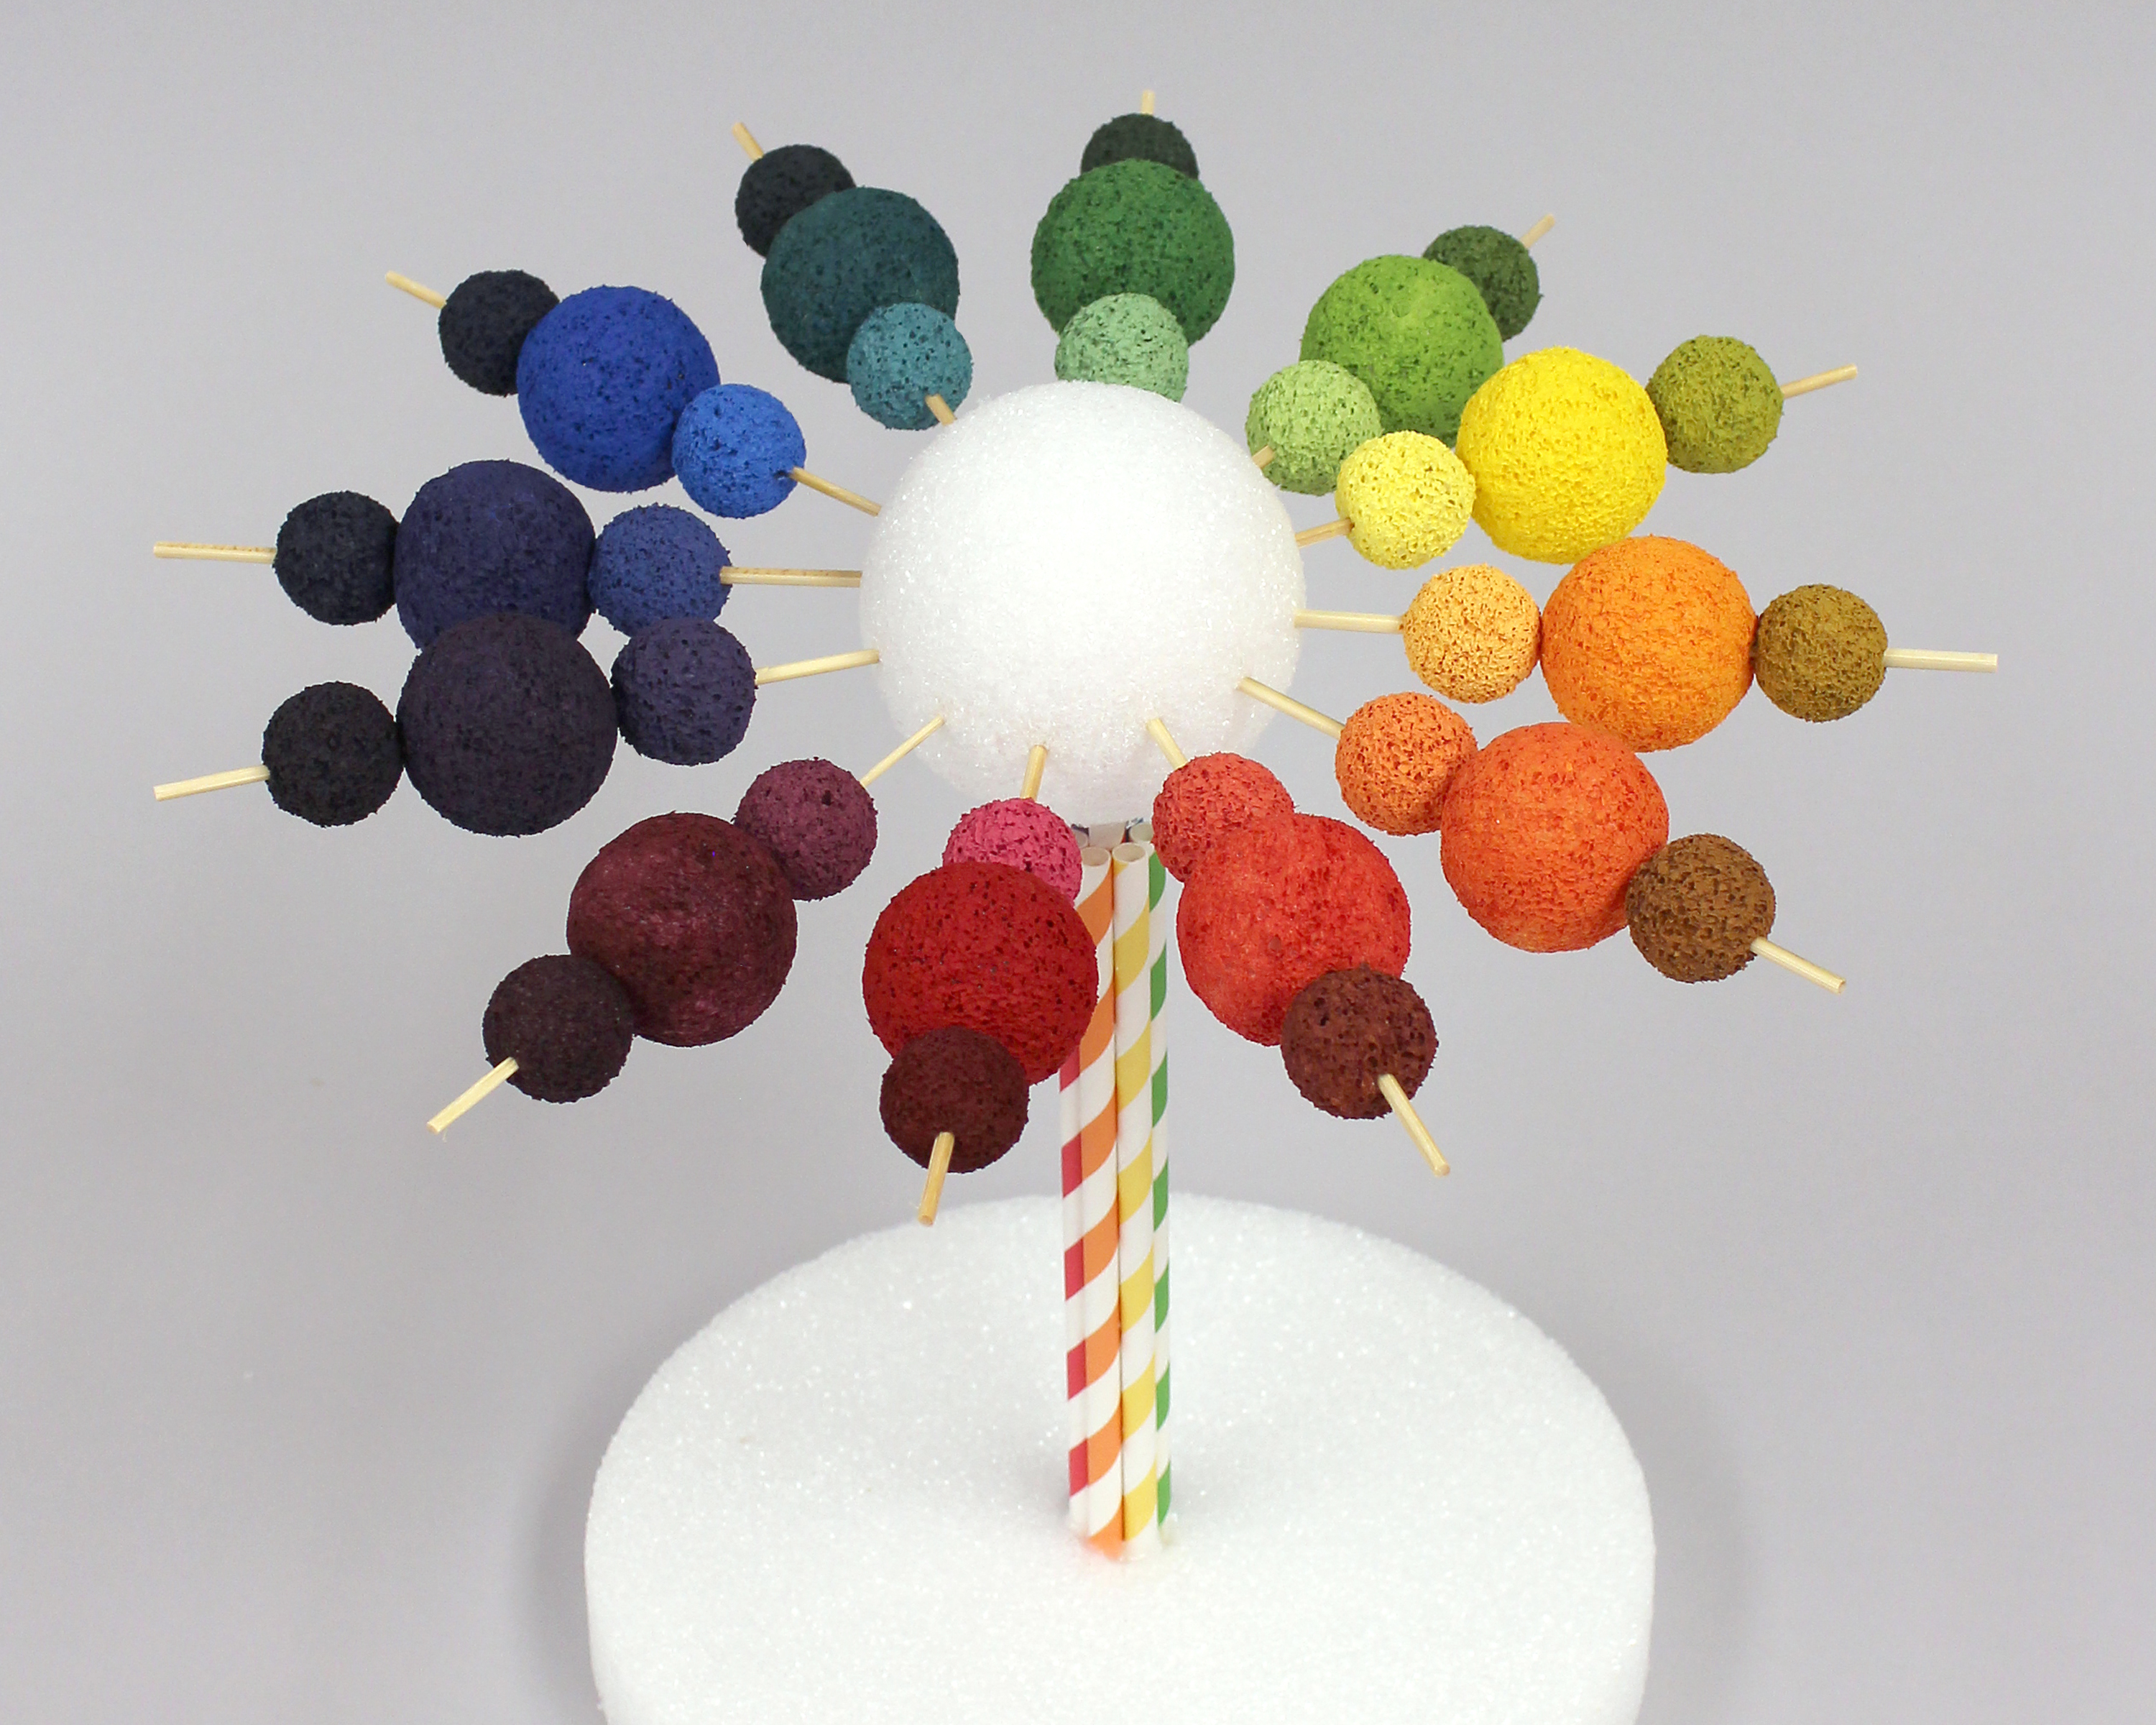
Threading onto skewers
Leaving the foam balls in their rows on the drying foam, remove only the red ball and its tint and shade balls. Demonstrate how to hold a skewer close to its point and pinch the shade ball pinched between your fingers as you gently twist it straight through the center of the foam ball. Caution the child not to stab or to have their hand holding the ball so that they are poked. Push the shade ball back, about 1″ from the end.
Similarly, have them add to the same skewer, the larger-main-color foam ball and last the tint foam ball.
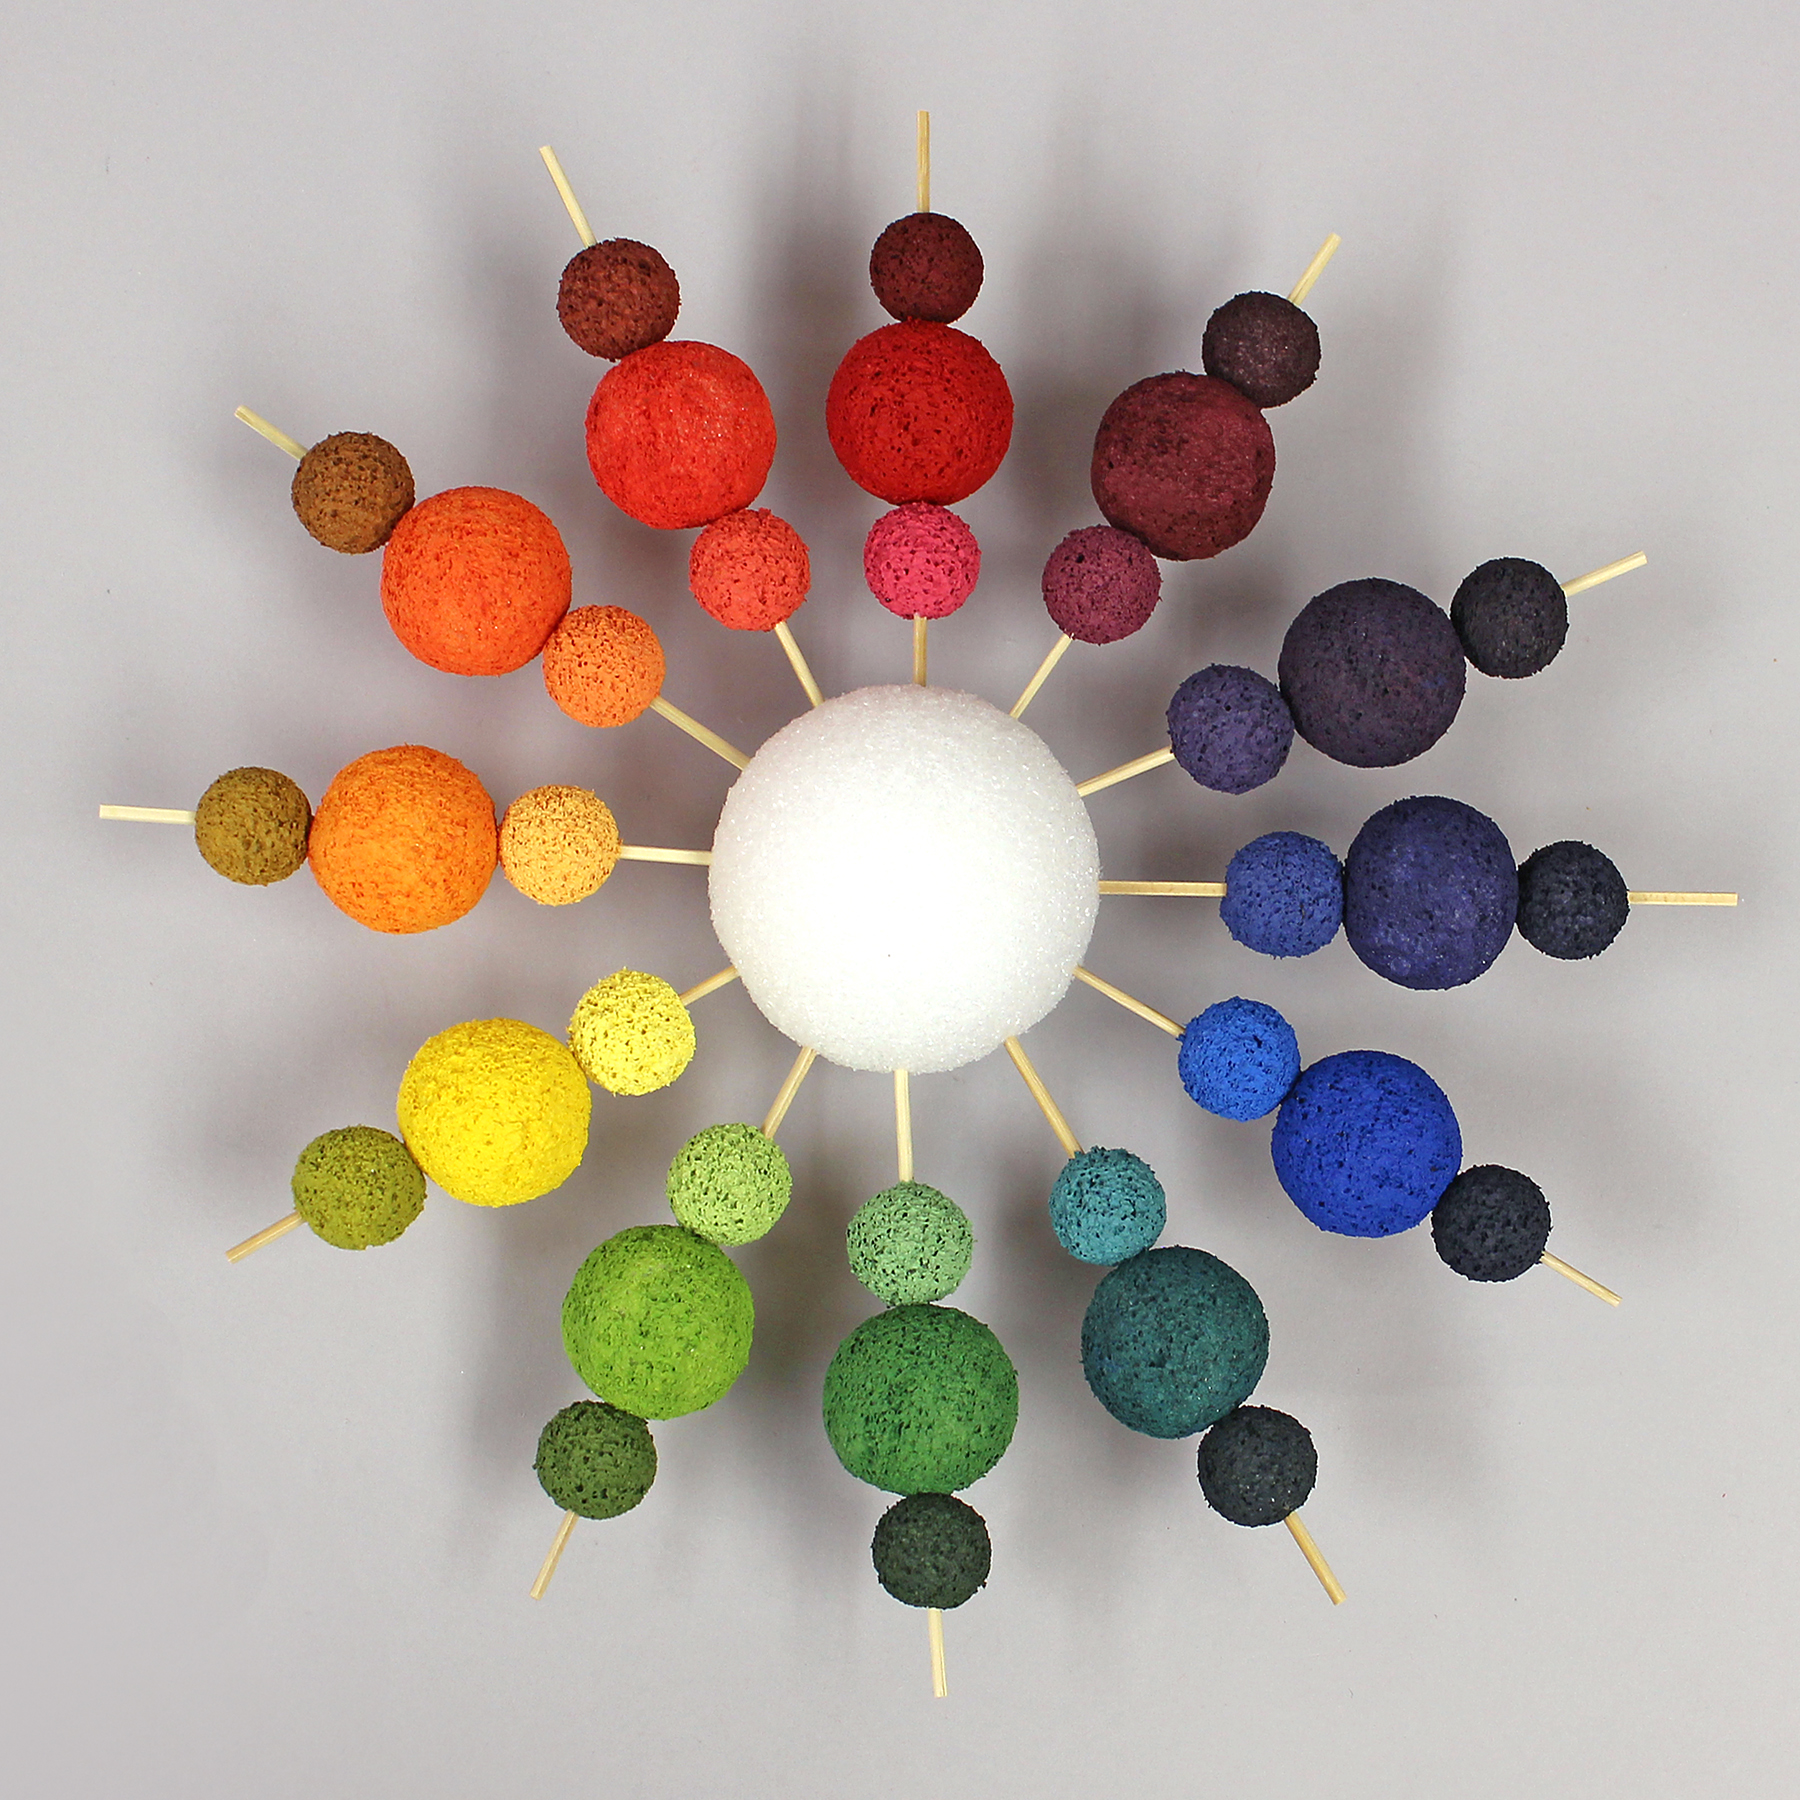
Doing one set of three balls at a time, repeat with all twelve color sets. (Double check to be sure that the tints are all on the inside and the shades are all on the outside.)
Assembling color burst
Explain to the child that the color burst can be assembled like the numbers on a clock. Help them insert the primary color skewered foam balls into the 3″ foam ball with the red at 12:00, blue at 4:00 and yellow at 8:00. Then, insert the correct secondary colors in between each of the primary at 2:00, 6:00 and 10:00. Last, insert the correct intermediate colors in between each primary and secondary (1:00, 3:00, 5:00, 7:00, 9:00 and 11:00).
Spinner Stand (Optional)
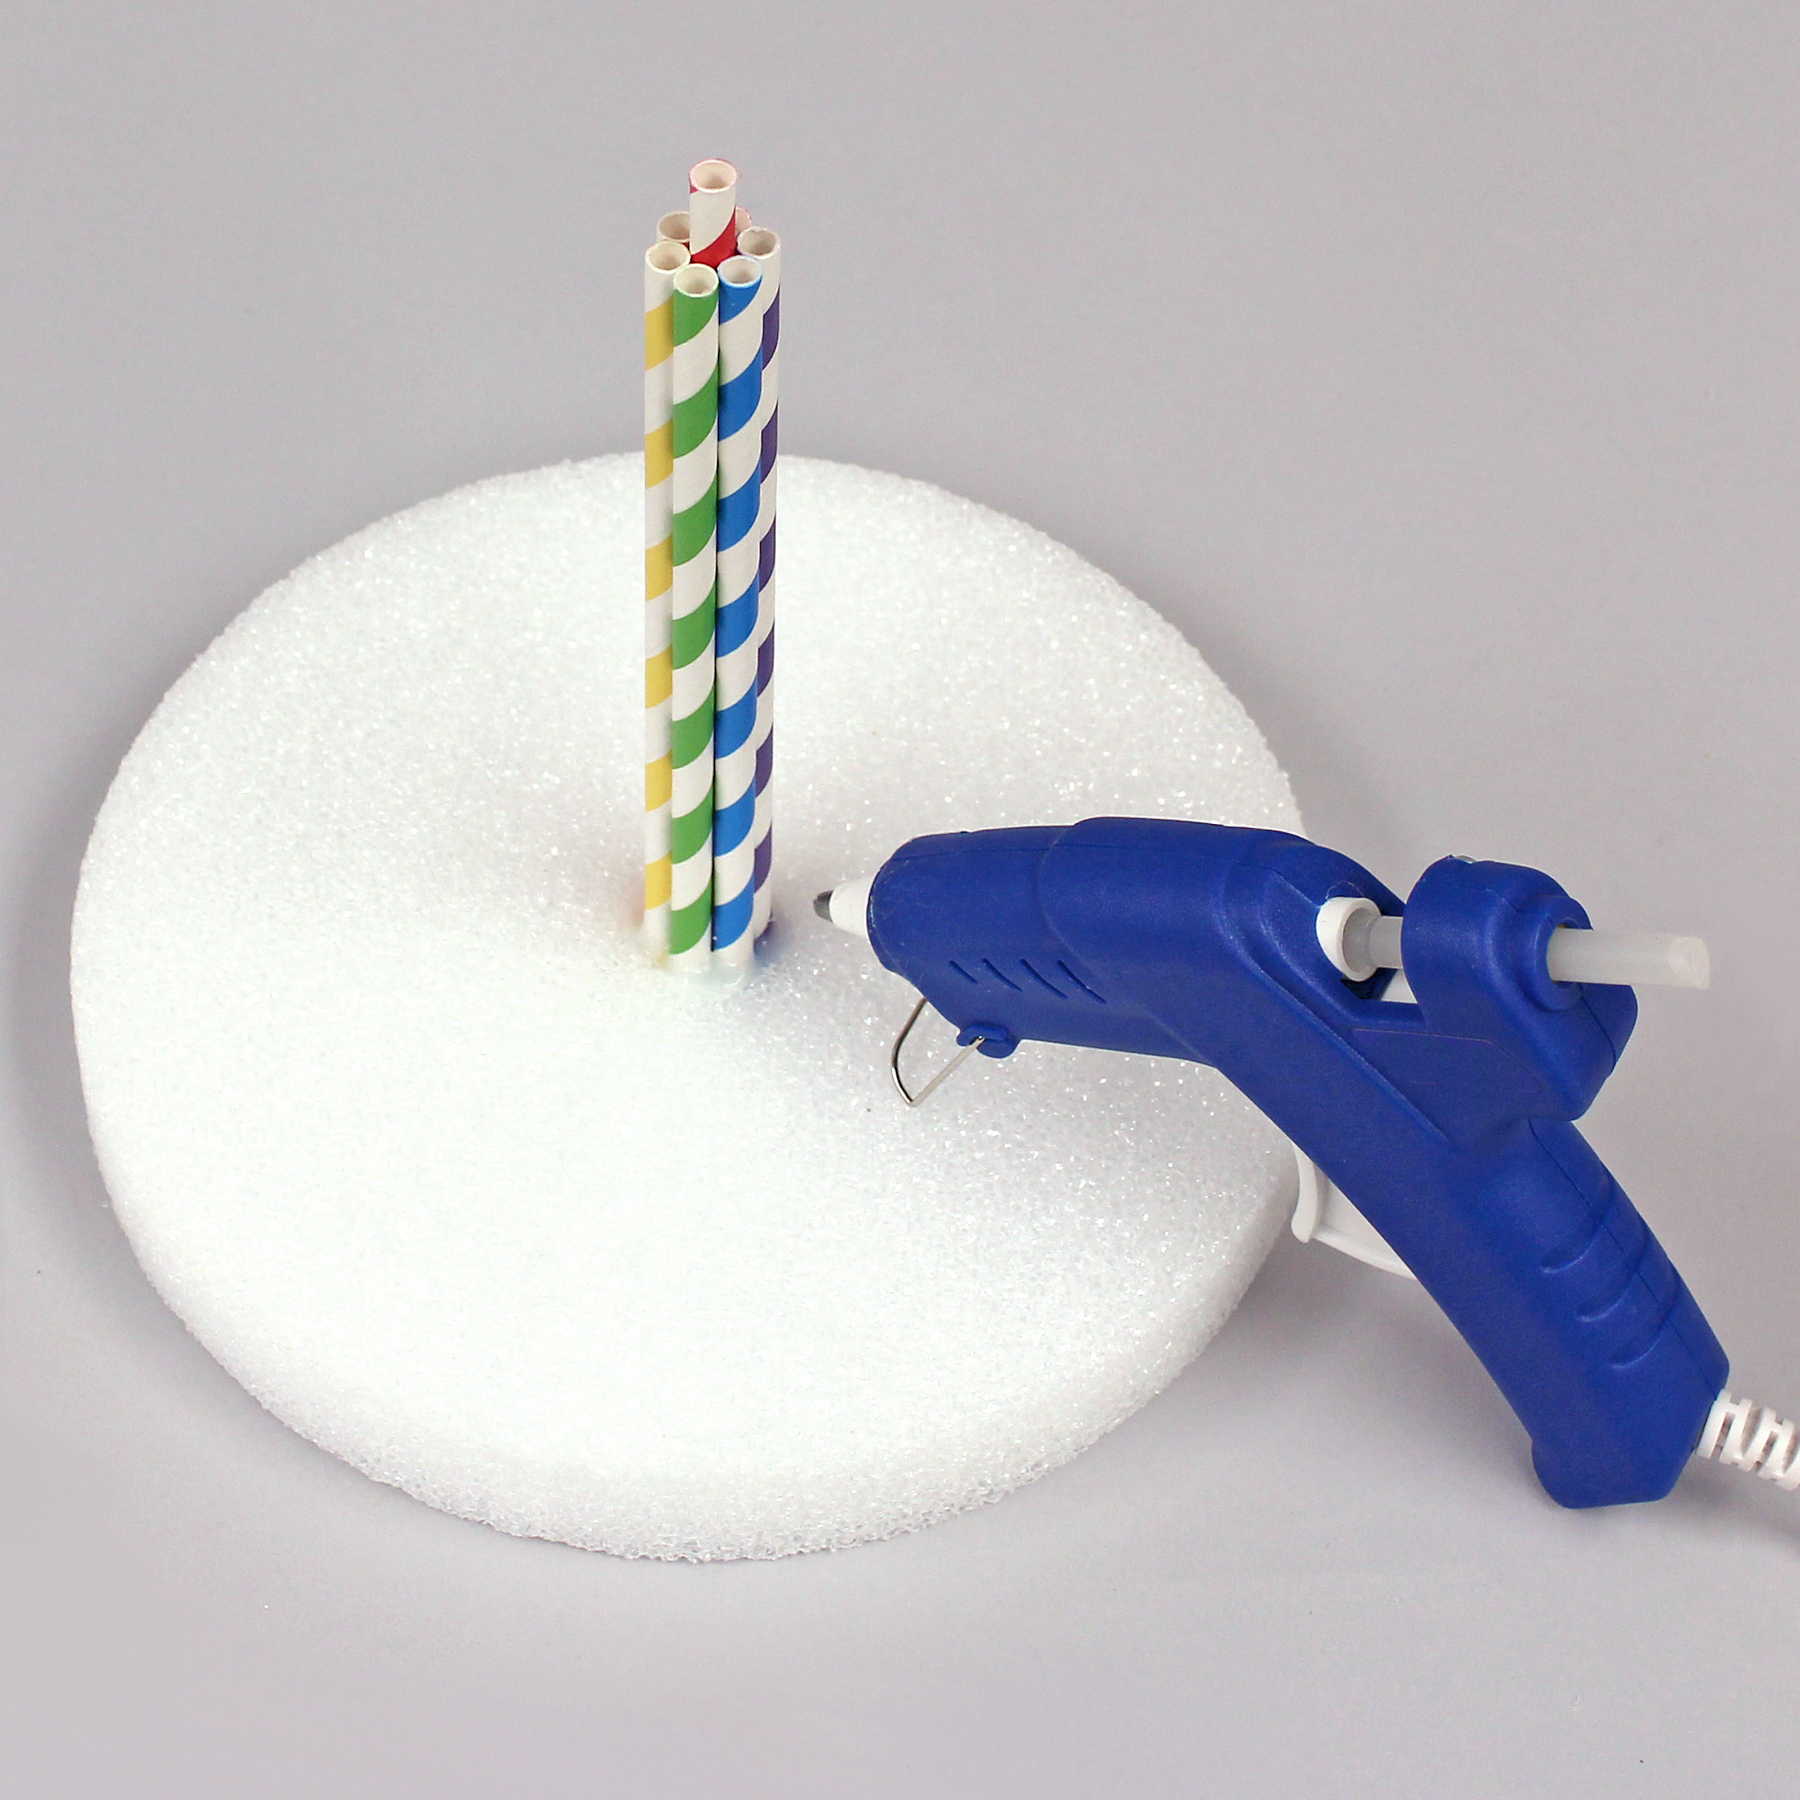
If desired, you can quickly make a stand that allows the child to spin the color burst. Select seven same-length straws. Trim 1/2″ off six of them. Gather them around the long straw in the center and glue, making sure that the bottoms of the straws are aligned.
Measure and mark the center of the foam disc. Use the serrated knife to scoop out a 3/4″ diameter hole (going all the way through) that is just large enough to tightly hold the group of straws. Insert the straws to check the fit and make sure that it’s straight up and down.
Remove the straws, apply glue down into the foam and re-insert the straws, aligned with the bottom of the disc, making sure that the disc will set flat on the table. Add additional glue on the bottom and around the straws on the top surface to firmly secure.
With the color burst parallel with the table, insert one skewer underneath the center foam ball. (Be sure that it goes straight into the ball about 2″. Then set the skewer in the taller center straw of the spinner stand. To spin, hold center ball with fingers and spin. (Caution the child that it’s not a tornado!)
Tips & Ideas:
To simplify the project:
- Use pre-made secondary color paint, the same way as was explained for the primary colors. Then have the child mix one primary with one secondary to get the intermediate. (That way they don’t have to determine the value of the secondary color.)
- Or… just make a color burst with primary and secondary colors and their tints and shades… or all the colors but no tints and shades. You know the capability, interest and patience level of your child (and you) the best!
To expand the project:
- Purchase longer skewers and mix two or even three shades of tints and shades, expanding into a multiple-session project.
Be sure you use true primary colors – if not, the color mixing results may not be what the child is accustomed to seeing for secondary and intermediate colors. Violet or purple is often difficult to get to look like the “purple” that is in the child’s box of colors.
More…
For more information on this project and other learning activities, click here to visit the Make It: Fun Learning Center.


Leave a Comment
Want to join the discussion?Feel free to contribute!